

While running a non-profit organization, it seems more convenient to accept donations on your website instead of asking users to adopt a different method.
The users will give up on their idea of helping for the cause because of the hassle of added step for payments.
With WordPress, you can create a donation form to accept donations on the website of a non-profit organization, really easily. In this article, we will show you how to set up a payment form or donation form on WordPress.
- Create a WordPress Donation Form
- Create a Custom Donation Form in WordPress
- Step 1: Install and Activate Ninja Forms
- Step 2: Create Your Donation Form
- Step 3: Set Up Payment Integration
- Step 4: Customize Notifications
- Step 5: Import Donation Form on Your Site
Create a WordPress Donation Form
Adding the option of Paypal might look like the simplest thing to do for accepting donations. However, one solution cannot be ideal for all kinds of businesses. It might not suffice the business needs of some organizations. So, there needs to be a custom option for setting up donations page as per the needs an requirements of the business.
With the help of a custom donation form, you can:
- Lay out customized form fields for your require information
- Maintain transparency in donations by keeping the donors on your website
- Seek consent of the donors for newsletter subscription
- Provide a variety of payment options other than Paypal
- Integrate with third-party software like cloud storage, CRM, etc
Instead of redirecting your audience to PayPal, you can have a lot more control and transparency on payments by keeping donors on your own website.
To some people, it might sound like a difficult and techie process, but it’s not. With the help of WordPress plugins, anyone can do it easily. How? Let’s see.
Create a Custom Donation Form in WordPress
Ninja Forms are super easy to build forms because of its drag and drop interface and pre-built templates. With the help of these templates, you can make the donation form really easy because all you have to do is: include the donation form template, and that’s it.
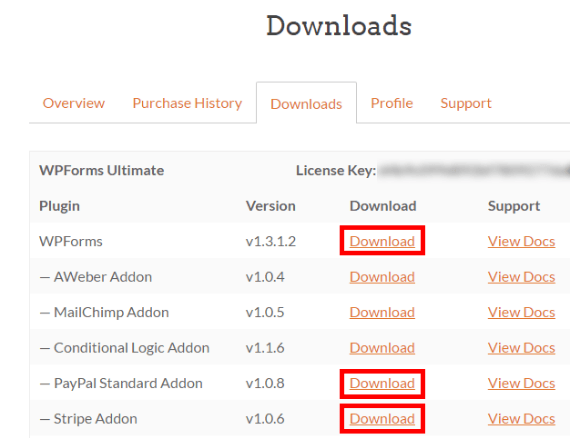
With the help of Ninja Forms creation, you can create donation forms to process payments. You would need Paypal or Stripe addon for Ninja Forms, which are available in licensed as well as free versions.
Step 1: Install and Activate Ninja Forms
Of course, in order to use Ninja Forms, you need to download and activate the form builder first. You can log into your account at Ninja Forms and download the plugin. After that, you need to activate those plugins so that you can use them on WordPress.
Step 2: Create Your Donation Form
All set for creating donation forms?
Let’s start making those forms to accept payments.
Click on NinjaForms » Add New
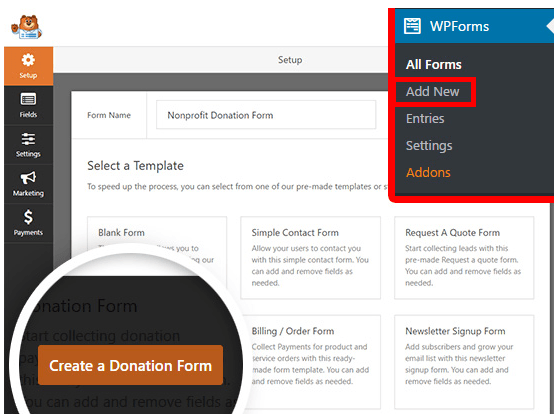
Give the name for your form at the top of the page. For now, our donation form will be named as “Nonprofit Donation Form.”

You can choose a layout from the pre-built templates. Head to the Donation Form template, and hit click. Your Donation Form is set to be built.
Create a new WordPress donation form
You’ll be prompted to configure your payment provider. However, we can do that afterwards. For now, click on the OK button and take a look at your form.
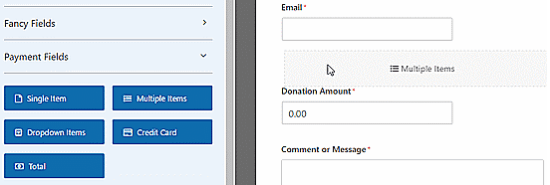
The template for donation form will require following fields:
- Name
- Comment or Message
- Donation Amount (the donors will specify the amount for donation here. You can use single item field as well as multiple choice or drop down menus in this field)
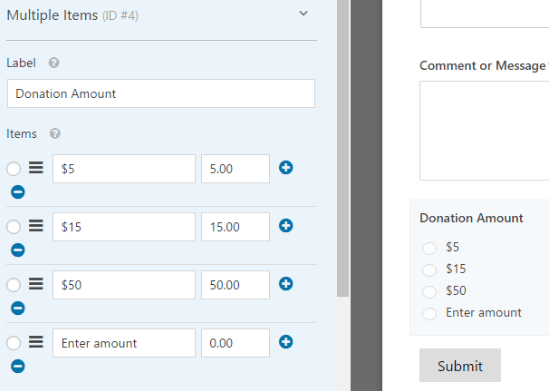
You can add a multiple choice payment field, where various donation amounts are defined. Also, there is an ‘other’ option- to enter a different amount for donation.
If you want to pick multiple-choice payment fields, instead of single payment field, click on the Multiple Items button from Payment Fields. You can rearrange the fields by drag and drop. This will allow you to set up the Multiple Items field directly above the Donation Amount field.
Add a multiple item field to your donation form
Once you have picked the multiple items options, you can change the options by clicking on the Multiple Items field in the form preview.
Rename the label as “Donation Amount.” And provide the amounts to pick from, and an “other” option.
Now, you need to manipulate settings for the ‘other’ option because there is a need to display only the Single Item field when the “Other” option is selected.
To do that, click on the Single Item field and edit the options. Uncheck the “Required” checkbox as it will allow users to submit the form if they have selected a donation amount in the multiple choice field above.

Scroll down, Click Conditionals> choose the display settings for this field > check the “Enable conditional
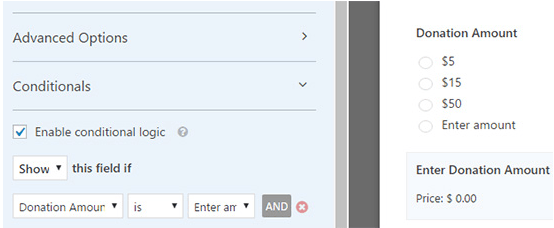
logic” checkbox > select the option Show if “Donation Amount” is “Other.”
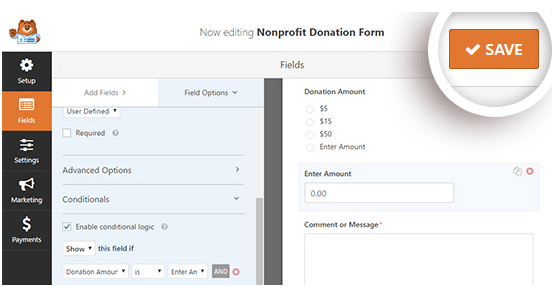
Make sure to Save the settings by clicking on Save button at the top right.
Step 3: Set Up Payment Integration
After configuring the settings, let’s move on to setting up the payment process for integration.
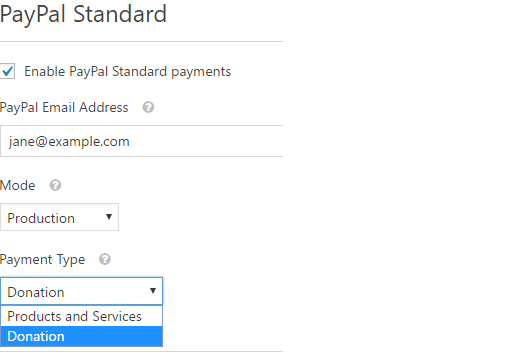
Within the form edit screen click on the Payments tab on the left > click PayPal Standard option.
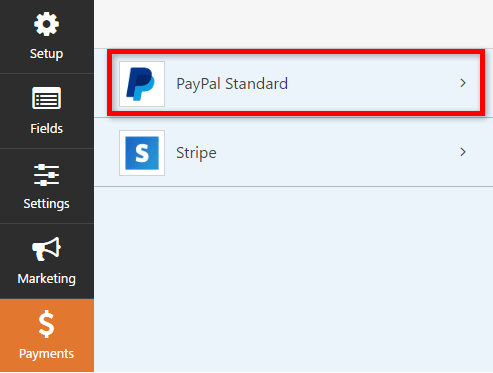
Here you can configure the settings in the right side of the screen.
Start with Enabling PayPal Standard payments checkbox, and providing your PayPal email address. Now, select Donation from Payment Type dropdown.
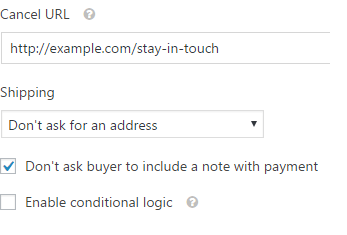
In case a user cancels the checkout process, you can enter a URL for them. By sending a URL to users, you can make an effort to re-engage them with a relevant blog post, or request to follow on social media.
You can configure more settings such as shipping address an including a note, during the Paypal checkout.
Be sure to Save all configured settings by clicking on Save button.
Step 4: Customize Notifications
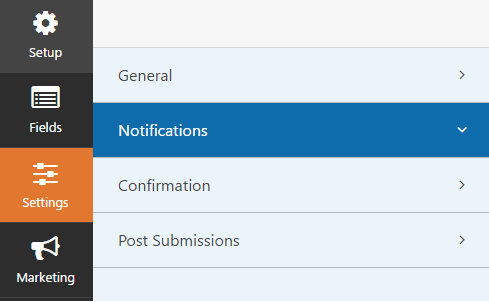
Next, the donors need to be notified through emails about the donations they have made. To customize the email notifications: Click on Settings > Notifications
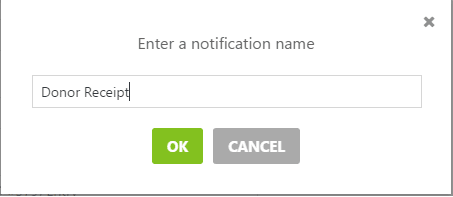
The default notification will be sent to the site administrator. By clicking on the Add New Notification button, you can create a separate notification for the donor.
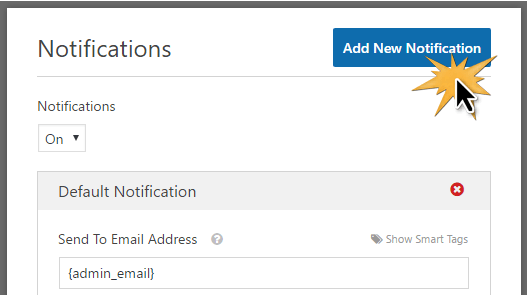
Enter a name for your new notification, and click OK.
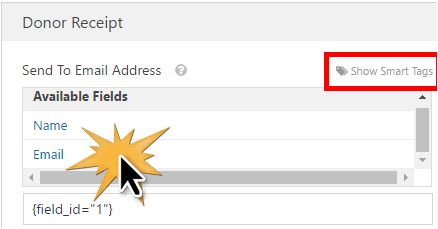
You need to make sure that the donor receives this notification on his email. Click on Show Smart Tags, next to Send to Email Address. Click on the Email. You’ll see a smart tag such as {field_id=”1″} appear.
Step 5: Import Donation Form on Your Site
With Ninja Forms, you can embed your form in any page with the help of a shortcode. You can also place a donation widget in your sidebar or footer.
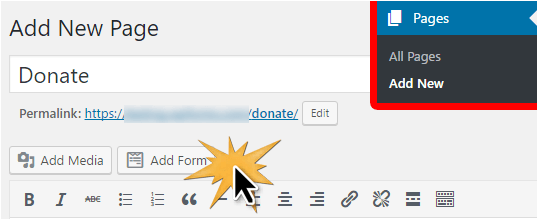
Let’s create a dedicated donation page to display your form.
- Click on Pages > Add New > enter a title for your page e.g “Donate”.
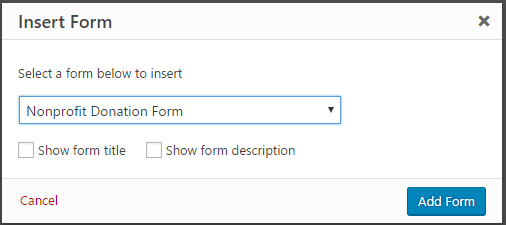
- Now click the Add Form button.
Select your form from the dropdown menu and click the Add Form button.
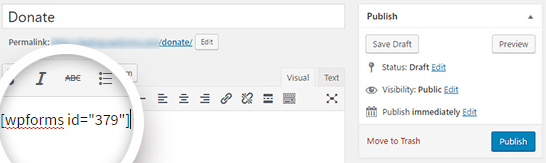
You can see a shortcode within your page. Add text or images you like to the page. Once you have specified all assets, click the Publish button.
Add your new donation page to your navigation menu so that it is easily locatable for visitors.


