
The text widget in Elementor page builder is sometimes seen to be the most underrated widget, among other WordPress widgets.
However, it’s essential in creating unique styles and helps you display your content more attractively. It gives you a visual way of creating stylized text and adding images without the need for any coding knowledge.
In this article, we’ll show you, using practical examples how you can use the text widget in Elementor to achieve high-quality content presentation schemes for blog posts and whole pages that will attract readers to keep on reading.
The text widget has incredible functionality since it can work best with everything ranging from HTML to shortcodes to placing images behind texts.
The elementor text widget is just like a standard WordPress visual editor where you can add text editor and then edit, style, set typography settings, and alignment of text. A more relatable example is a simple word processor like Microsoft office. You just need to know where the tools are and how to use them to create pages that are very pleasant to read.
The scope of this post will cover:
- Elementor text widget tools and what they do
- How to divide your text into columns in the Elementor text widget
- How to wrap text around the image using the text widget
- Conclusion
The Elementor text widget helps you transform your content settings such as font-weight, height, letter spacing alignment, and many others. Let’s explore the text widget functionality and how you can transform your content using this widget.
Elementor text widget tools and what they do
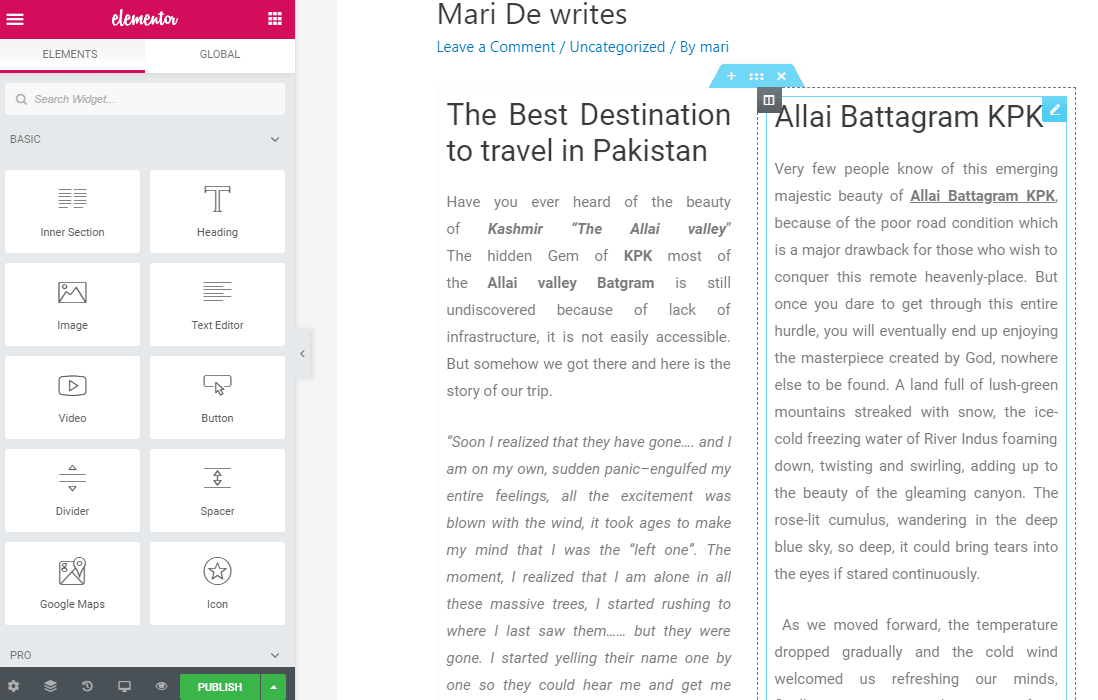
Create a new post with two sections, and when you click on the right blue corner of the section “Edit text Editor”, setting area of the area will pop up in the left-most corner as follows.
Here you can see all the accessible settings of your content. You can control your text settings using three main options.
- Content
- Style
- Advanced
When you click on the Content tab, you’ll find a standard WordPress editor area with visual and text tab also;, Here you can insert media files and several other options to edit the text.
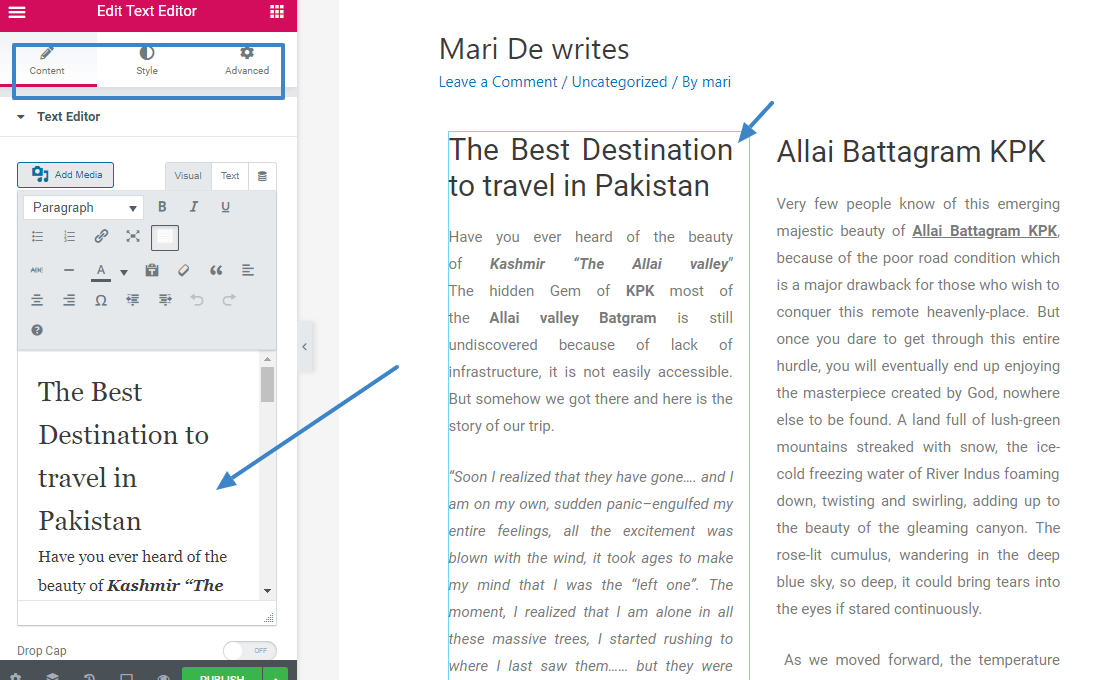
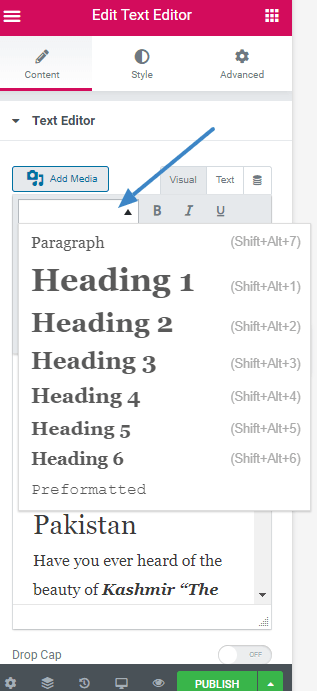
Once you have entered your text, highlight a piece of it to change its format ie, to change it to a heading, subheading or a regular paragraph text. When you click on the paragraph tab, all other available options will pop up, and you can choose different headings, paragraphs, or content types from the available options.
You can also control the panel width area by clicking and dragging the width area.
To get a preview of how your work looks at the front end, click on the preview button to see the preview of your content.
When you are done with changing the text format, The next phase is to move on to the style area where you can control the alignment of your content. This section will give you the ability to justify your content to the center, left, or right.
Next is the option is for text color, where you can set the desired color for your content text.
The next option is typography, which allows you to set a desired font style, size, and weight for the content.
At the bottom of the left menu screen, you will notice a tab with the name “Drop Cap”.
The Drop Cap will increase the font size of the first letter in that paragraph to the size of two text ligns. It makes the start of a nw paragraph look bold and unique.
You just need to slide this tab on to activate the drop cap look.
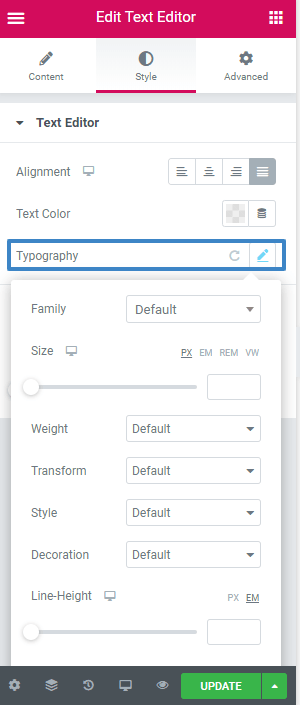
The transform tab allows you change the text casing with options like uppercase, lowercase, or capitalize.
Line Height allows you to reduce the space between the lines, and letter spacing lets you increase or decrease the spacing between the letters.
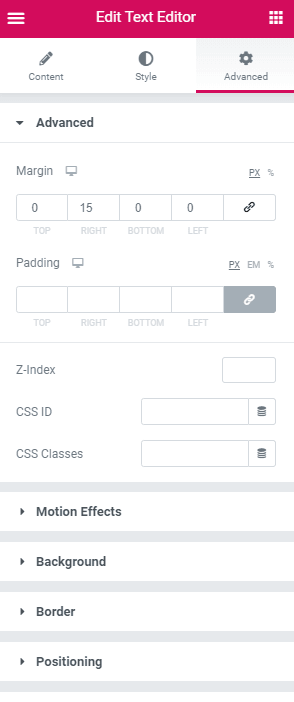
The advanced tab comes with padding and margin settings where you can adjust the padding area of your content.
How to divide your text into columns in the Elementor text widget
With the Elementor pro text widget, you can transform your text into two columns or up to 10 columns. You can also set the column width or align the text to the right-left or justified.
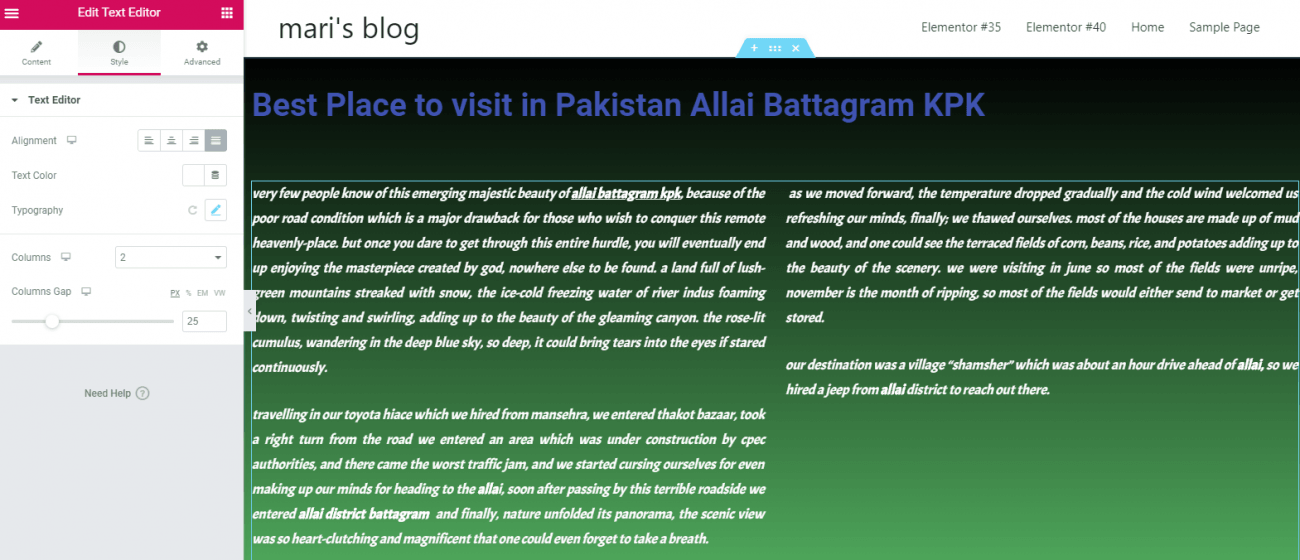
Here, we have divided the text into two columns. The column gap option allows you to set some space between them to make your work look neat and distinct.
To achieve this, click on the style tab> columns > you can set columns up to 10.
Next, you can adjust the column width using the column gap option.
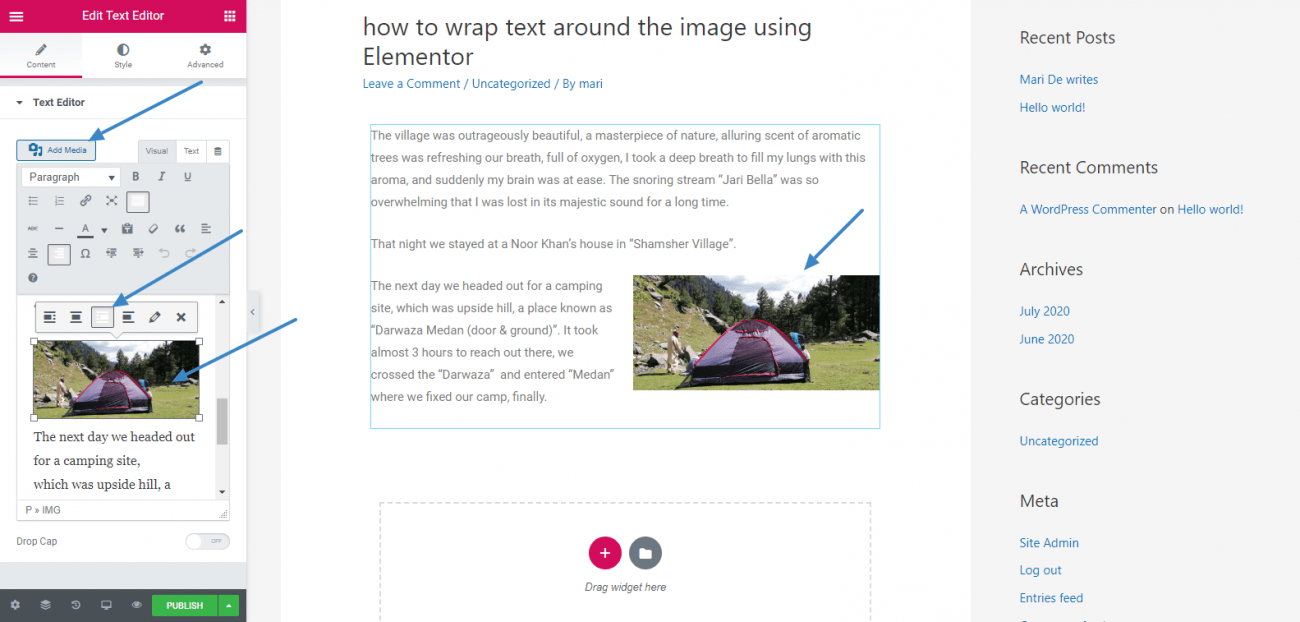
How to wrap text around the image using the text widget
Wrapping the text around the image is really easy using the Elementor text widget.
Here is how to do it.
Add some text into the section and then add media into the text as well.
Click on the image to bring up display options for the image.
You can choose how you like to align your text around your image and adjust the alignment as per your need.
Conclusion
Elementor helps you craft unique content displays or presentations for your blog posts or pages. There are many options to stylize your content. You can divide your text into as many columns as you like. Also, the text wrapping option helps you display your image elegantly alongside your text.
I hope you have enjoyed reading this guide. Now it’s your turn to try the text widget and find the wonders this widget do for you.


The text in my editor is intertwined text over text and I don’t know how to solve
Hi, all the options that may cause a problem with background and text over it are in the “advanced” tab. Double-check the margin and padding options. Reset everything to test.
C’è un modo per gestire lo spazio tra i paragrafi? Mi sembra assurdo che Elemento non lo preveda. Soprattutto alla fine del paragrafo, trovo assurdo che venga aggiunto dello spazio che non si può controllare.
Grazie
Hi, for spacing you can use the text widget custom margin or the Elementor spacer.
Grazie mille per la risposta, io intendevo lo spazio tra un paragrafo e l’altro. Per intenderci, quando scrivo una frase e poi batto enter e continuo a scrivere. E quindi lo spazio che il text widget mette dopo l’ultimo paragrafo (si aggiunge sempre uno spazio che rimane anche se si mettono i margini di colonna e widget a zero perché é parte interna del modulo. Quelli sono incontrollabili credo, a meno di un aggiunta CSS.
Bonjour, j’essaie de changer la couleur du texte de l’éditeur de texte via style->couleur du texte, est-ce une anomalie ou bien je fais quelque chose qui ne va pas ? Merci d’avance
Hi, this is the proper way to do that, if it doesn’t work that maybe because something is interfering with this color setting, probably the CSS from your theme.
Update, je cherche comment faire pour changer la taille du titre d’une page, merci d’avance
Dave LOPPER
Bonjour,
Je voudrais justifier le texte mais je ne trouve pas cette option. Pourriez vous m’indiquer comment faire svp ?
Merci par avance
cordialement
Hi,
You need to load additional rich editor tool to have access to the button or use the “Style” tab from Elementor.
what if i want to make the image round i don’t see the option to edit it that way?
Hi,
The round image is made using a border radius option. This option is not available for images added in the text widget, you’ll need a separated image block
Hallo, wenn ich ein Bild in den Text wie beschrieben einfüge im Texteditor, dann funktioniert das grundsätzlich. Nur die Intensität liegt bei ca. 30 %. Sie so aus, als wenn ich bei einem Hintergrundbild die Intensität verringert hätte. Finde auch keinen Punkt, das zu ändern. Woran kann das liegen?
Hi, do you mean the opacity is automatically changed by your theme?
Ola, excelente conteudo, gostaria se puder me auxiliar com problema que nao estou conseguindo resolver. eu estou tentando colocar um caixa editor de texto com o elementor para que eu possa fazer um conteudo de artigo sobre uma categoria de produtos diferentes, ou seja cada conteudo deste texto recem criado so fale assunto pertinente aquela categoria, eu até consegui inserir o editor e tudo certo, mas o mesmo assunto que coloco no editor, vai para as outras categorias cujo o tema não tem nada a ver, como procedo, será que tem como direcionar via url para categoria? se sim gostaria de uma caminho step by step, desculpe por sou leigo sobre essas coisas ao pé. Sou muito grato . Claduio.