
When organizing an event for your company, you go through complicated procedures of planning and management to host the event successfully.
Moreover, it’s a complicated and time-consuming procedure to collect all the information of your attendees manually. Therefore, it is conducive to automate your event registration by adding event registration forms so the guests could signup and provide all the essential information needed for the event registration.
Furthermore, you can screw up your marketing system by integrating your event registration form with the email marketing services so the new visitors could easily signup and receive marketing material immediately right after their sign up.
- Create an event registration form with Gravity Form plugin
- Step 1: Install Gravity Forms Plugin
- Step 2 install a payment Add-on
- Step3 install an Email Marketing Add-on
- Step 4 Create a new form
- Step 5: Select the Form Fields
- Form Buttons options
- Save and continue
- Step 6 insert your Payment Fields in the form
- Step 7 setup confirmation and email Notifications
- Final step 8: Embed your event form on the page
- Final thoughts
Create an event registration form with Gravity Form plugin
Creating an event registration form with the Gravity form is as easy as a breeze. You can select different fields to gather the critical data so you could proceed with your event marketing materials immediately. You can also receive payments for event registration by adding amount Add-on of different payment gateways.
Here is the step-by-step tutorial to create an active form that provides comprehensive information about the attendees.
Step 1: Install Gravity Forms Plugin
The step1 starts with the Gravity form plugin installation
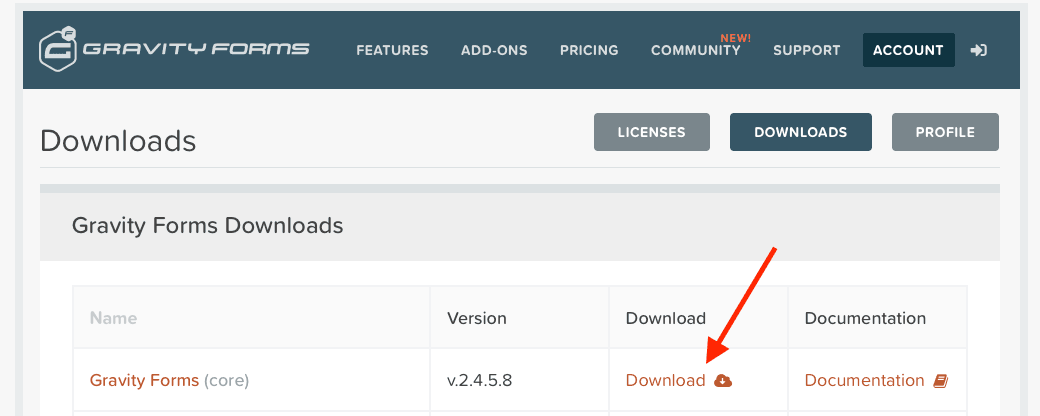
You can also visit how to install Gravity form plugin instructions to install the Gravity forms. All you need is to get the Gravity forms license key to download the file.
Step 2 install a payment Add-on
Gravity forms plugin comes with several other payment gateway add-ons like PayPal, Stripe, Authorize.net, and 2Checkout. You will need these add-ons if you want your attendees to pay at the registration process. Once you have downloaded the payment Add-on as per your business need, then proceed with the documentation to install and integrate the payment gateway.
Step3 install an Email Marketing Add-on
Before your event takes place, many companies strive to connect with their newly registered visitors by providing them upcoming events information. For this purpose, you can connect your visitors by using email marketing.
Gravity forms come with almost all famous Email marketing Add-ons to facilitate your email marketing campaign successfully.
Some of these Email marketing tools are ActiveCampaign, AWeber, Mailchimp, CampaignMonitor, and others. Download the desired Email Marketing Add-on and install it by following the installation procedure.
Step 4 Create a new form
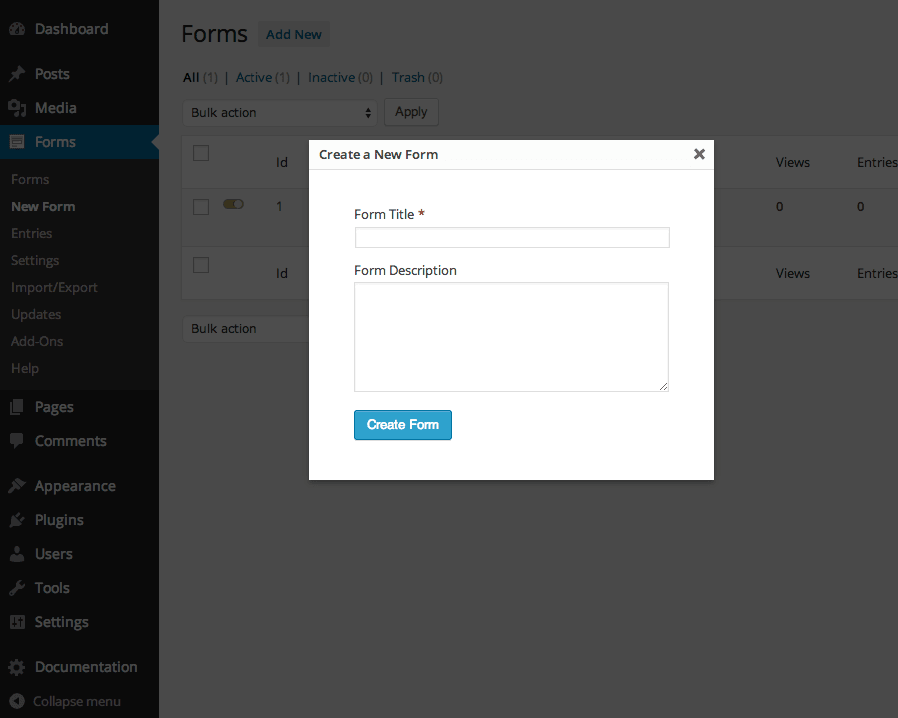
First of all, log into your WordPress site; on the left side, a link is visible, namely New Forms. If you click on the link, a box will pop-up asking for the Title and Description of the new form. You have to fill out the required fields to proceed. However, you can change the description later on if needed.
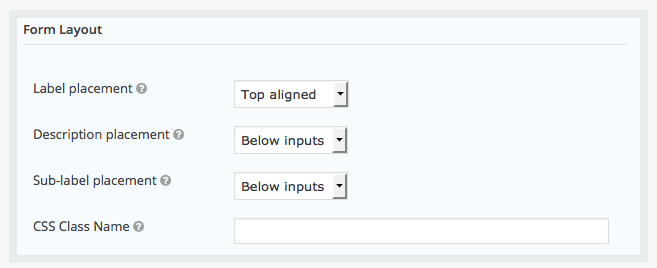
You can also change the layout of the basic form i.e.
- The Label placement
- The Description Placement
- Sub-Label Placement
- CSS Class Name
Step 5: Select the Form Fields
You need to select the form fields wisely so you could collect the maximum information required for your email marketing campaign and get your event registration error-free. There are plenty of field options that you can instantly add to your form. Some of these are as follows;
- Name
- Address
- Email Address
- Contact number
- Emergency Contact
Social media accounts details, i.e., Facebook, LinkedIn, and Twitter accounts so you could send notifications before the event gets started
Moreover, you can use the conditional Logic feature here if a person is trying to register multiple persons. You’ll need to collect information about each person, and for this purpose, you can create numerous dropdown fields to get the number of attendees, phone numbers, and email addresses.
Furthermore, if you are organizing an event related to career orientation, then definitely you’ll need to collect data about their companies, such as company name, address, and contact information.
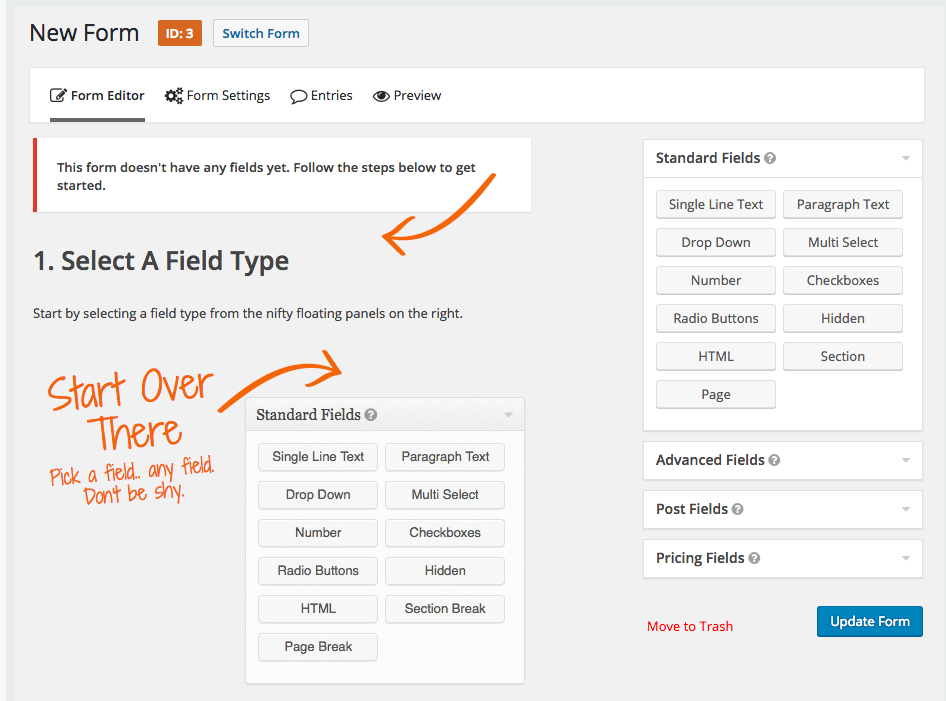
The form field toolbox comes with multiple field box choices, and the interface has advanced field options as well. To add the form field into your form, you can simply select the field by clicking on it, and that field will be automatically added to the bottom of your form.
To edit the form field, you can hover over the field, and a field editor will come into the display where you can select and customize the field according to your needs.
Form Buttons options
You can also choose whether you like to use a text-based button or an image-based. If you want to use the text-based button, then simply click the text and write down whatever you like to come into view as the button text. Or you can choose the image button by merely entering the full path to the image you want to appear on your form.
Save and continue
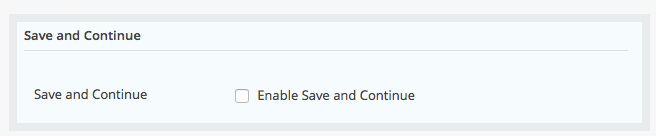
If you enable this option, then the visitors can save whatever they have entered in the form and keep it there and continue at a later time right from there.
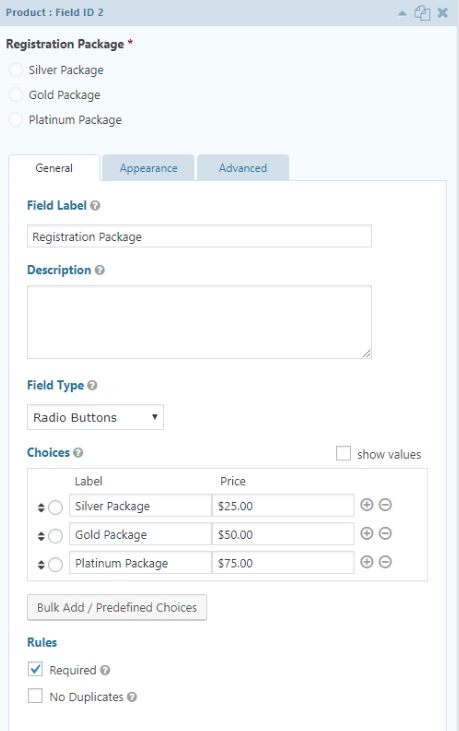
Step 6 insert your Payment Fields in the form
If you want your visitors to make a payment at the registration, then put in some payment fields in the forms. For this, you have to add a product field in the form where you can offer multiple choices, too, like silver, gold, and platinum package with pricing details. If the payment field is compulsory, then don’t forget to mark this field as “required.”
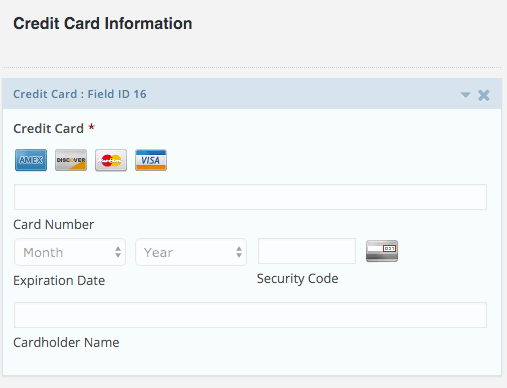
Along with the collect payment field, you have to enter a total field so the users could see how much amount they are paying. Another required field is for Credit Card so the users could put their payment information.
Once you are done with the form fields, the next step is to integrate your event form with the preferred payment gateways. Gravity forms come with the most popular gateways integrations, and you can get the Add-on that matches your business requirements.
Leading payment gateways are PayPal, Stripe, and Authorize.net. You can download any of these add on and integrate them with your event form. Follow the configuration process carefully to download and integrate the payment gateways setup.
Step 7 setup confirmation and email Notifications
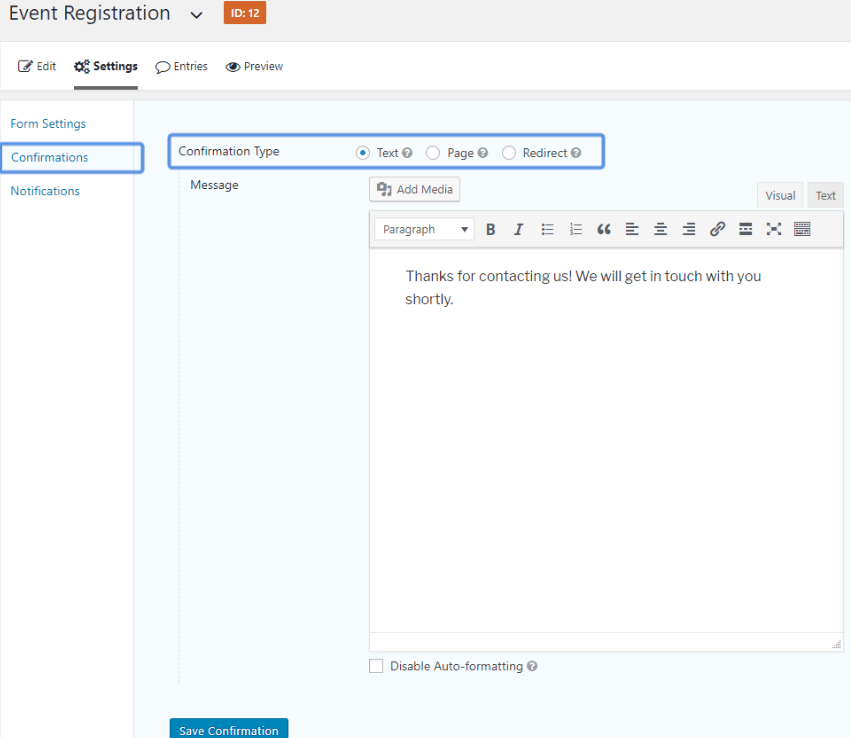
Once the visitors submit the forms with all essential details, the next step is to send them a confirmation message that everything is in its place. To create a confirmation message follow these steps
In the form, setting section open the confirmation tab and select the text tab next to the confirmation tab and write down the confirmation message.
Other than showing the confirmation message on the screen, you can redirect your visitors to the new page with the confirmation message on it. for this, select the Redirect tab next to the confirmation Type in the setting and add the URL of the page you want your visitors to get to.
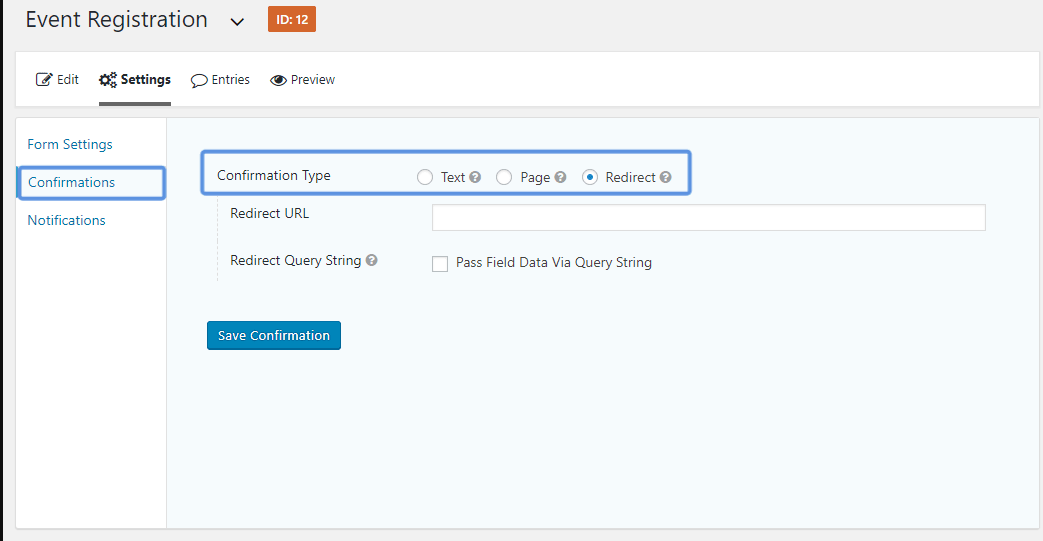
Most of the event organizers prefer to redirect their visitors to another page where they have mentioned other details related to the event. This additional information can be about the dress code, the car parking details, the content details regarding the development and nearby hotels list, and anything valuable for the visitors to know before coming to the event.
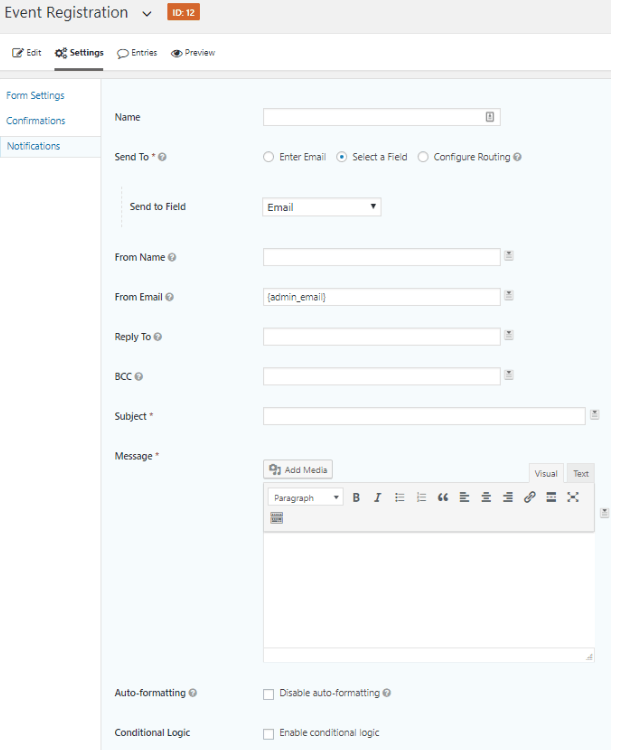
Moreover, you can also send them confirmation emails. This type of email is known as email Notifications sent to the visitors.
In the admin area select the settings > Notifications> add new to choose the notification to the visitors
Give a name to the notification then select the field next to sent to. Now select from the dropdown menu of send to field and chose to which emails address you want to send the notifications. Fill in your name and company name in the From Name field.
Final step 8: Embed your event form on the page
In this last step, you’ll need to embed the event form on the page so the visitors could reach it.
Open your WordPress dashboard and open the Gravity forms Gutenberg Block, or Gutenberg shortcode or paste the shortcode manually on the page where you want to appear the form.
Final thoughts
Now creating an event form is no more a difficult task with the help of Gravity forms plugin. You have to follow the simple step-by-step procedure to get your event form done in no time. Once you are done with the event-form, you can place it anywhere on your event promotion landing page by using a shortcode. So, give it a try and start promoting your event advertising with the Gravity forms.


