

The current web standards are high. If you are doing business, you need to be wary of how important it is to stick to those standards.
One of the common ways to share information is through tables. Tables are easy to read and understand, and that’s why you will find them used so much by many blogs out there!
In this tutorial, we will learn how to create tables from databases using WP Table Manager. WP Table is one of the best plugins that you can use to create and manage tables on your site.
Let’s learn more about it below.
Table of Content
- Table of Content
- What is WP Table Manager?
- Features of WP Table
- Why should you use the plugin?
- Create Tables From Database Using WP Table Manager
- Step 1: Installation
- Step 2: Creating a Table
- Step 3: Using the table wizard for database
- Step 5: Adding the table to post/page
What is WP Table Manager?
WP Table Manager is a WordPress plugin that lets you create and manage tables with a spreadsheet interface.
It offers an easy way to create the table, and then you can pick up the theme that suits your needs. Once done, you can now edit the tables and create tables that give meaning to the data.
You get access to different tools which let you perform useful action on the table including table copying, HTML cell editing, Google Sheets synchronization, and Excel.
So, what does that mean for someone who is using the plugin? Well, they can easily click on the cell they want to edit and enter the data. This gives the user the ability to make changes without the need to use a visual editor of any sort.
In short, you get access to a more granular visual editor that enables you to share information in a more readable format.
Features of WP Table
To get a better idea of WP Table Manager, let’s go through its key features below.
- Responsive Tables: The latest January 2021 update brought new responsive modes to the WordPress tables. This means that you can now create adaptive tables for different screen sizes. With responsive tables, your site will look correctly on different sizes and enjoy the benefits of SEO. To ensure that you can create a responsive table, you need to use column hiding and display priority. You can also use data header group mode to display responsive layout and data.
- Get visual access to databases: Working with databases is always a challenge as you need technical knowledge to run queries. With WordPress, the process might become simple, but you still need some form of technical knowledge to know how to get things done. With WP Table, you can easily get visual access to the database and create interesting tables and charts.
- Table Editor: With the latest update, you also get access to the new design. In this new design, you will find better custom modes that will fit your requirements better than ever. It works with Excel and Google sheets as well as you can synchronize it and create the tables based on your needs.
- Save Time: WP Table comes with the table edition which makes it easy for you to edit the tables. To ensure that the editing is simple, the editing is set to spreadsheets. So, you can click on the cell and edit the data. Simple as that!
- Themes and colors: It is also important to ensure that the table matches your site’s theme. To do so, it is
- Table data filter and sort: As the data is handled via the tables, it is easy to order and filter the table through the frontend. This gives the users the ability to visualize the data and make more sense of it.
- WordPress Excel Plugin: It also comes with the excel plugin, which means you can easily import Google Sheets and Excel to populate the tables.
Why should you use the plugin?
May you think that it is easy for you to simply copy-paste the data and then create the table using the WordPress table? Well, why do you need to invest in a plugin when you can manually create tables. However, it might not be as simple as you may think. First of all, you may struggle to access the tables later and make changes to them. It also becomes hard to import data quickly and create tables from it.
So, what are the benefits of using a plugin? Let’s check the benefits below.
- You get access to a visual editor, which eases the process of creating and managing the tables.
- You can manage the tables later with ease.
- You get formatting options for tables, making it easier for you to handle the table and customize it according to your theme.
- Plugins such as WP Table offer options to limit access to users. This makes it much easier for admins to allow editing capabilities for tables.
Create Tables From Database Using WP Table Manager
Now that we have a good understanding of WP Table Manager, it is now time to learn how to create tables.
Step 1: Installation
The first step is to install the plugin. If you are not sure how to do it, let’s go through the process together.
The WP Table Manager is a paid plugin. So first you need to get a paid subscription for it. Once you have it, you need to download it from the site.
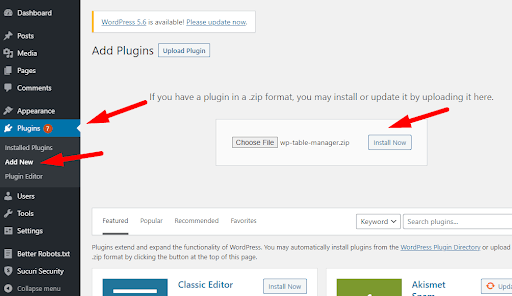
To install it, you need to upload the plugin to the backend. From the backside, you need to go to Plugins >> Add New. From there, go to Upload Plugin and then upload the plugin.
It will take some time for the installation to get complete. Next, you need to enable the plugin after it is installed.
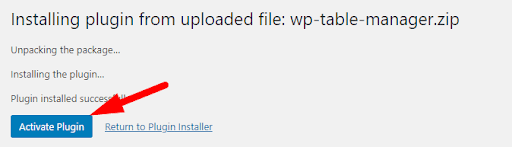
If everything went fine, you should see that the dashboard sidebar has now been updated with the Tables Manager entry. Excellent! We are now ready to use the plugin to create stunning tables!
Step 2: Creating a Table
Creating a table is easy.
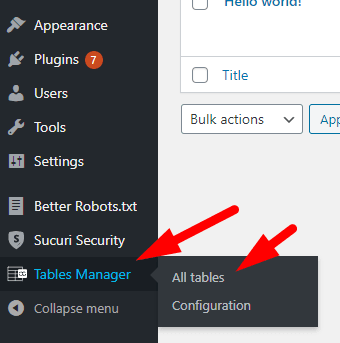
To get started, you need to go to your site’s backend. There you will find the Tables Manager option on the side menu. Simply click on it, and then select “All Tables.”
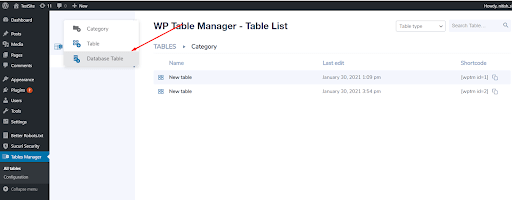
Once there, you will find an already created table for your guidance. If you open it up, you will find that it has listed the carmakers’ models, their years, and their respective price in a clean yet effective spreadsheet format.
There you will see all the tables listed. All you need to do is click on the new table, and create the table using the database as shown in the image below.
Step 3: Using the table wizard for database
It will redirect you to table creation wizard. Here, you are free to choose the table of your liking. For this purpose, we are going to choose the posts table as we are going to create a table using it.
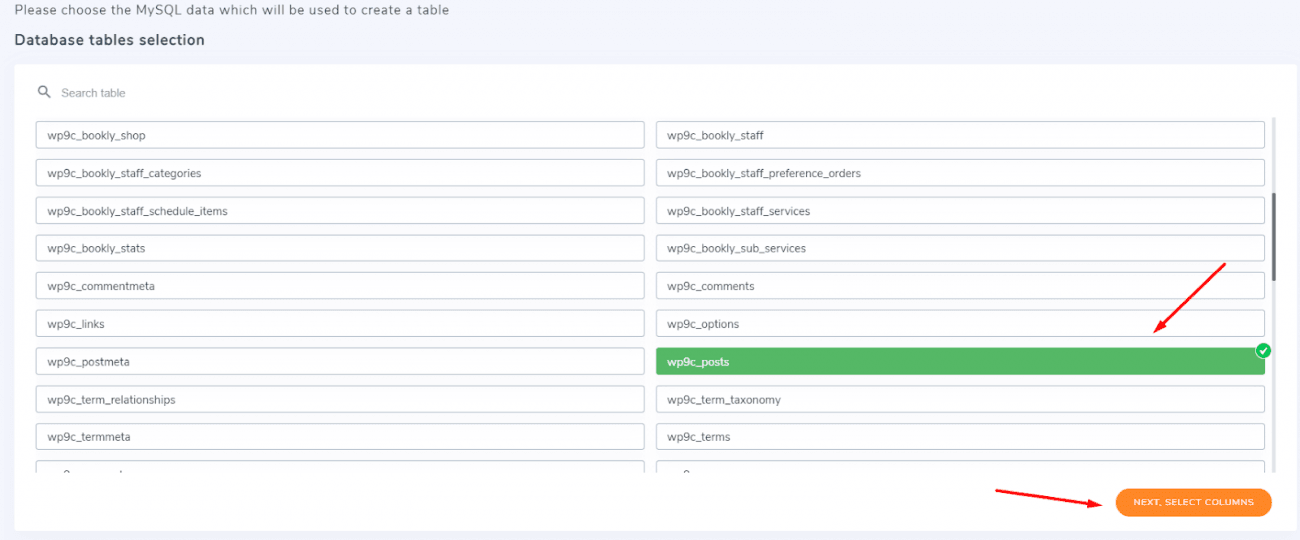
If you scroll down, you will see the option to select, “Next, select columns”
This will automatically move to the below section where you will find the Columns list for select. Here, you can select any number of columns for your table.
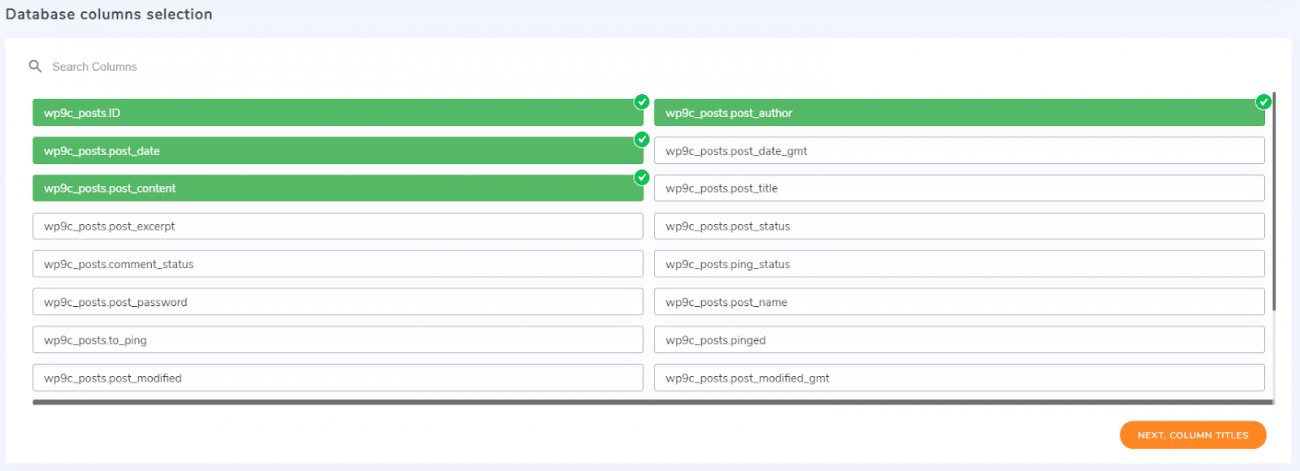
Once selected, you now need to click on Next Column Titles.
Here, also you need to enter the column names based on your requirements.
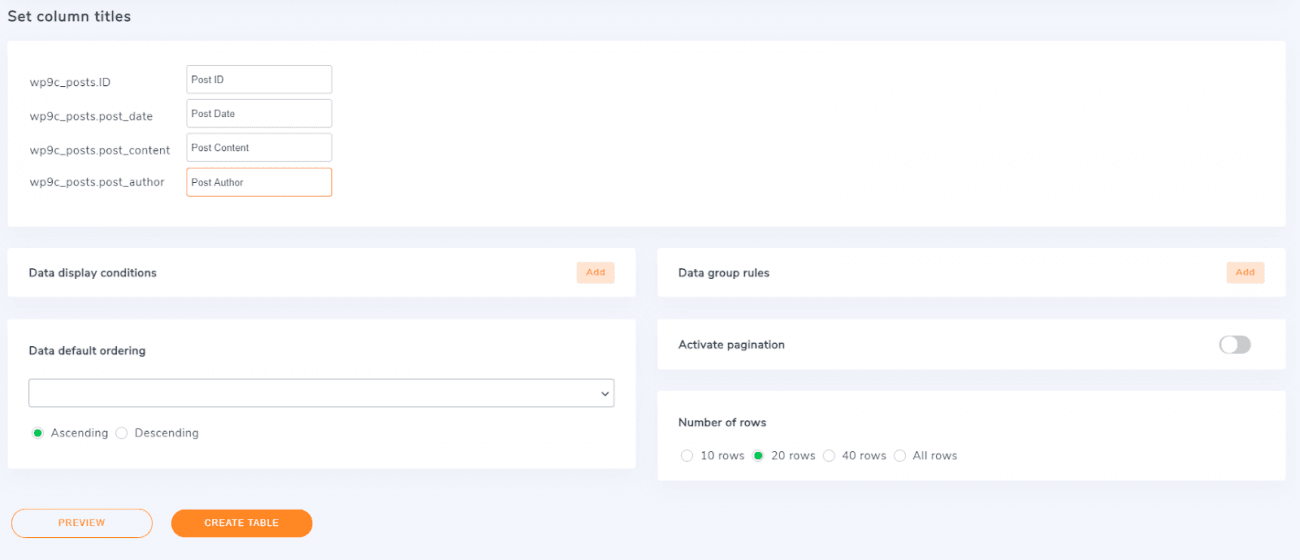
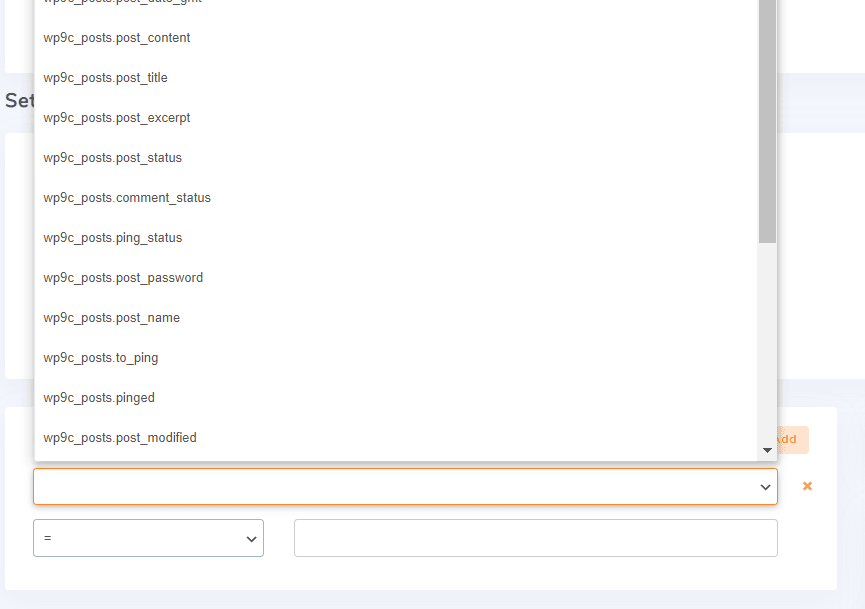
As you can see you can also add data display conditions where you can add conditions for showing certain data.
Other than that you can also set data group rules and data default ordering(ascending and descending).
The last two options that you get is Active pagination and the number of rows. By turning the active pagination, you get the option of letting the table value load when scrolled down. You can also set the number of rows to be shown in one instance from 10 to 40 rows.
Step 5: Adding the table to post/page
To add the table to the post, you need to go to the blocks search option in your post and then look for WP Table Manager. This will look like below.

Once done, you will be able to see all the available tables at your disposal. All you need to do is select the table from the drop-down list, and you are good to go!
The same method applies to adding a WP Table Manager Chart to the post/page. Simply click the WP Table Manager Chart and then choose the chart from the drop-down menu to insert it in your post.
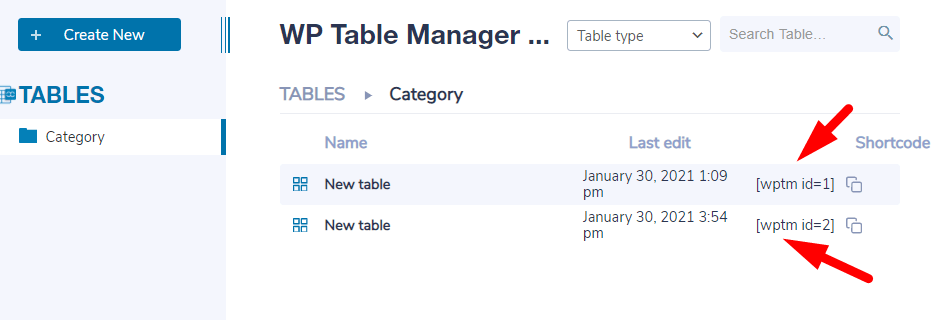
You can also add the table to the post using the shortcode. To find the shortcode, you need to go to Tables Manager >> All tables. There you will find the shortcode listed.
That’s it! You have successfully used WP table Manager and created a table.
Let us know in the comment section below what you think about the table creation process using the WP Table Manager.


