
We are all huge fans of WooCommerce. It is straightforward to set up and customize. Features that make it simple to create and manage a dynamic and powerful e-commerce store are included with the package.
However, there is more to creating a successful e-commerce page than simply adding popular products. All of the pages must be visually appealing as well. The more visually appealing and user-friendly your website is the greater likelihood of attracting more customers.
- Configuration of the popup window
- You can also create popups using the visual builder in Elementor
- Publish Preferences
Although WooCommerce creates the shopping cart and checkout page for you when you build your site, Elementor makes them more appealing by customizing them.
You have the option of either redesigning them or starting over from the beginning. You can repeat the process for all of the other pages on your website.
By creating a warm Thank You page and updating your My Account and Terms of Service pages, you can win over your customers’ hearts and minds.
The drag and drop functionality of Elementor, combined with this tutorial, will ensure that you have a trouble-free experience when creating your pages.
After setting up your wooCommerce store, you might want to make it more appealing to your visitors and customers. Adding popups gives the user another impression and a new desire to stay put on your store.
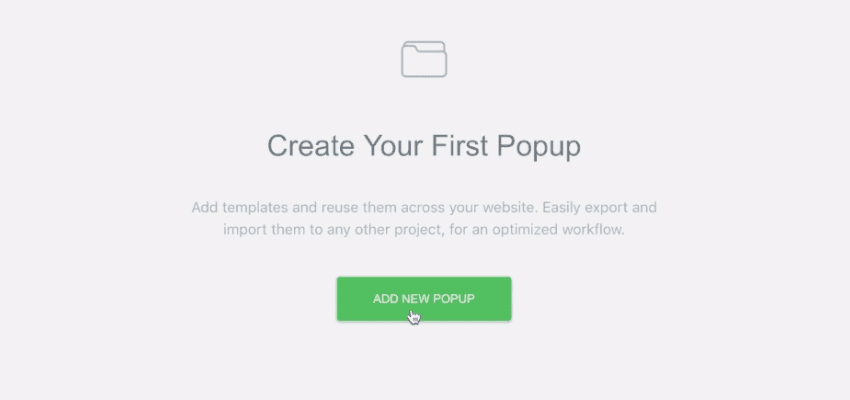
To create a popup, go to Templates > Popups in the menu bar. You’ll be presented with a list of all of your popups, and if you haven’t yet created one, you’ll see something similar to the following:
Once you’ve clicked on ADD NEW POPUP (which is pretty self-explanatory), you’ll be asked to give it a name and then select a template from the premade examples displayed. Various templates are available for multiple purposes; some are appropriate for announcements, others for promoting a discount, others are ideal for encouraging users to sign up for something. There are even examples for warning users of cookie use or other GDPR notifications. As soon as you’ve found something you like, click on it to see a larger preview, and then press the Insert button.
You’ll be taken to the popup builder in the WordPress backend after clicking this button.
If you’ve worked with Elementor in the past, you’ll feel right at home with the interface, the options, and the way everything is laid out for you. It’s essentially the same process as creating Elementor page templates in WordPress.
On the right-hand side of the screen is the main canvas, which displays a preview of what you’re currently working on. You can edit and customize each element individually by selecting it and selecting Edit > Edit Elements. When you’re finished, you’ll see the controls and preferences displayed in the sidebar to the left, along with the option to Publish your work.
Configuration of the popup window
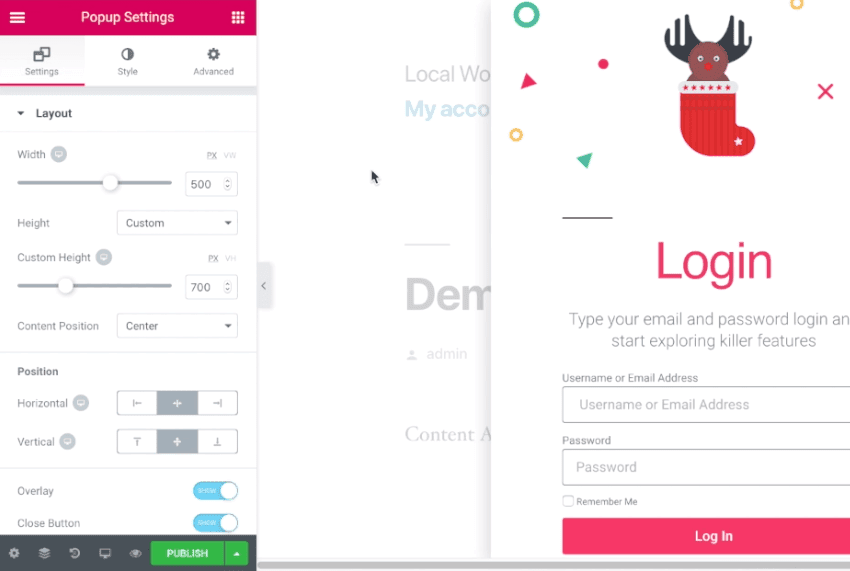
This is when you should see a preview of your popup – either a blank slate or the template you chose.
The Popup Settings, always open by default, allow you to customize how the popup canvas itself functions. They are as follows:
- This is where you’ll want to spend the most time because it’s where you’ll be able to create different types of popups. In other words, by adjusting these settings, you will be able to make the following effects:
- Modal popups are a type of modal window.
- Slide-ins, notification bars, and so forth.
In addition, you can customize several other important settings.
The following options are available on the Settings tab:
- Change the height and width of the image.
- Change the vertical or horizontal orientation of the object (for example, you could fix it to the top or bottom to create a notification bar)
- Make a decision on whether or not to use an overlay (this lets you, for example, grey out the background when the popup is active)
- Disable the close button on your browser.
- Include an animation for the entrance.
You can do the following things on the Style tab:
- You can change the background color, make it a gradient, or use an image as the background.
- If the overlay is enabled, configure it.
- In case you have the close button enabled, you must configure it.
Finally, the Advanced tab contains some miscellaneous import settings that allow you to do things like the following:
- Display the close button or have the popup automatically close after a certain amount of time.
- By clicking on the overlay or pressing the escape key, you can prevent the window from closing.
- Disable the ability to scroll down the page.
- Avoid multiple popups (if you’ve targeted multiple popups to the same page, this will prevent your visitors from becoming annoyed).
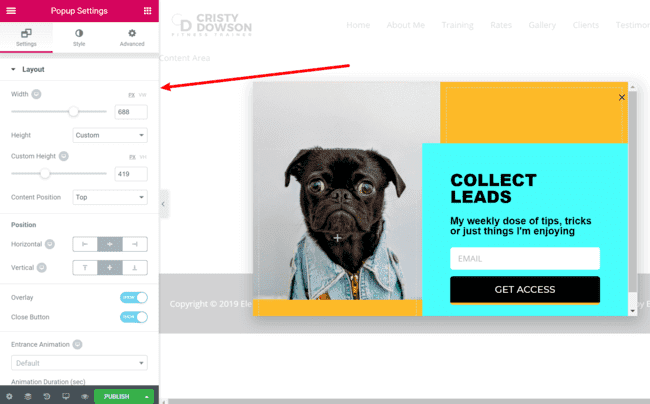
To give you an idea of how these settings will affect your popup, here’s what it looks like when you change the Position to the bottom-right corner of the window:
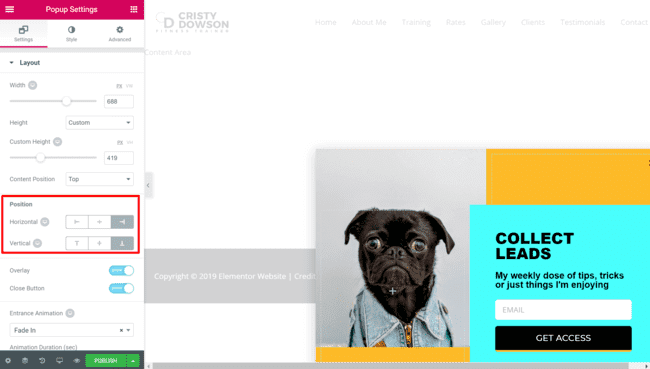
Take a look at how the popup is now permanently fixed in the bottom-right corner. Using a scroll trigger in conjunction with an entrance animation, you can achieve a nice, discreet slide-in effect.
You can also create popups using the visual builder in Elementor
As soon as you’ve completed the basic Popup Settings, you can begin designing the actual content of your popup by dragging and dropping elements into the visual drag-and-drop interface.

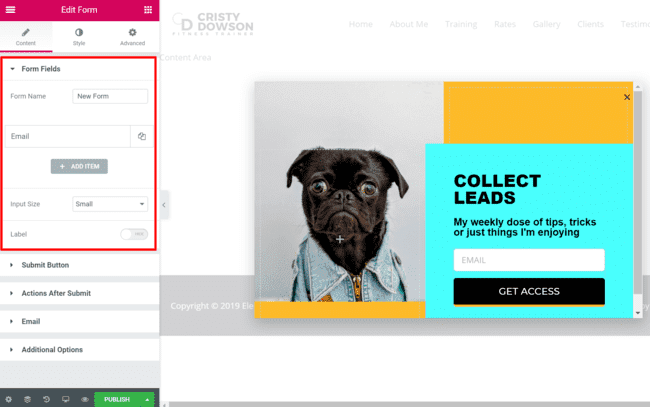
You can use any Elementor widget you want, which gives you a great deal of control over the final design. The Form widget is the only thing you absolutely must include because it is the only one that allows you to create your email opt-in form.
With the Form widget, you have complete control over the fields you want to offer, as well as the text and appearance of the submit button. For example:
Beyond that, I strongly advise you to become acquainted with all of Elementor’s widgets and design options.
As previously stated, you have a great deal of control over the appearance of your website, and you also have access to some useful widgets that can help you increase your conversion rate.
Publish Preferences
When you’re satisfied with what you’ve created, you’ll want to share it with the world. Following the press of the PUBLISH button, you will be presented with a series of questions. As an illustration:
Is it possible to specify the conditions under which you want the popup to appear? You can choose which pages to include or exclude from your search results. You can have as many conditions as you wish.
What, then, is the event that causes the popup to appear? You can choose whether or not to display the popup immediately on page load, on scroll, or when the user scrolls to a specific element, among other possibilities. All of these options have their settings, allowing for complete customization.
Last but not least, you’ll see some advanced rules, such as showing the popup only to returning visitors, only showing the popup a set number of times, or perhaps only showing the popup when a visitor is referred to your website from a specific URL. There are a few more as well. These options can significantly improve the user experience of your popup, allowing you to design it with true integrity and consideration for your users.
Complete the settings in the manner that you desire, then click SAVE & CLOSE. You’ll be taken to a sample of what your popup will look like after clicking this button.
Popups can be customized, and dynamic content can be added to them.
Bring things up to the next level, shall we? Up to this point, we’ve selected a template and tweaked one or two sittings, and that’s about it. Consider the scenario in which we want to customize our popup further.

We’re back at the ADD NEW POPUP stage of the process, where we can specify a title and choose a template once more.
After that, we can select it, make any necessary changes to the basic settings, and hit PUBLISH once more.
Okay, this is where things start to get interesting. We can use Elementor to fetch dynamic data from our WordPress installation and insert it into the popup itself in our popup. We can include information such as the user’s name, the page title, and so forth.
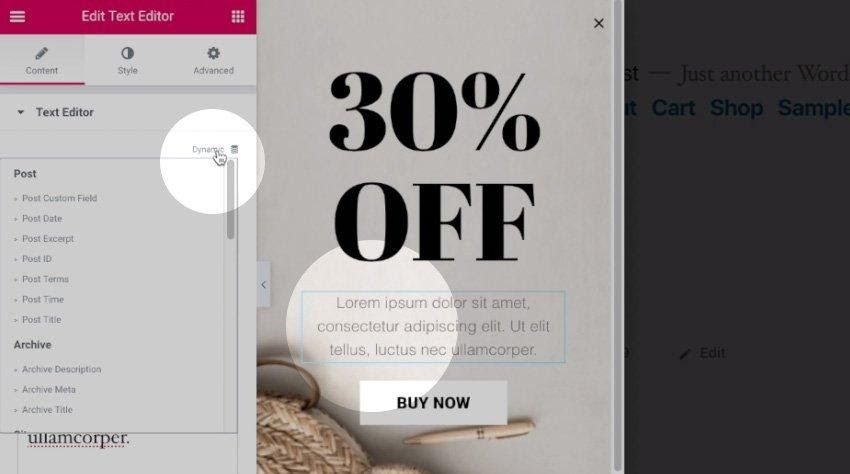
Consider the following scenario: we are running WooCommerce, and we want to inform a user that there is a discount available on the specific product they are currently viewing. To begin, select a section of text from the template and then click Dynamic in the sidebar:
We have a wide variety of options to choose from, including Information from the post itself, Information from the site as a whole, media information, author information, and even WooCommerce Information. We’ll select a Product Title, and it will be added to our text content block as a result of our selection.
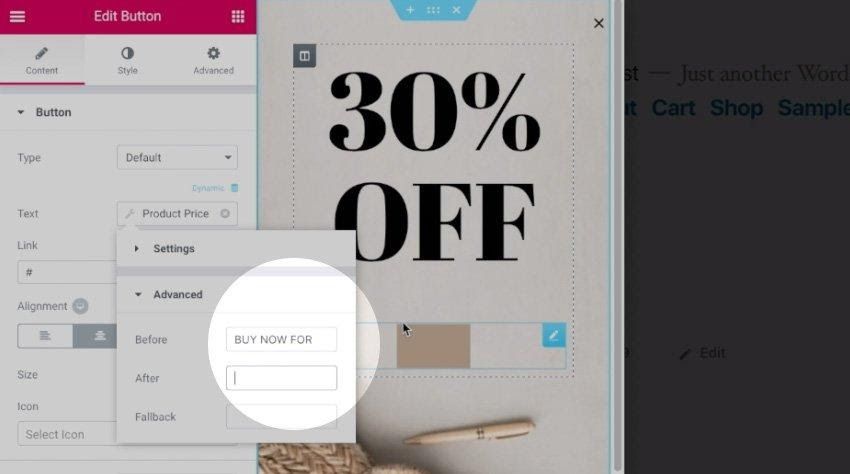
Suppose the database details are not properly retrieved. In that case, it is possible to specify some before the text, some after text, and a fallback text (if the database details are not properly retrieved).
So let’s duplicate this process for the button, which will display the product’s price. We can phrase the preceding text as BUY NOW FOR to provide us with a compelling call to action:
We can even take it a step further and use the product image as the background of the popup window itself.
When we press PUBLISH, we are presented with the publish settings once more, allowing us to specify that we only want the popup to appear on WooCommerce pages. We’ll set the timer to 15 seconds of inactivity to be the trigger. Here’s how it turned out in the end:
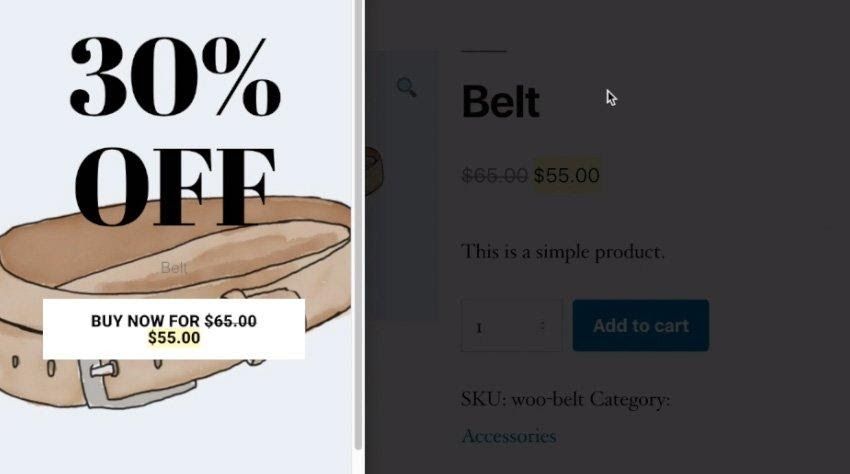
Although the design could be improved, you can see that we are displaying the product name, its price, and an image of the product as the background of the popup. Brilliant!


Здравствуйте, вопрос таков. При нажатии на кнопку в popup окне происходит переход на якорь(его мы указываем в ссылке) но при переходе на якорь popup окно не закрывается. Каким образом можно организовать закрытие popup окна и переход на якорь одновременно?
Hi, have you tried to use the Dynamic Action options? See: https://elementor.com/help/popup-faqs/#:~:text=You%20can%20allow%20the%20user,a%20set%20amount%20of%20time.