
Every website must include a contact form! Contact forms are helpful for a variety of purposes, no matter what type of website you have. They can generate leads, build connections and relationships, allow users to report issues with your site, and everything in between.
It is not necessary to be a technical expert to create contact forms in WordPress. The Elementor page builder makes it easier than ever to create beautiful websites.
To demonstrate how to create contact forms with Elementor, we’ll go over the different options and everything there is to know about contact forms in Elementor.
Elementor has included a Form widget for quite some time now, which means you no longer need to go anywhere else to create Forms for your WordPress website, which is a blessing!
In the past, you may have encountered difficulties when creating Forms with some of the plugins available. The process of designing and configuring Forms can be time-consuming and frustrating. Fortunately for all of us, the Elementor Form widget is straightforward to work with it.
- What Is the Best Way to Create a Form in Elementor?
- How to create an Elementor Form
- Forming Elementor Elements in a Structured Way
- Types of Fields in a Form
- Types of Fields in an Elementor Form
- Width of a Form column
- Forms in Elementor for Styling
- Actions on a Form
- Creating a Contact Form Messaging Template in Elementor
- Conclusion

Before we get started with the Elementor form builder, let’s take a quick look at some of its most essential features.
One of the most distinguishing features, for starters, is that it is fully integrated into the Elementor interface, which means that you have access to many design/style/layout options available in Elementor. I don’t believe you’ll find a standalone form plugin with a design system that is as robust as this one.
From there, you can create up to 18 different types of fields:
- The URL and telephone number are as follows:
- Radio buttons are a type of radio button.
- Choose from a list (dropdown)
- Checkboxes are used in checklists.
- There is only one checkbox (acceptance)
- reCAPTCHA
- Honeypots are a type of container that holds honey (prevents spam)
You can also divide your forms into multiple pages to create multi-step forms, beneficial for long-form applications.
Elementor Pro has over 12 integrations with popular email marketing services and customer relationship management systems to help you make the most of your forms. There is also a catchall Zapier integration that allows you to connect to any of the thousands of tools available on the Zapier platform if your tool isn’t listed.
There are a few other intriguing alternatives as well. For example, when someone fills out your Form, you can receive notifications via Slack or Discord.
Speaking of notifications, you can also personalize the email notifications that you receive and the email notifications that form submitters receive. After they submit the Form, you can redirect them to a custom thank you page that you create.
What Is the Best Way to Create a Form in Elementor?
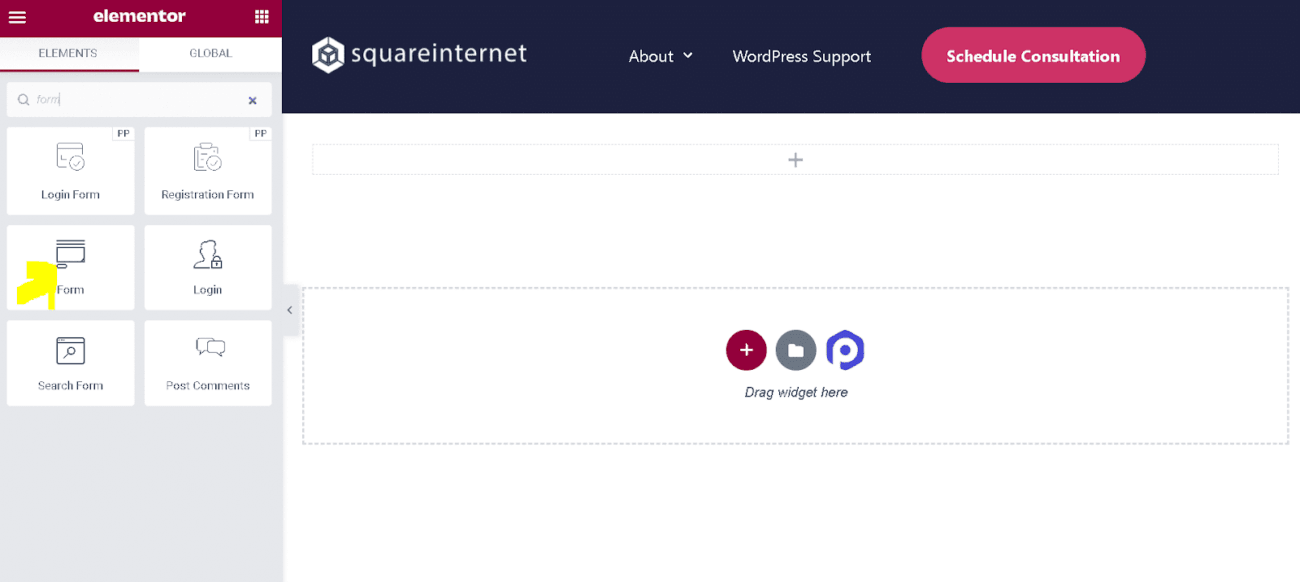
We’ll begin by opening the Elementor editor and then dragging and dropping the Form widget to the location where we want to build our Form.
How to create an Elementor Form
Like everything else in Elementor, the process of creating Forms is carried out visually. It is not necessary to use an additional plugin, nor is it essential to act as the backend of your website.
Forming Elementor Elements in a Structured Way
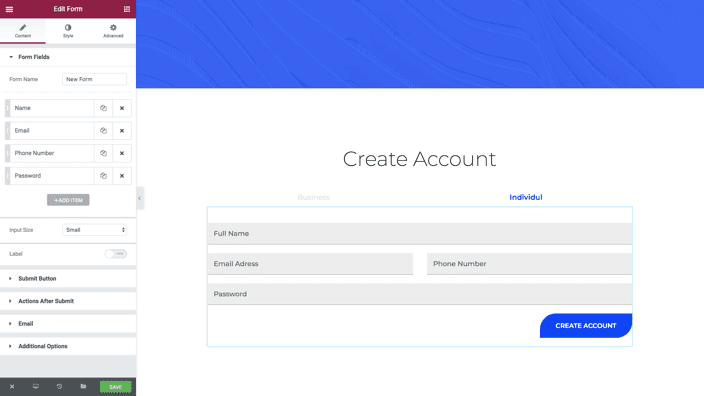
Once your Form is in place, the first step is to organize the information contained within it. What Fields do you require, and what types of Fields should they be? What are you looking for?
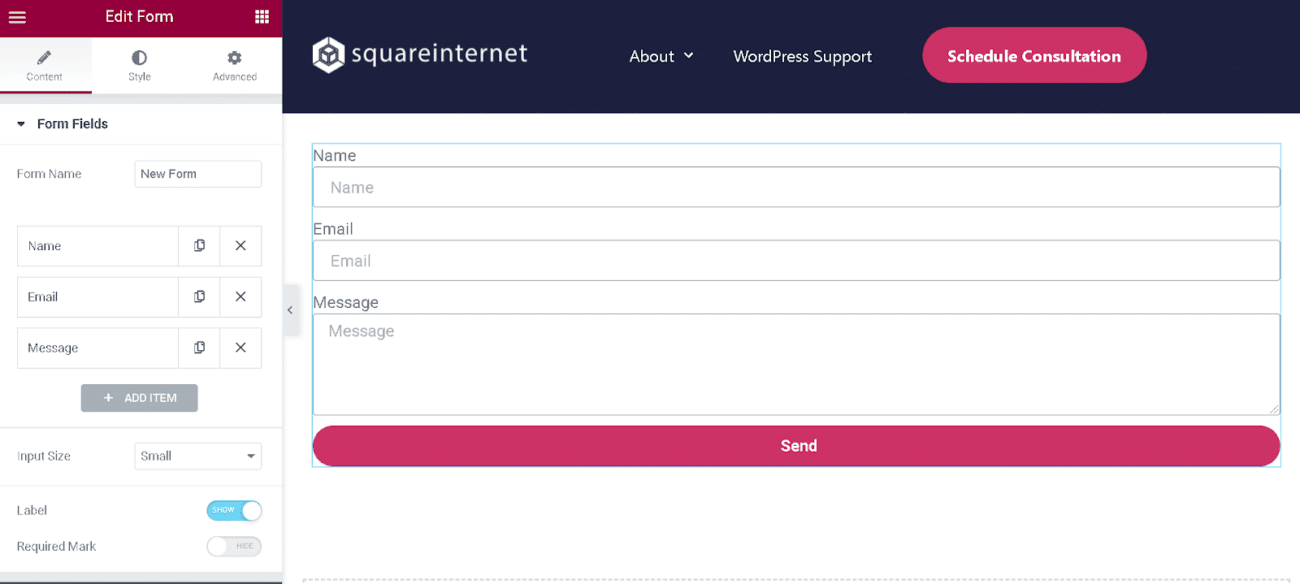
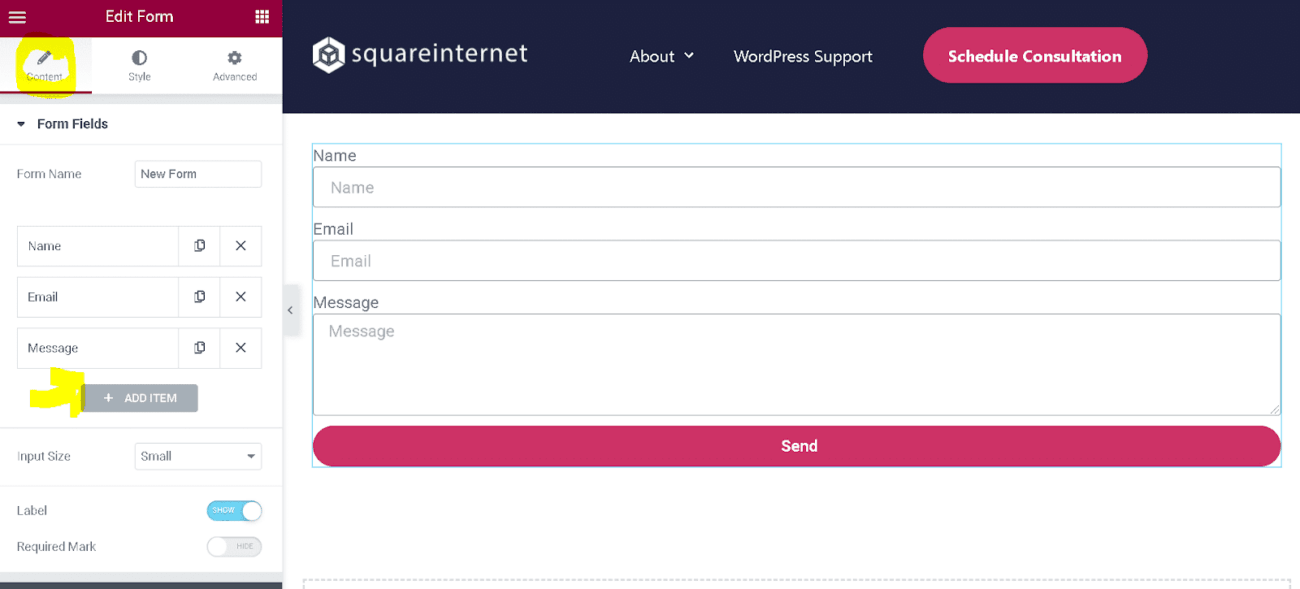
When working in the Elementor editor, Form Fields are added and edited from the Content tab. As you can see in the example below, Forms include a few default Fields. By selecting Add Item from the dropdown menu, you can create new Fields.
Duplicating a Field is also possible by selecting the icon that looks like two documents, one in front of the other, and clicking on it.
Types of Fields in a Form
Many Form Field types are available, ranging from simple text Fields to passwords, ReCaptcha, and honeypot fields.
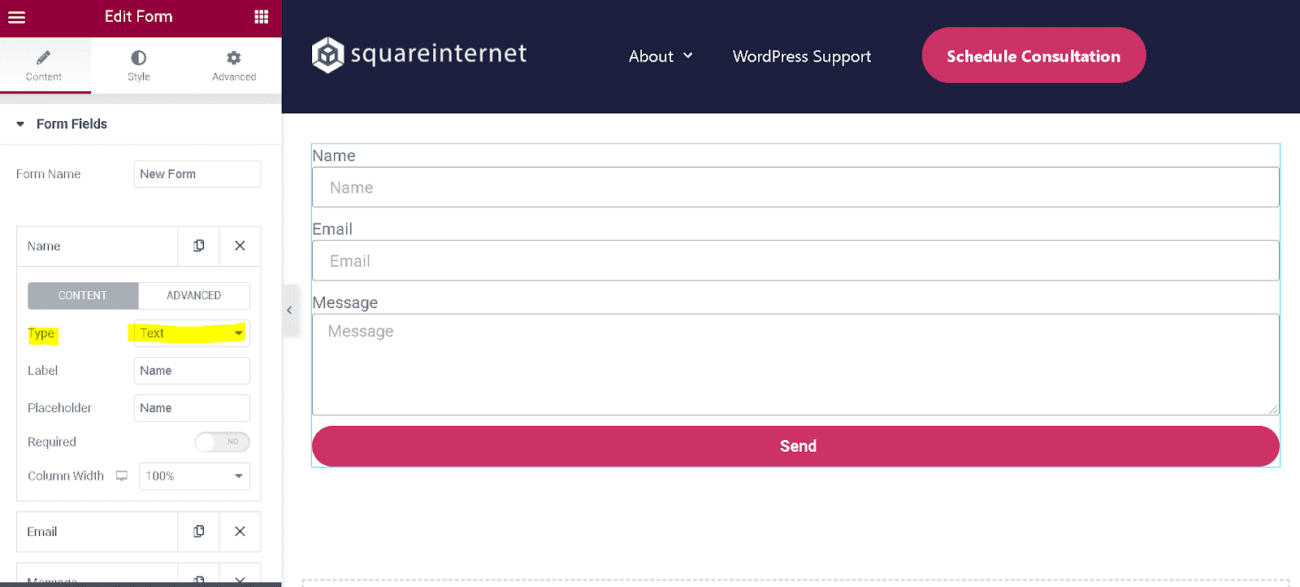
To change the behavior of a Form Field, first, select the Field and then like the Type dropdown menu to see the available various Field types.
Types of Fields in an Elementor Form
Width of a Form column
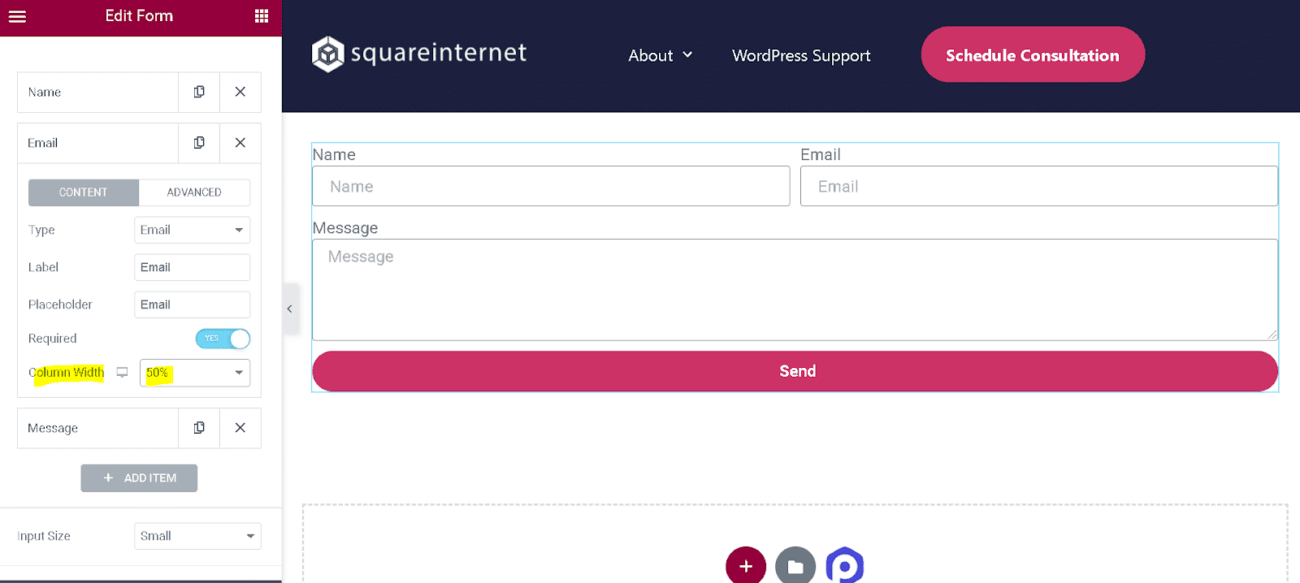
This feature allows you to use two Form Fields on the same line by adjusting the Column Width setting. Change the width of the window by selecting it from the dropdown selector and selecting 50 percent. It is worth noting that if you do this with two consecutive Form Fields, you will notice that they appear on the same line together.
Forms in Elementor for Styling
Style your Forms in Elementor the same way you style other widgets by navigating to the Style panel located within the Elementor editing interface.
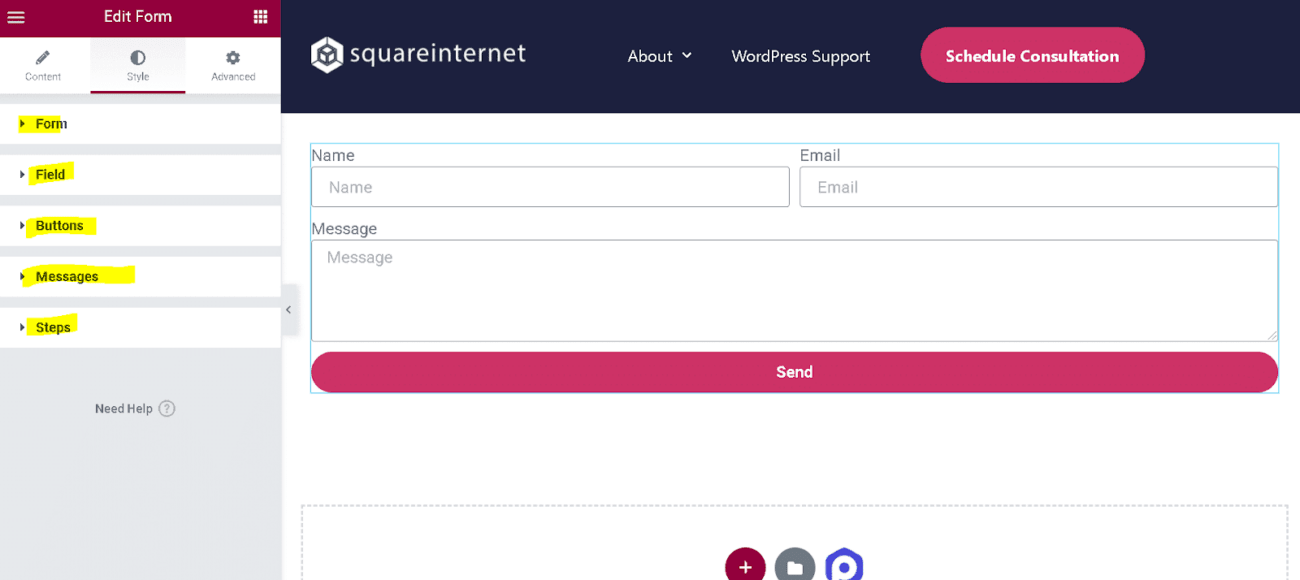
The Form itself, the Fields, buttons, any steps, error messages, and confirmation messages can all be customized.
For those already familiar with Elementor, there isn’t much more that they need to learn in styling Elementor Forms.
Actions on a Form
Following our discussion on creating a Form in Elementor, let’s look at configuring what happens after your Form is submitted; this is accomplished through Form actions, or as they are referred to in Elementor, Actions After Submit.
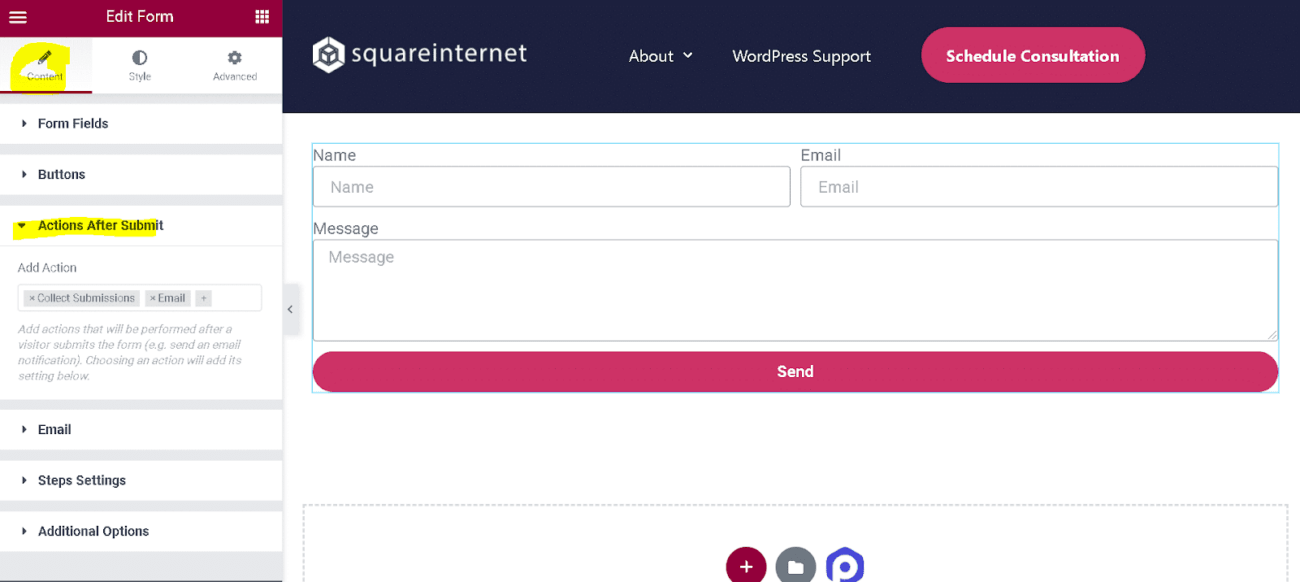
When a form is submitted, it is common for the system to send an email and redirect the user to a different webpage. You can, of course, include as many actions as you want on your Forms and combine them in any way you want. As you might expect, there is a specific selector Field with no coding involved.
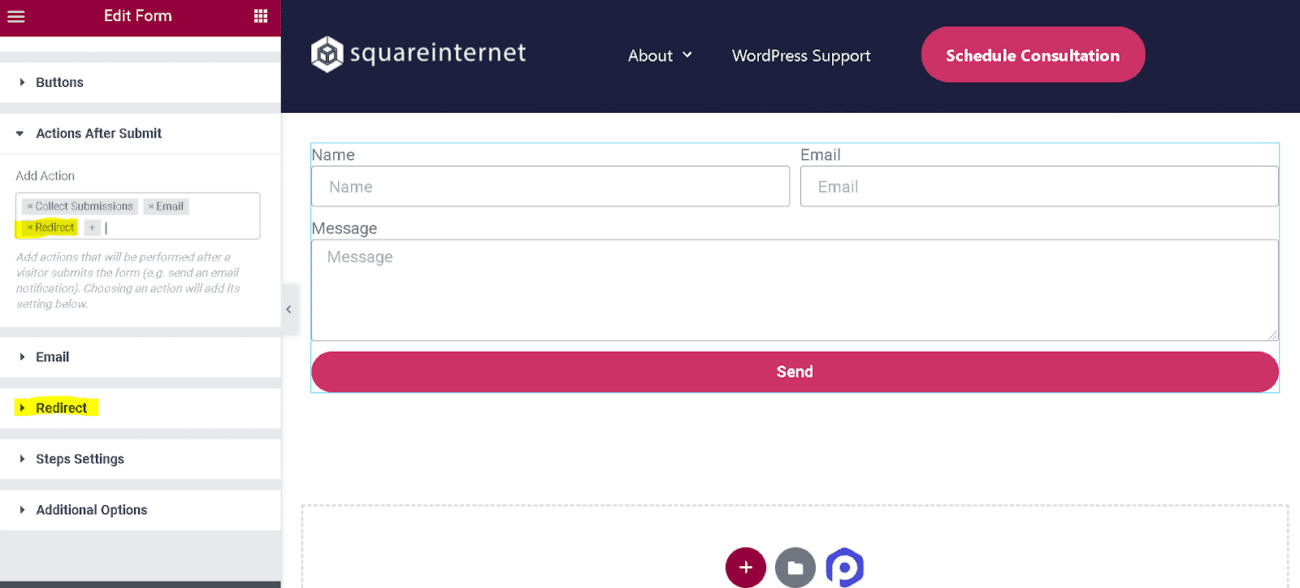
Each of the actions you add will appear as a separate tab option on the main menu. We currently have a tab option for Email, but if I were to include a redirect in the Add Action Field, I would also see Redirect in my tab options, as shown in the example below.
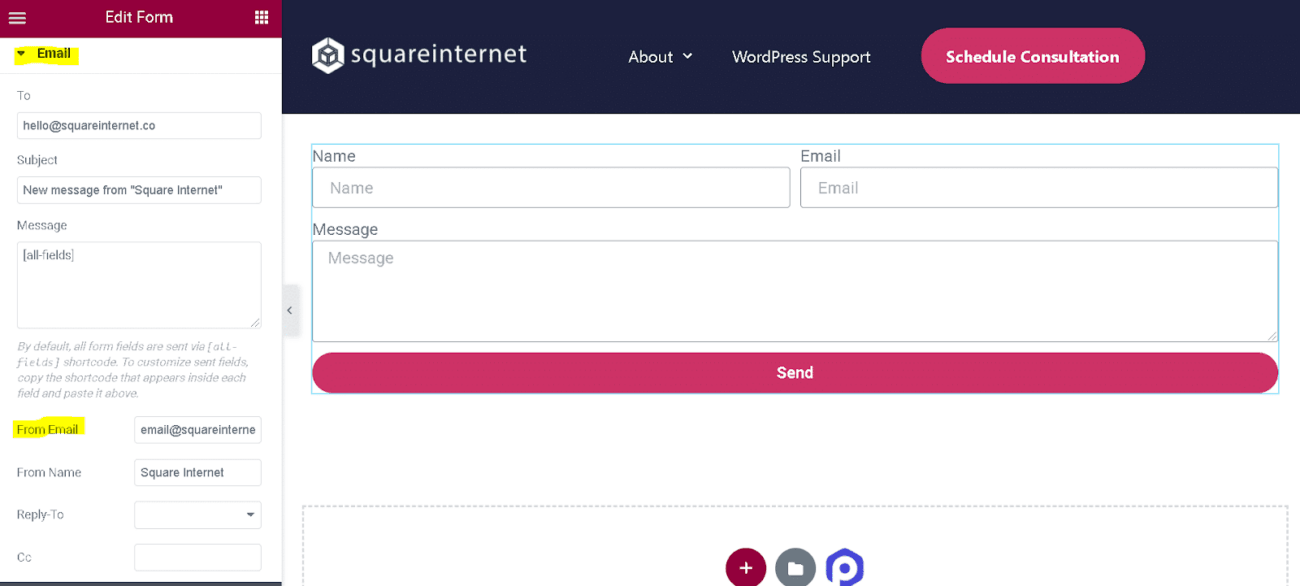
To conclude, I’ll demonstrate how to configure the Form to accept submissions via Email, the most frequently asked question about Forms.
When you select Email from the Content tab in the editor, you will be presented with the screen shown below; this is where you can personalize the from Email and the reply email, and you can also add a CC or BCC to anyone who should receive a copy of the submissions from the Form.
Creating a Contact Form Messaging Template in Elementor
Many people are surprised to learn that Elementor’s form editor is more powerful than it appears at first glance, and one of the more advanced features is the ability to customize the messaging for each Form.
It is possible to customize the form messages in order to provide a more personalized feedback process to the end-user who has filled out your Form, rather than sounding like a boring robot. But, specifically, what messages can you customize for your Elementor contact form are as follows:
To begin, you must first enable custom messaging by selecting “Additional Options” from the dropdown menu and then switching the toggle switch for “Custom Messaging” to “Yes.”
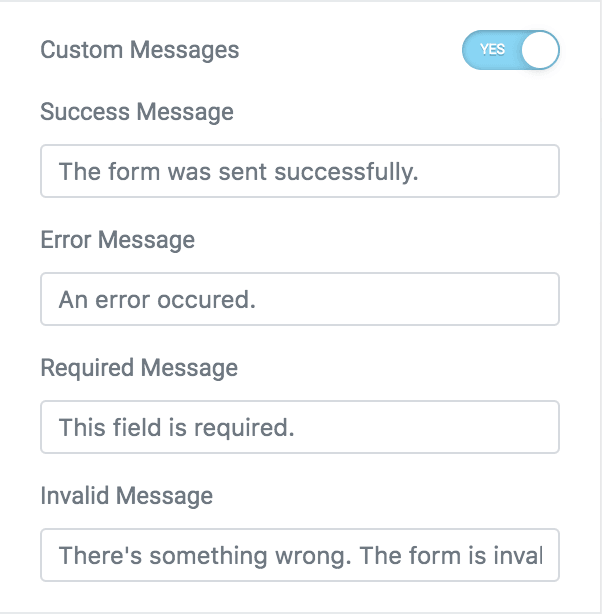
Elementor contact form widget customization by adding custom messages
As you can see, there are four different messages that you can customize, including the ones listed below:
A success message is displayed to an end-user after submitting the form and verifying that the Form was correctly filled out (e.g., no missing required fields, etc.).
Error Message — a message that is displayed to the end-user when an unknown error occurs during the submission of the Form.
Required Message — appears when a required form field is not filled out, the Form is submitted, and the Form is not completed.
When something within the form submission is incorrect and cannot be sent, the message Invalid Message is displayed to the end-user.
Being able to edit the messages allows you to be creative and quirky, or more formal and business-like if you run a corporate site. The best part is that they are completely editable, so you can do whatever you want!
Conclusion
Elementor form widget, it is effortless to construct a contact form. It comes with an intuitive drag-and-drop contact form builder and a plethora of customization options that distinguish it from the other contact form plugins available on the market. You can easily customize its styling and color scheme to match the look and feel of your company. Also included are various other attractive widgets, more than 300+ professional templates, and a pop-up builder in one convenient package. This fully-featured WordPress page builder consists of all of the necessary widgets and features, so you won’t have to purchase additional page builders to customize your website further. Furthermore, it allows for the integration of more than 30 marketing services, which is why it is one of the most popularly purchased plugins on the market today.


