
You must modify your product page to distinguish your e-commerce store from the competition and provide your clients with a unique experience. Furthermore, the option to aesthetically personalize your product page is critical to maintaining a consistent visual design throughout your online store.
Elementor is one of the leading WordPress website builders on the market, but did you also know you could build WooCommerce stores using it?
Many built-in Elementor WooCommerce modules allow you to insert WooCommerce content or functionality blocks or style them using the Elementor builder. Pretty great, right?
Styling and customizing WooCommerce used to require PHP and CSS for every tiny change, but as tools like Elementor improve and become more complex, more and more options become available for taking control of the way your store looks and works.
Let’s get started.
- Creating an Elementor template
- Building Elementor product image or gallery
- WooCommerce product title, price and add to cart
- Setting up Elementor product tabs
- Elementor product brief description
- Elementor and WooCommerce product upsells
- Conclusion – Elementor product page builder
Creating an Elementor template
The first step in the procedure is to build a new Elementor template by navigating to Templates in the WordPress dashboard. Click ‘Build New’ then pick Single product as the template you wish to create.
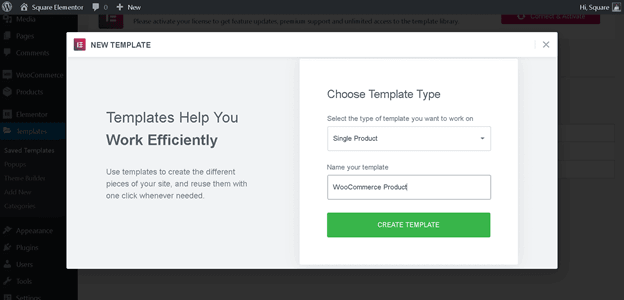
As we develop this template from scratch, there is no need to put any blocks; exit the next box until you reach the usual Elementor builder screen for a new page.
Building Elementor product image or gallery
Every WooCommerce Product has a product image or image gallery showcasing the product’s photographs to customers. Elementor provides a built-in Product Images module that allows us to insert this in our template.
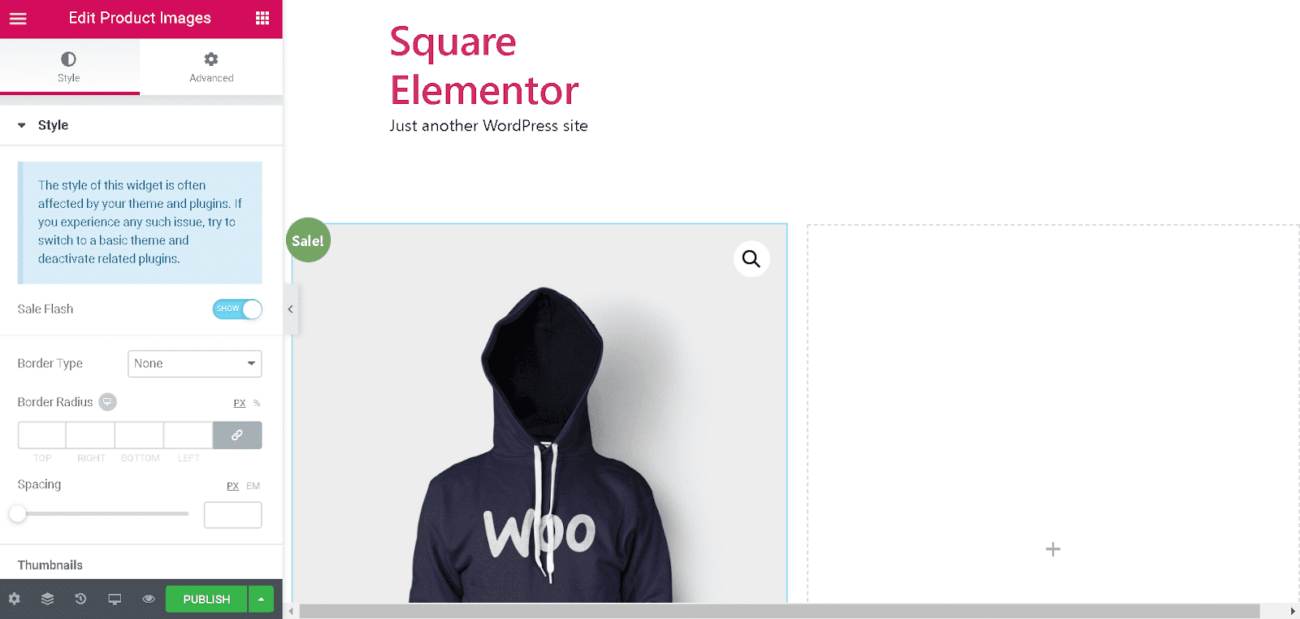
Create a simple 2 column row and enter the Product Images module in the left column; this looks practical and performs the job, but let’s customize the sales badge to match the Elementor Hello Theme being used for this article. To do this, we need to apply a small line of custom CSS, which can be introduced by heading to Advanced > Custom CSS and paste the below code.
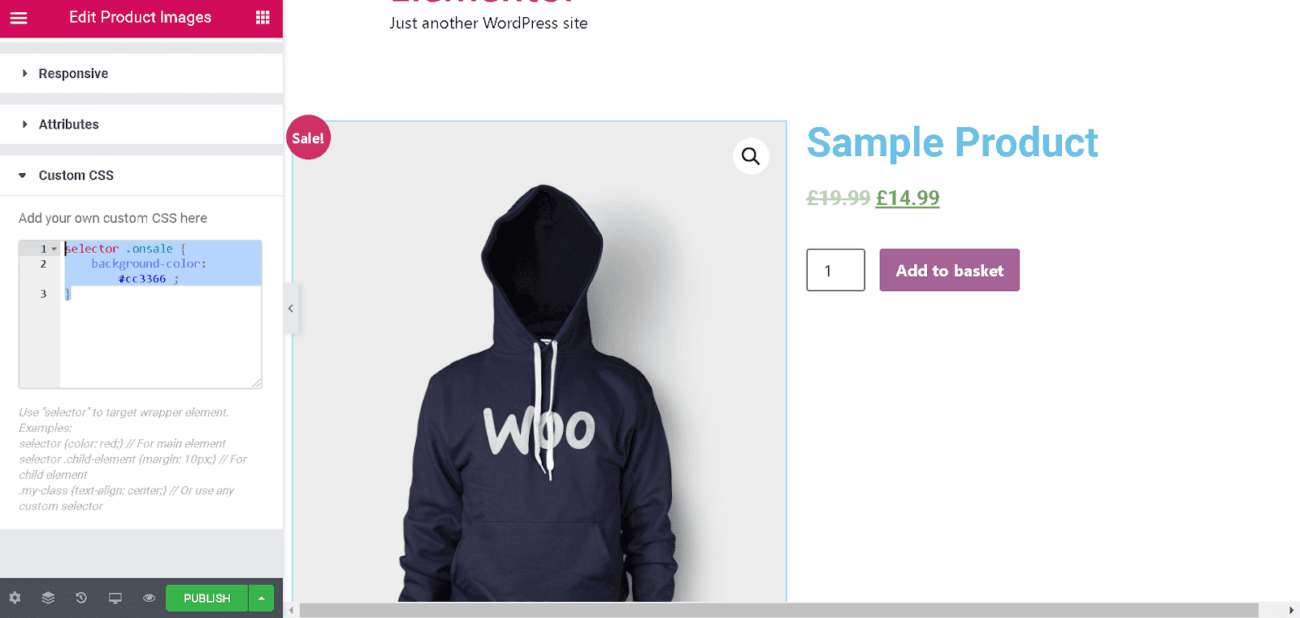
selector .onsale { \sbackground-color: #cc3366 ; \s}
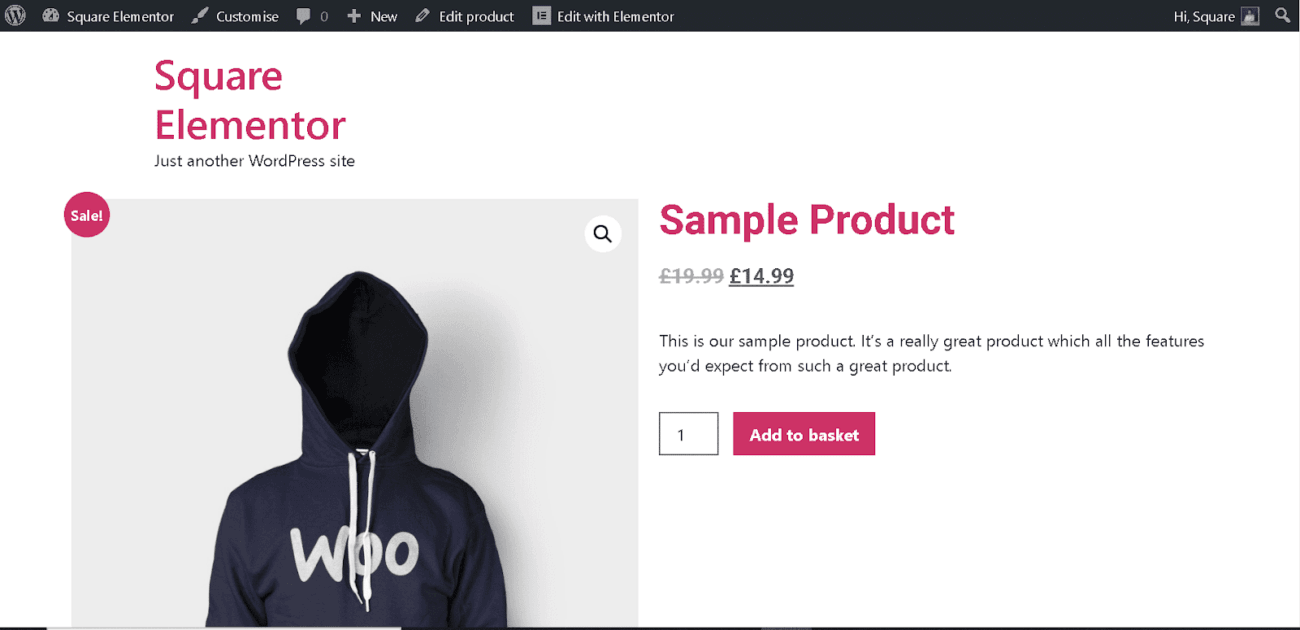
WooCommerce product title, price and add to cart
We will be adding the Elementor modules for Product Title, Product Price, and Add To Cart in the right-hand column.
Search for these three modules in the Elementor constructor, then drag & drop them across to arrange them in the sequence stated above; this is fully functional, but we want to customize it to match the styling like the above section Hello Elementor theme. Styling modules with Elementor is easy, all that you need to do is click on the module, and the editor should open up the styling options to the left.
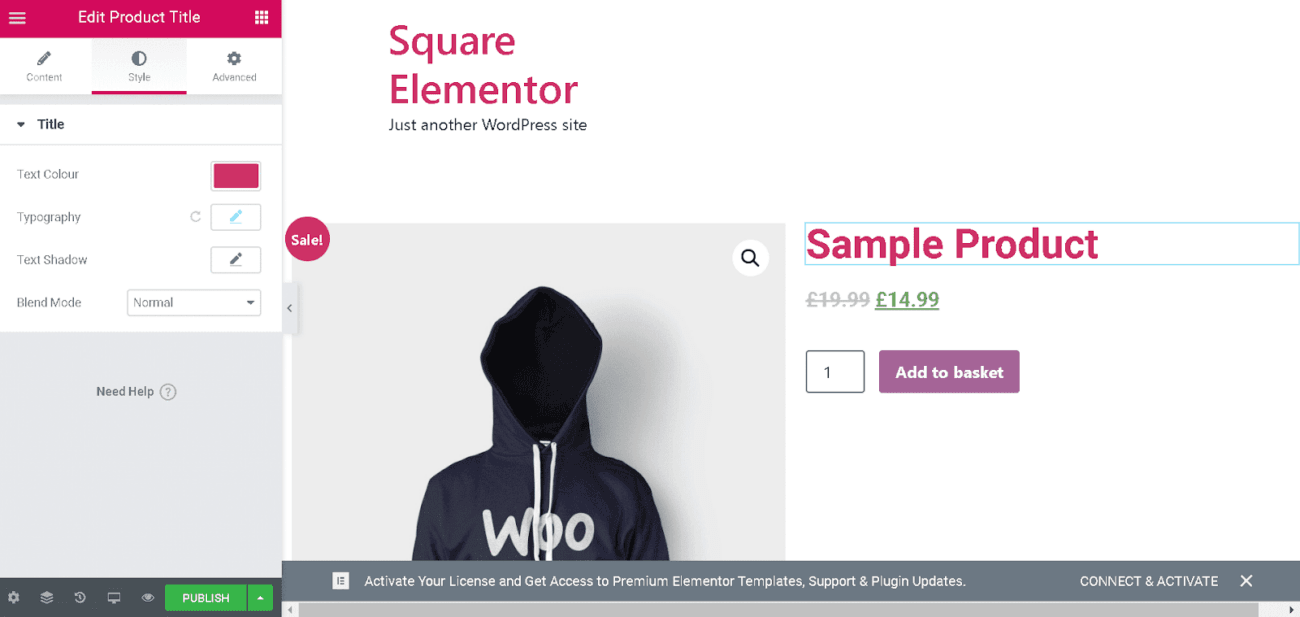
The content of these modules is excellent. Thus we are going to be working under the Style tab. Firstly, let’s update the font and color of the Product Title to match those used in the Hello Elementor theme.
We then need to do the same for the Product Price and Add To Basket modules by clicking on each module and modifying the text color. For the Product Price, I’m going to use a dark grey to contrast against the headline, so type this hex code if you are following along – #54595f
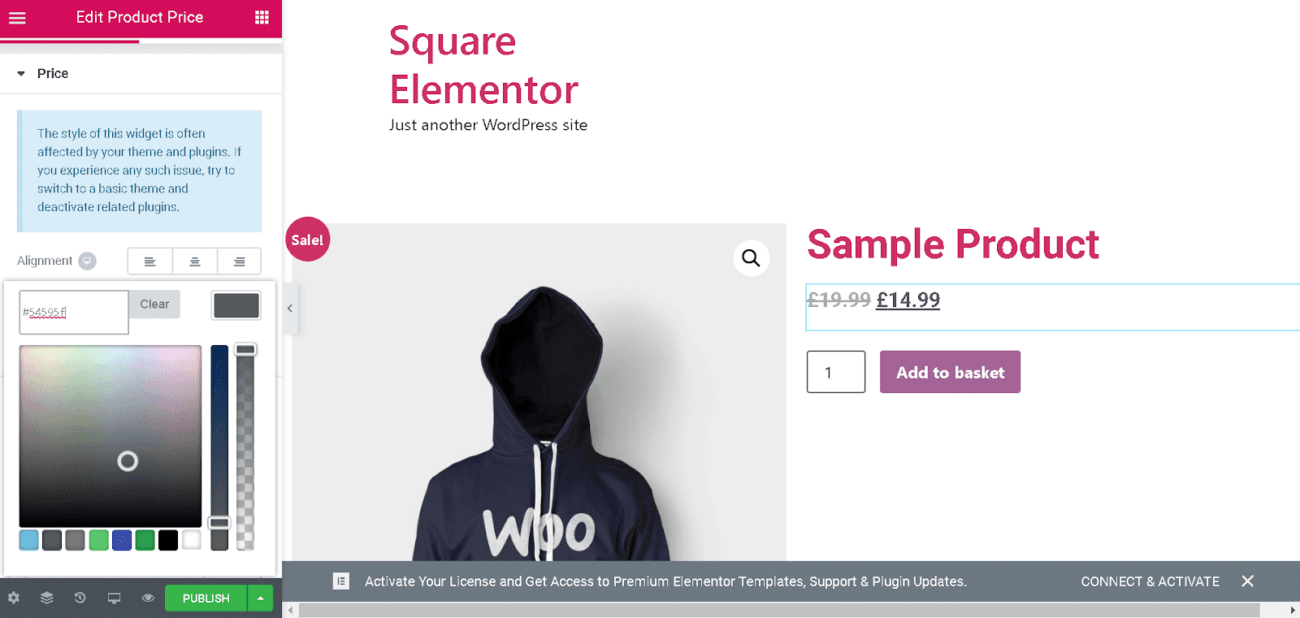
Next, on the Add To Cart module, we will update a few things. The background color of the button and the border radius of the button using the below settings:
- Set the content to ‘Add to cart.’
- Set the background color to ‘#cc3366’
- Set the border radius to 0
I did change the border radius of the amount selector to 0, which you can do within the Style tab for Quantity.
Setting up Elementor product tabs
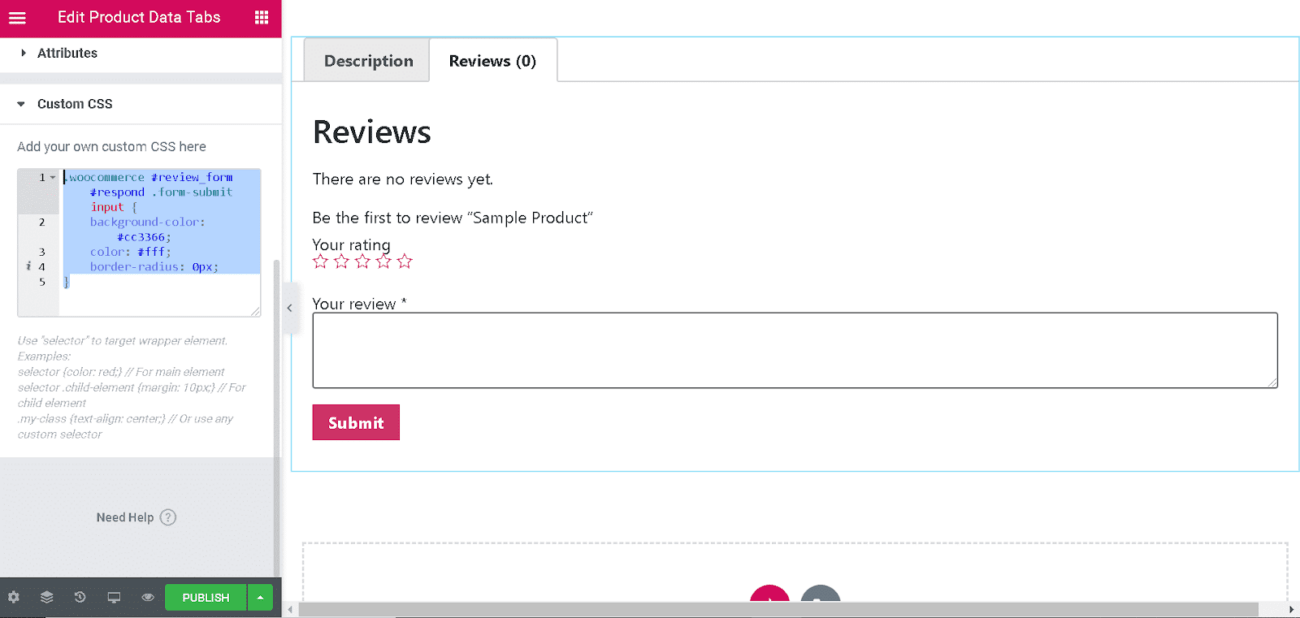
Every product has to display some basic information like a product description and reviews if available; this is commonly handled through product tabs.
Please create a new row beneath the top section and drag the Product Data Tabs module from the Elementor builder into the row to insert it. There’s not much styling required here because it inherits some styles from the Hello Elementor theme. However, let’s modify the style of the review submission button.
To do this, we’re going to need a little bit of custom CSS again. Start editing the Product Data Tabs then click on the Advanced tab and scroll down to Custom CSS. Input the below CSS, and you can adjust the colors according to your design.
.woocommerce #review form #reply .form-submit input { background-color: #cc3366; color: #fff; border-radius: 0px; }
Elementor product brief description
O.k, so we have a decent, simple-looking design thus far, but it looks a little sparse. Adding a Product Short Description module to the top part can help pad this out and add more context.
Please search for the WooCommerce Short Description module, then drag & drop it beneath the Product Price and above the Add To Cart Module.
There’s no styling required here yet as it’s inherited the styles from Hello Elementor.
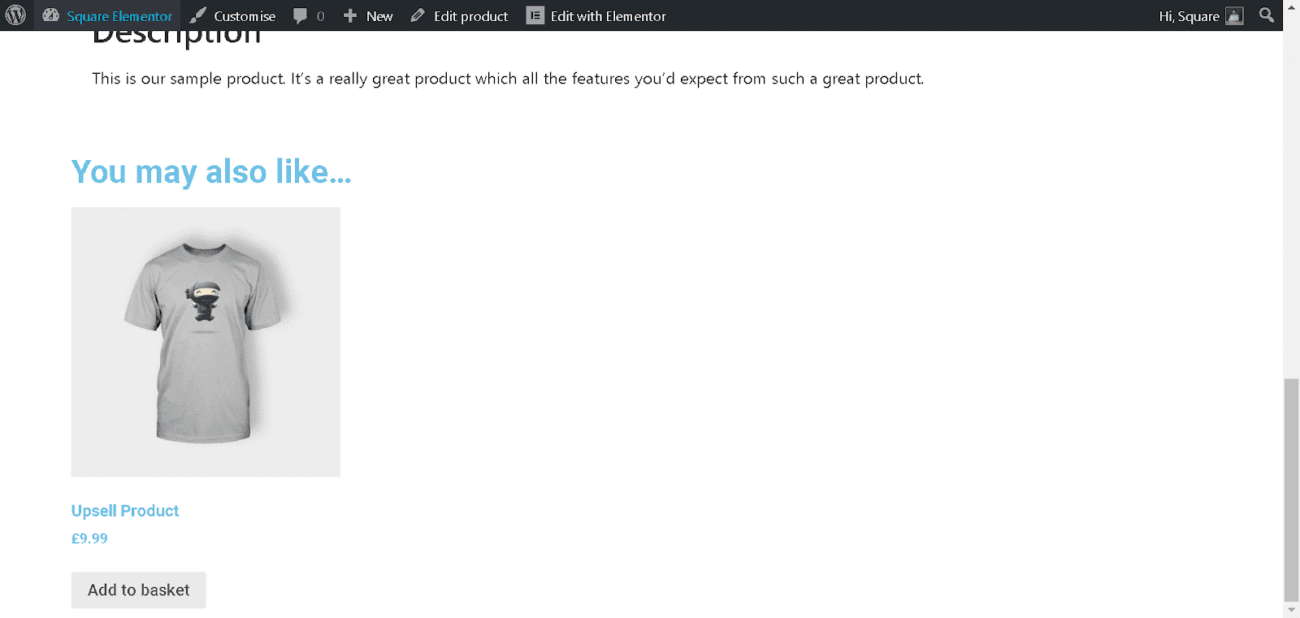
Elementor and WooCommerce product upsells
Increasing your average basket value is crucial for every WooCommerce site, which is why it’s nice that Elementor includes a Product Upsells module for you to integrate customization on your store easily.
Please search for the product Upsells module in the Elementor builder and insert it in a new row behind the Product Data Tabs.
As you can see, this requires a little bit of adjustment to complement the rest of our style. Start modifying the module and make the following changes:
- Set the Title color to – #cc3366
- Set the Heading color to – #cc3366
- Set the Price color to – #54595f
- Set the Button background color to – #cc3366
- Set the Button color to – #fff
- Set the Button border radius t0 – 0
The finished product will look like the above. You can adjust the color hex code as you see fit if you use this guide as a jumping-off point for your template.
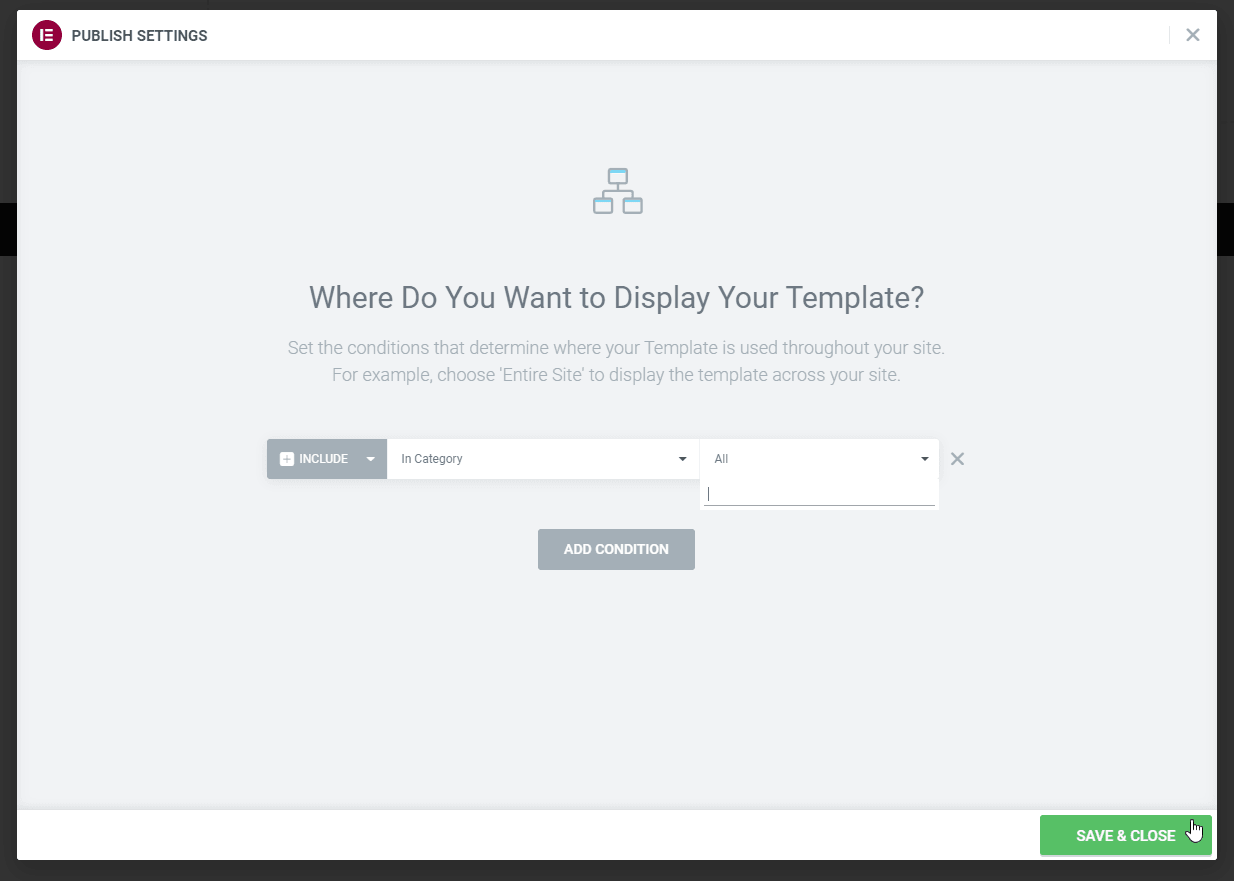
Once you are done, you publish your template. In the next window, you’ll see the question “Where do you want to display your template?”. Click on “Add Condition” to determine when this template should be used. You can select “All Products” to use the template on all your product pages. You can also choose to use this template only for products that fall into a specific category or have a particular tag associated with them.
Conclusion – Elementor product page builder
Some users can have difficulties getting their customized design settings, such as font color and typography, to display when using Elementor. The appearance of your WooCommerce store may be affected if you are using a WordPress theme that can control the appearance of your store. If you encounter this problem, keep in mind that your article may override your custom page settings in some cases.
You can also choose a blank page and create one from the ground up using the product widgets for a completely customized appearance. Use an empty page, close the template library pop-up window when it appears and begin building on the newly created page. The custom “Add to Cart” button, “Product Price,” “Product Image,” and “Product Title and Description” are just a few of the WooCommerce widgets you can use to customize your product page. You can look at all of the different widgets currently available by visiting this page. If you prefer, you can arrange the widgets wherever you want on the page layout and customize their styles to match your desired appearance.
You must modify your product page to distinguish your e-commerce store from the competition and provide your clients with a unique experience. Furthermore, the option to aesthetically personalize your product page is critical to maintaining a consistent visual design throughout your online store. Elementor is a fantastic tool for customizing the pages of your WooCommerce store, and it comes highly recommended. In addition to being simple to use, the page builder includes all the necessary widgets and styling options to assist you in creating custom product pages. We hope you found this tutorial informative and provided you with the information you needed to customize your WooCommerce product and product archive pages using Elementor. Have you used Elementor to create WooCommerce pages in the past? You are welcome to share your thoughts in the comments section. We’d be delighted to take a look.


Una volta personalizzata la pagina, come si associa al prodotto del negozio?
Hi, This is setup when you save the first time your page design or using the small arrow above the Elementor save button