Our very own page builder, the Avada Builder, is now available in two interfaces: Avada Builder, which is our back-end wireframe page builder, and Avada Live, which is our front-end builder, which was only recently introduced with Avada 6.0.
Using our straightforward system of Containers, Columns, and Elements, both versions of the Avada Builder allow you to design beautiful page layouts for your website easily. Avada Builder is a fantastic tool for modern web designers and site owners alike, as it gives them complete control over all aspects of page content and Layout. Both versions of the Avada Builder also generate the same code. They are completely interchangeable, allowing you to have the best of both worlds with Avada Builder, which is currently available.
- Using section layout
- Customizing A Layout
- Custom Layout Editing
- Conditional Layout Design
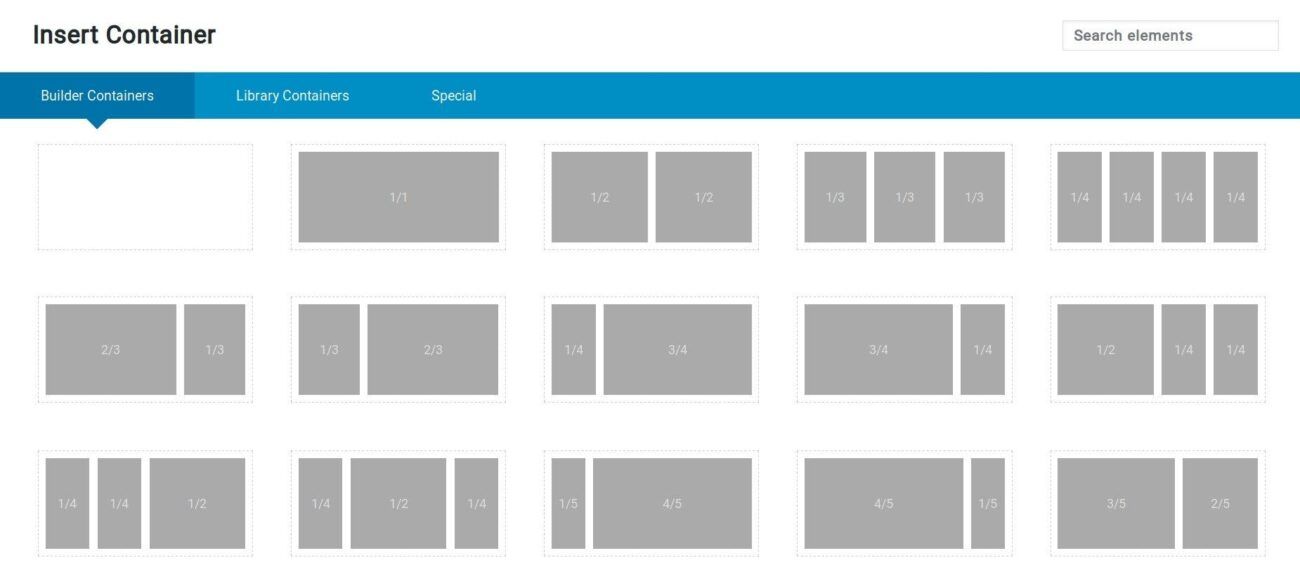
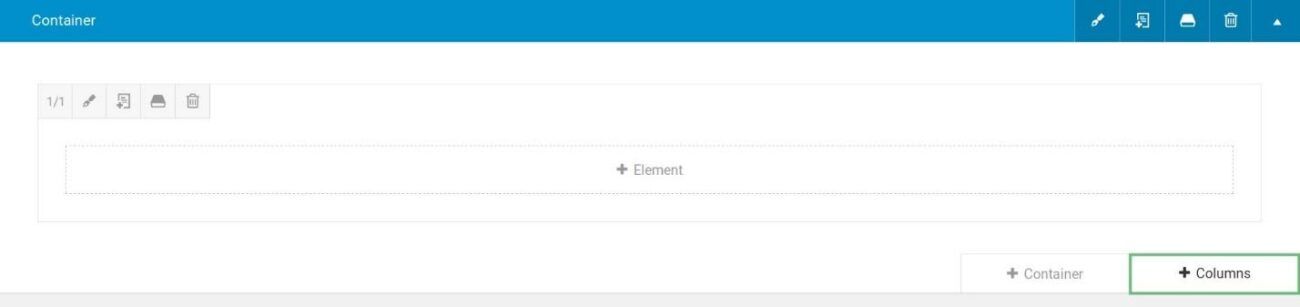
- Adding columns from Avada Layout builder
- Conclusion
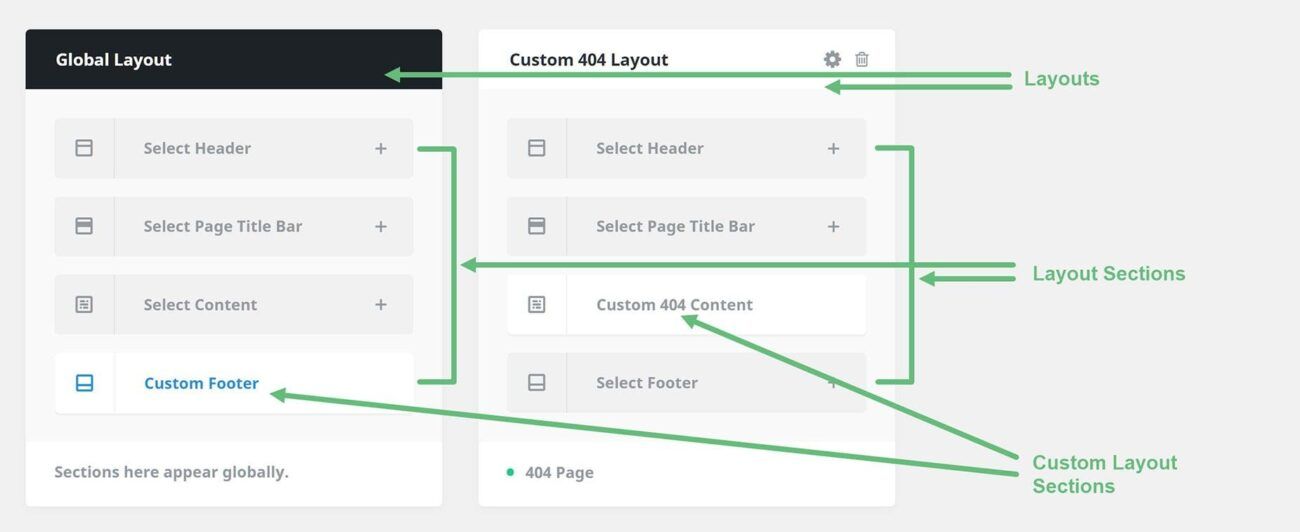
The Layout Builder page is where you will find all of your Layouts and any Conditional Layouts that you may wish to build in addition to the Global Layout created by default. Also located here is the area where you assign Layout Sections to your Layouts and specify Conditions for your Conditional Layouts to take effect.
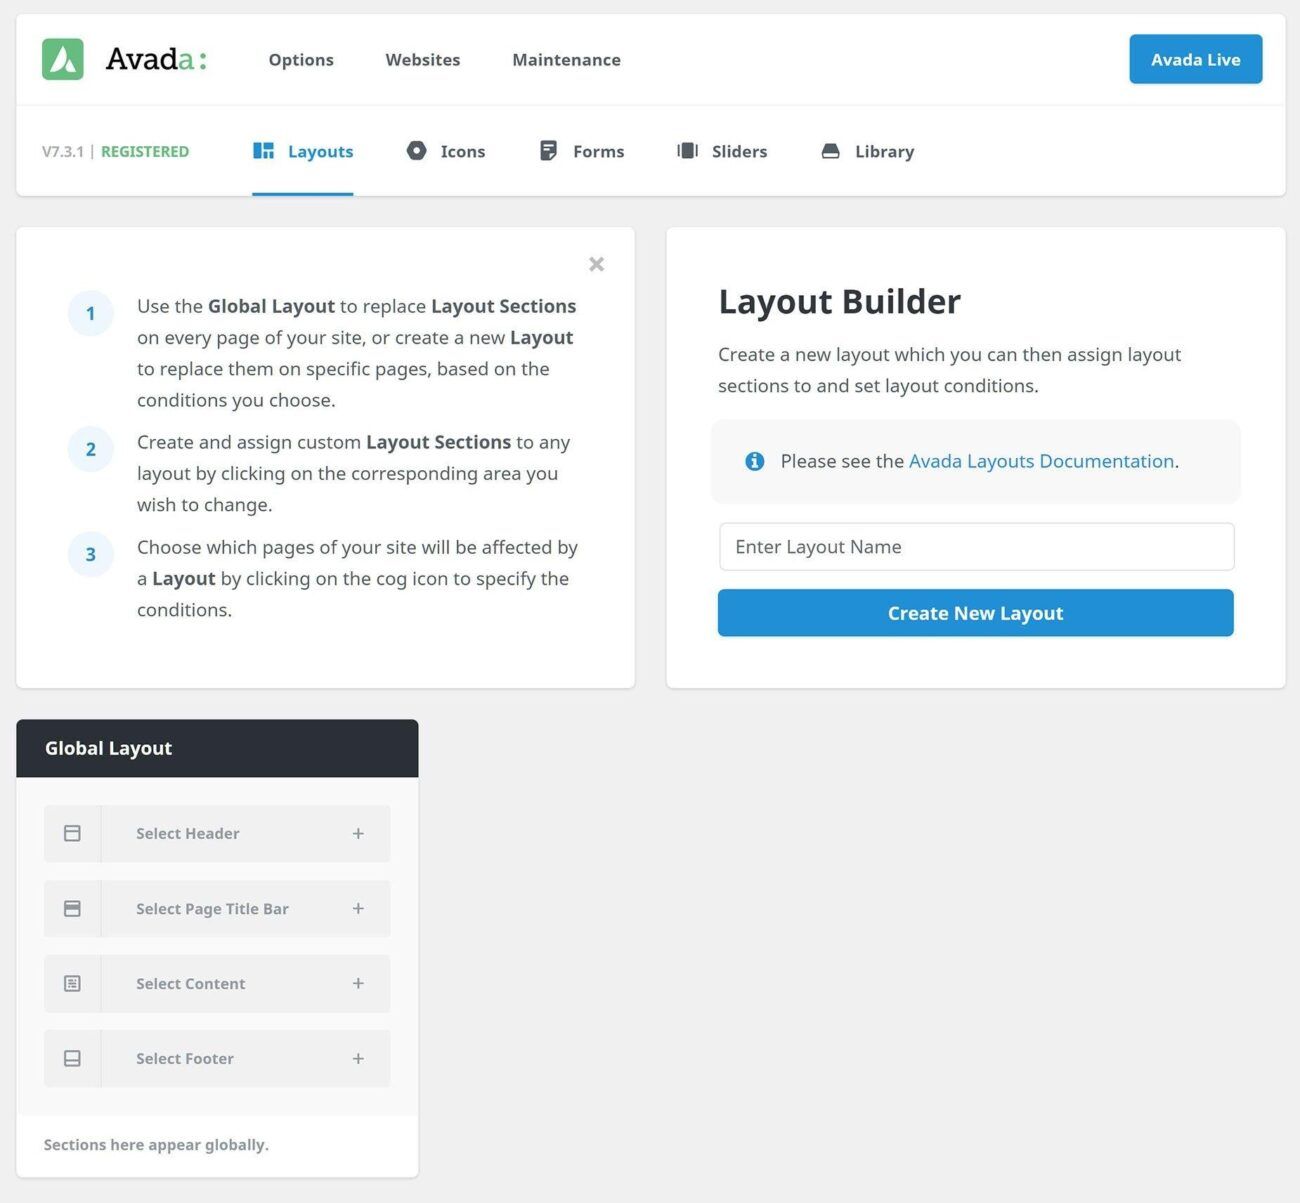
The Layout Builder may be accessed from the Avada Dashboard by selecting Layouts > Layout Builder from the drop-down menu. One of the most straightforward ways to describe Layouts is to say that they are Containers that house the four layout sections of a page – the Header Section, Page Title Bar Section, Content Section, and the Footer Section. You can learn more about the differences between Layout Sections and Layouts by reading this document: Understanding Layouts and Layout Sections (PDF). Continue reading to learn more about the things you may do on this page.

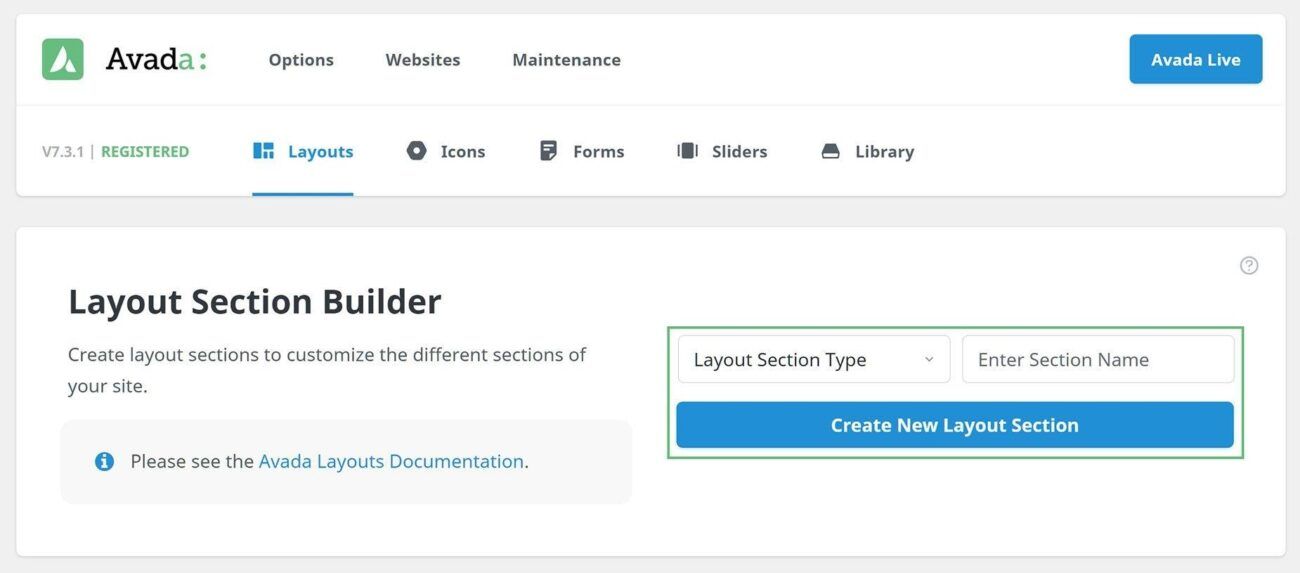
Two parts are located at the very top of the Layout Builder page. A technique for populating the Layout Sections in the Global Layout or generating Conditional Layouts is outlined in the first section (hint: you can close this with the X), and on the right-hand side of the screen is an area from which you can directly create new Layouts (see below). Type in a name for your new Layout and then click on Create New Layout to complete the process. A blank Layout is created when this method is used; no Layout Sections or conditions are specified.
As you build Layouts, they are automatically imported into the Layout Builder page. You can rename a Layout by clicking on the Rename button at the top of the page. You can also click on the cog icon to establish conditions for the Layout, and you can delete a Layout by clicking on the Bin icon at the top of the page. You may also see and assign criteria by clicking on the bottom of all Layouts, except the Global Layout.
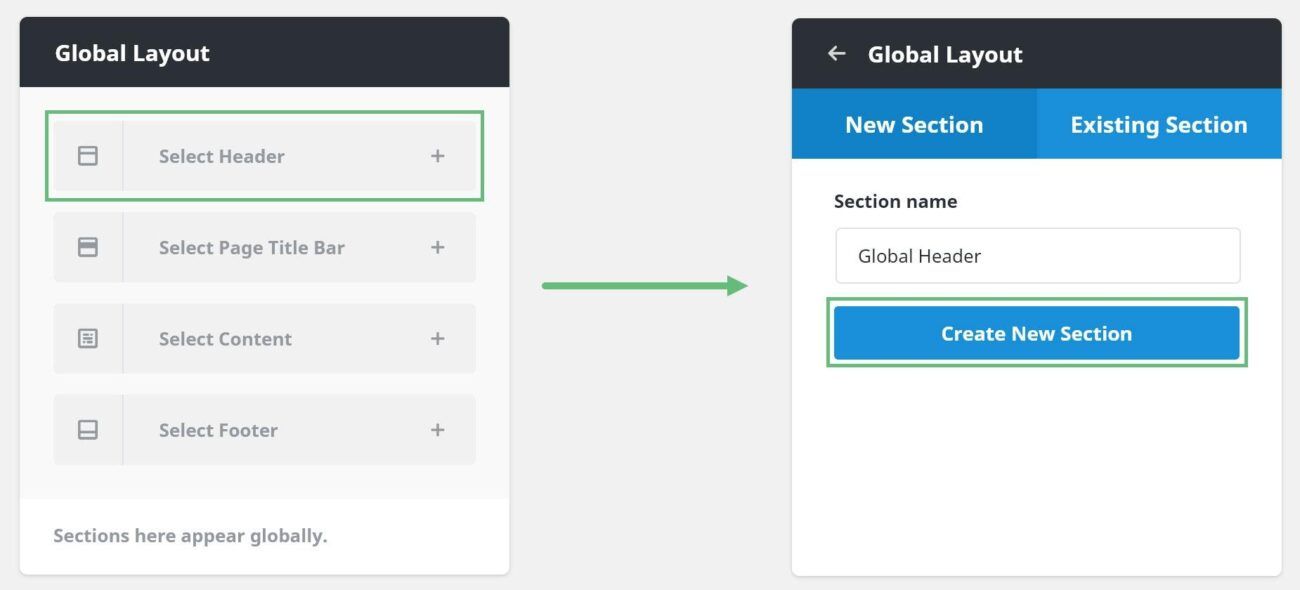
Within each Layout, you can see the four Layout Sections assigned to a particular Layout, one for each of the four layouts. In each Layout Section, you’ll see a + icon, which will allow you to assign a Layout Section to that section of the Layout when you move your mouse over it. You have the option of assigning an existing Layout Section to this section or creating a brand new section from scratch.
Using section layout
As part of Avada Layouts, you can now create fully customizable footers for your website, taking advantage of the entire creative ability of Avada Builder to accomplish this.
A Footer Layout is a Layout Section added to a Layout. For example, a Custom Footer requires a Footer Layout Section, which may be added to either the Global or Custom Layout. We’ll look at constructing a Custom Footer Layout Section in the next section, but first, let’s look at Introducing Avada Layouts.
In the WordPress sidebar or the Avada Dashboard, select Avada > Layouts. Avada’s Layouts and Layout Sections are created and managed here. As shown below, the Global Layout is initially empty, with no associated Layout Sections.
Customizing A Layout
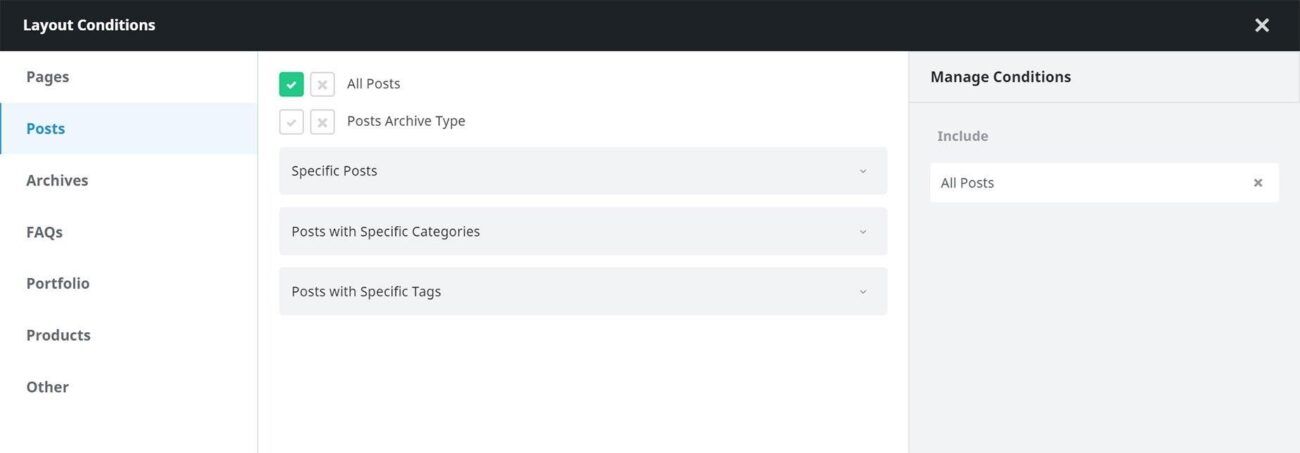
This section can be added to the Global Layout, or a Conditional Layout, only showing on certain custom post kinds or single pages. The Global Layout is already present, but we need to develop a Conditional Layout first.
On the Layouts page, add a name and click Create New Layout, as shown below.
Create a Footer Layout Section if you wish to add it to an existing Layout or the Global Layout.
On the Layout Section Builder screen, select the type of Layout Section, enter a name (in this example, Footer, possibly Global Footer) and click Create New Layout Section, as shown below.
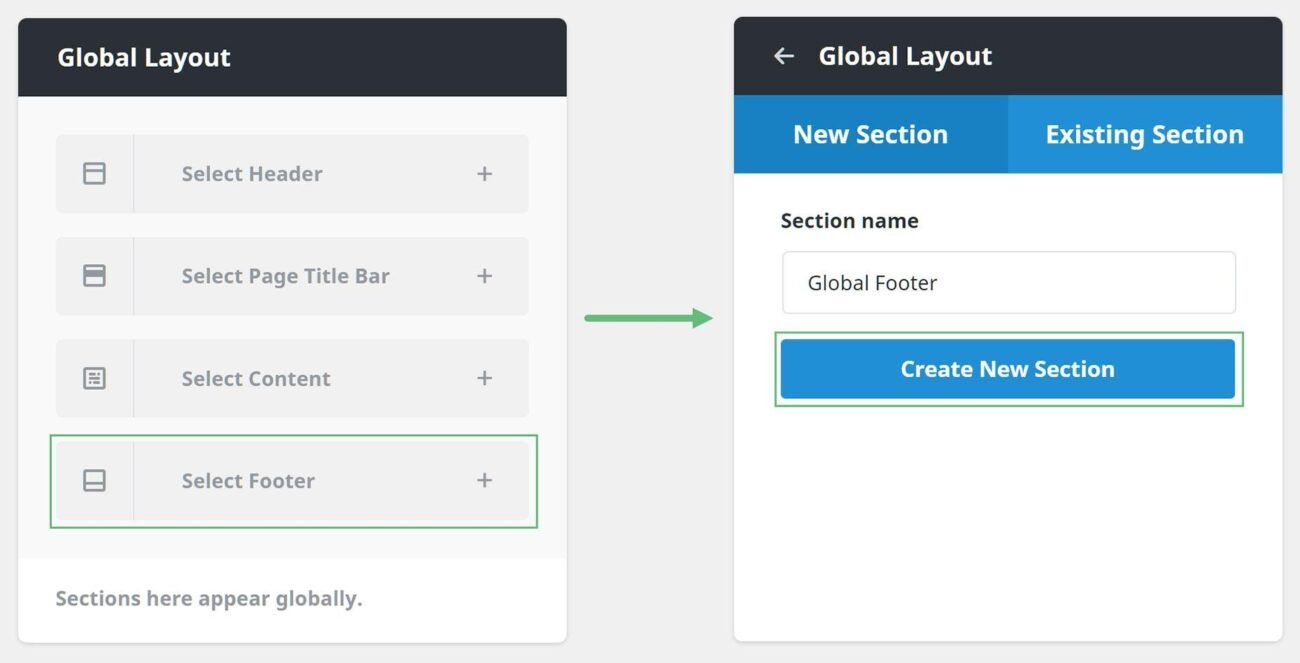
The following image shows how to generate a Layout Section directly from the Layout. Your site’s Layout Sections must be added to a Layout. Initially, there is simply a Global Layout. So, to create a Global Custom Footer, add it to this Layout. Custom Footer Layout Section, then add conditions to the Custom Footer Layout Section to make the Layout appear according to the criteria.
Nothing wrong with it, but it is vital to consider the situation. If the Layout is currently active (i.e., has conditions or is the Global Layout), any new Layout Sections will be active immediately and empty. It makes more sense to add a Custom Footer to a Global Layout via the Layout Section Builder page first, then add it to the Global Layout.
Alternatively, we might add a footer, header, or column Layout Section to a Conditional Layout and then create it. Conditions are not used until conditions are added. As illustrated below, we can alter the Footer Layout Section by hovering over it and clicking the edit icon.

Custom Layout Editing
The default WordPress Editor appears when editing a new Layout Section; you can use Avada Builder or Avada Live from here. Custom Layout Sections are created here. For additional information, see Creating Layout Section Content, but in short, you can build anything here.
Your Custom Footer can contain anything you can construct in the Avada Builder. You can have numerous columns, photos, etc.; This allows immense flexibility. The Layout section is where the footer material will appear. The material comes from the Builder, and your creativity is the only constraint.
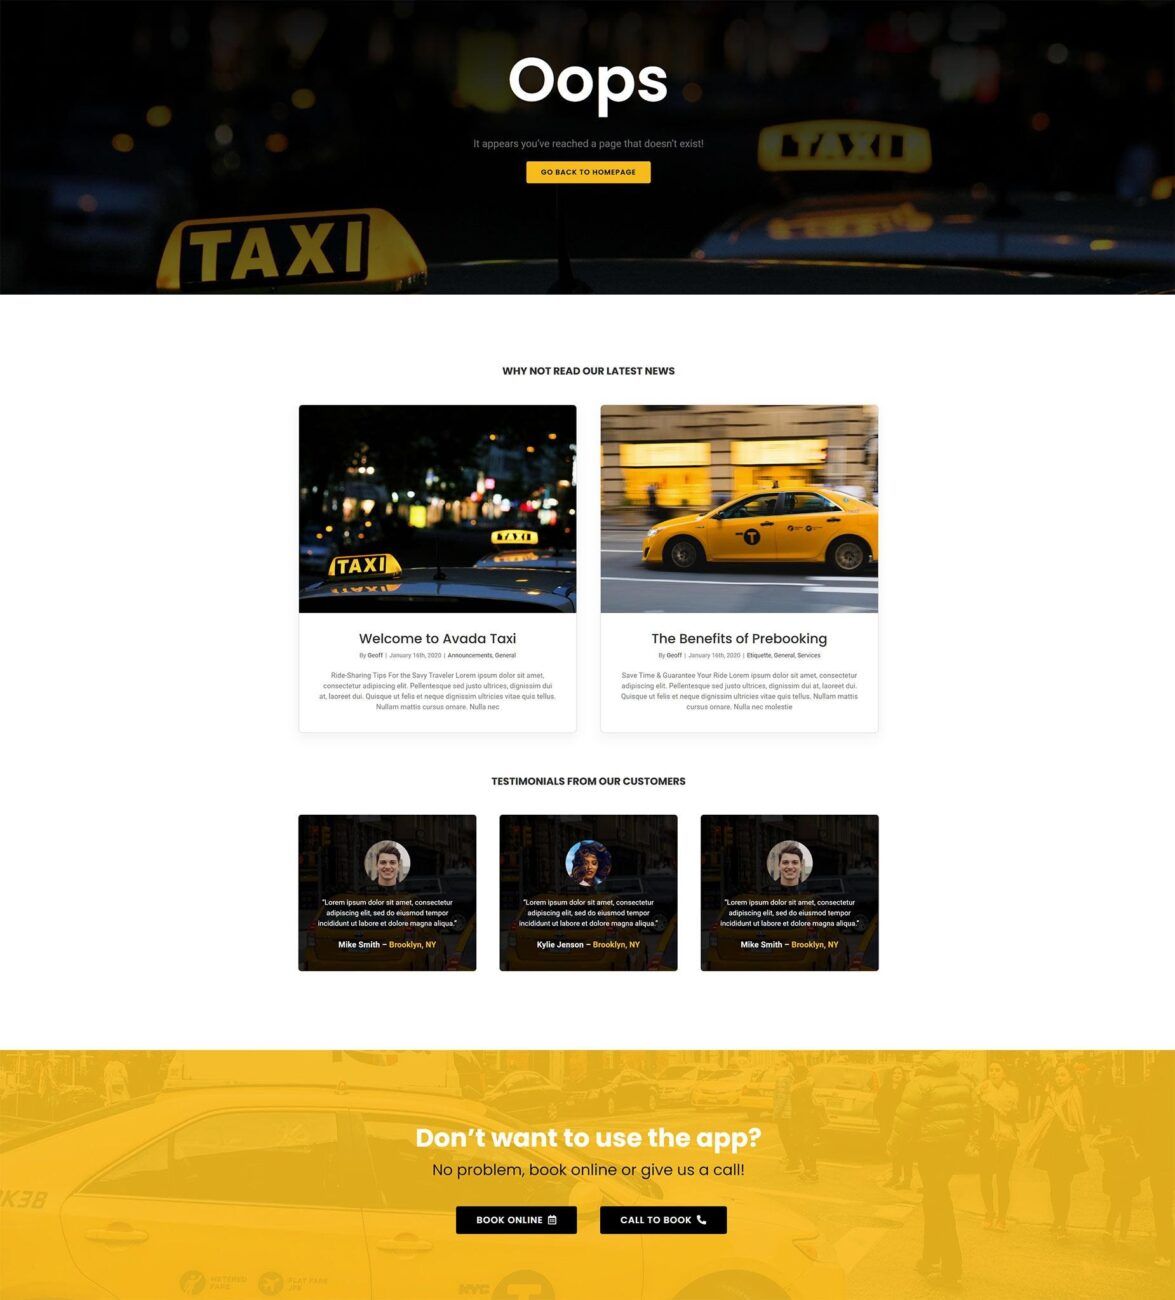
See the original Footer built for the Taxi Demo below; This was made by changing the theme options and footer widgets.