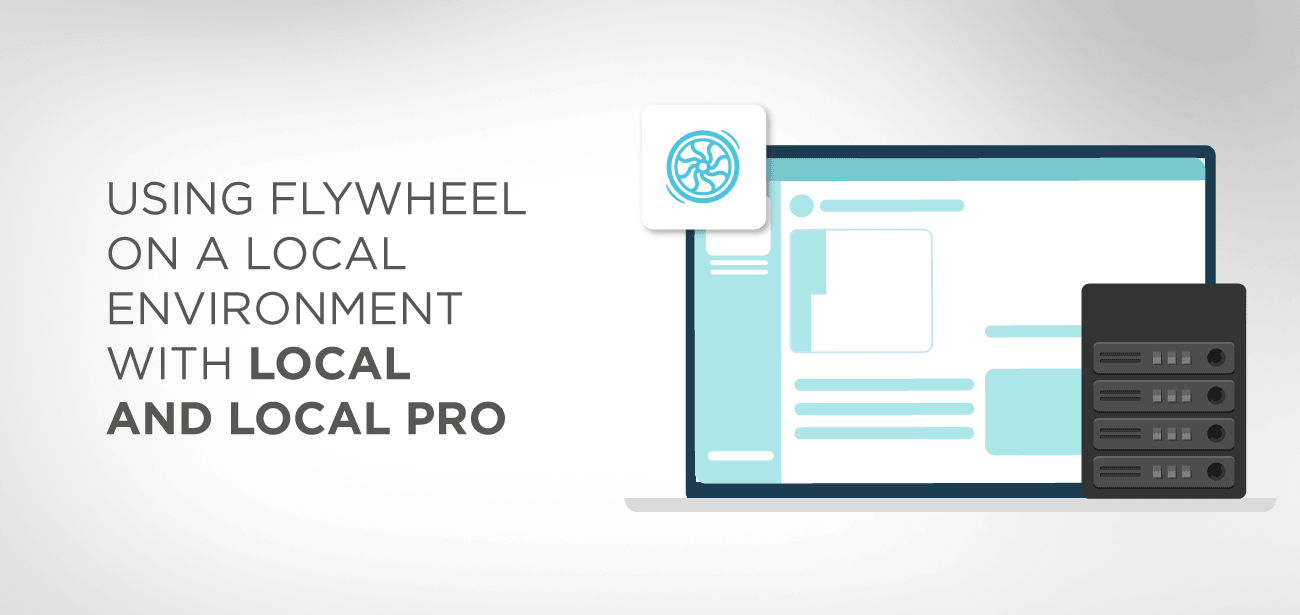
Are you looking for a straightforward WordPress hosting and light? Then you are on the right stage because Flywheel is one of the best platforms that could meet all your requirements. A forum constructed explicitly for thoughtfully brilliant creative people.
- Flywheel Hosting
- Setting up Local environment with Flywheel
- What features will you get with the local environment setup?
- Steps to follow for installing Flywheel on the local system
- Conclusion
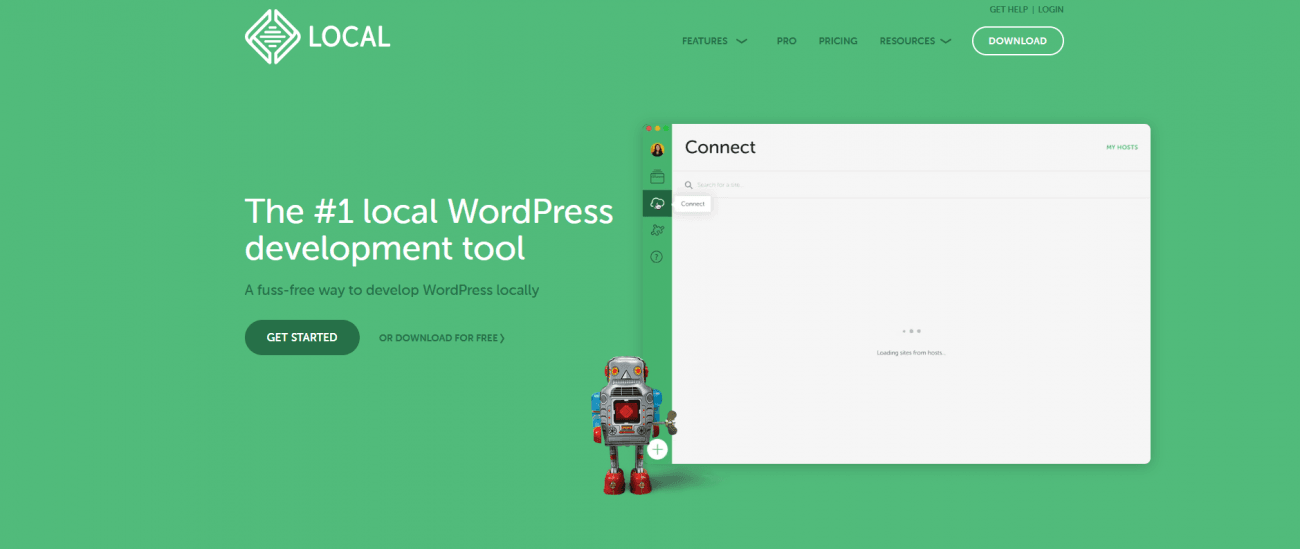
Flywheel Hosting
The Flywheel is a platform that provides you fast speeds, reliable performance, and support that is necessary to keep the WordPress site working effortlessly. Moreover, it is straightforward to create a website from the ground up because it comes with free demo sites and a single click staging features that you cannot find anywhere else.
Flywheel provides you the platform to excel in your development capabilities with its unique features, including one-click deployment to the live server, easy WordPress installation, and quick setup on the local system to let you focus on development.
Coming from a robust network infrastructure base, it is one of the biggest reasons you will experience optimized speed, scale, and security. They offer some beautiful plans that we will be discussing further ahead. So come on, let’s see what it offers…
Setting up Local environment with Flywheel
Flywheel accompanies numerous features such as free migration, auto backups, automatic WordPress updates, built-in caching, CDN integration, SSL support, and a lot more that looks unrealistic in this price tag. Furthermore, they also offer a 30-day money-back guarantee if you are not satisfied. So stop wandering around and follow the instructions below to set up the local environment with Flywheel.
When we say local development, we mean that anything you develop will be working on your pc and anyone who wishes to see your work needs to log into your computer and check. You must be wondering who would ever know that you are developing a website if they are inaccessible to the world. Nevertheless, the actual scenario is that before making it accessible to the world, it needs to be developed, tested, and verified. For that purpose, it is essential to have a local setup.
The following are some common reasons that will tell you why it is necessary to have a local environment setup.
- You need to experiment and learn the platform
- It is creating new sites offline that are either not complete or in the testing phase.
- Redesigning old websites or making large-scale changes to the existing ones.
- Troubleshooting and fixing reported errors
What features will you get with the local environment setup?
Most of the time, a local setup is one of the best solutions for numerous problems. Flywheel recognizes this and offers its customers some of the most exciting features for the local environment setup. Here is a list of these features.
- WordPress installation with one click
- SSL support to ensure the safety of your websites
- SSH access to allow you access to local site files.
- Sharable URLs for a demo
- Flexible environment for developers
- It provides website cloning, pushing from local to live environment, and vice versa.
- Add-ons library to allow you to customize development with desired features.
- No platform bounding, which means it is free for Mac OS, Windows, and Linux.
Steps to follow for installing Flywheel on the local system
- Step 1: Install Local
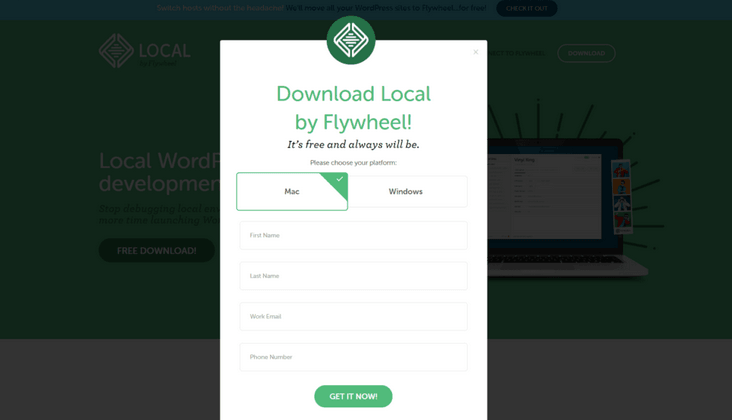
For setting up on the local system you, need to download Local. Go to the Flywheel website and click free download. In the next step, choose the platform you will use and proceed by adding additional information.
Once you complete these steps, an installer file will download. You need to run that installer file and wait until the setup screen appears. The following screenshots show you the first setup screen.
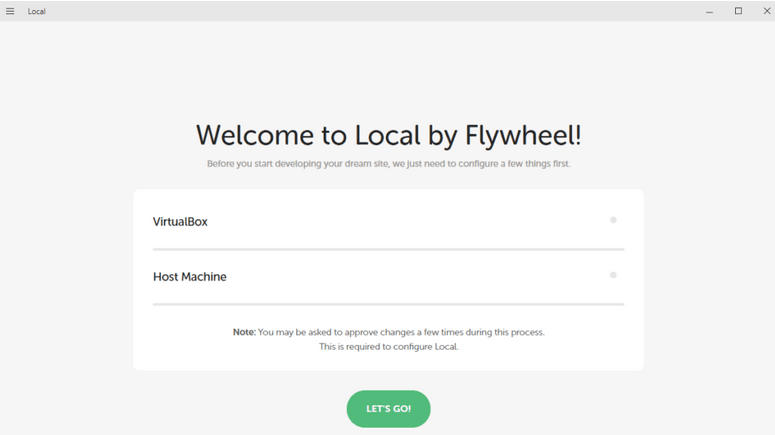
Just hit the LET’SLET’S GO button, sit back tight, and wait for the installation to finish. It will install a few programs that are necessary for the local environment to work. You might see a few prompts; make sure you click yes to allow the installer to do its job. Once it is complete, it will redirect you to the new local dashboard.
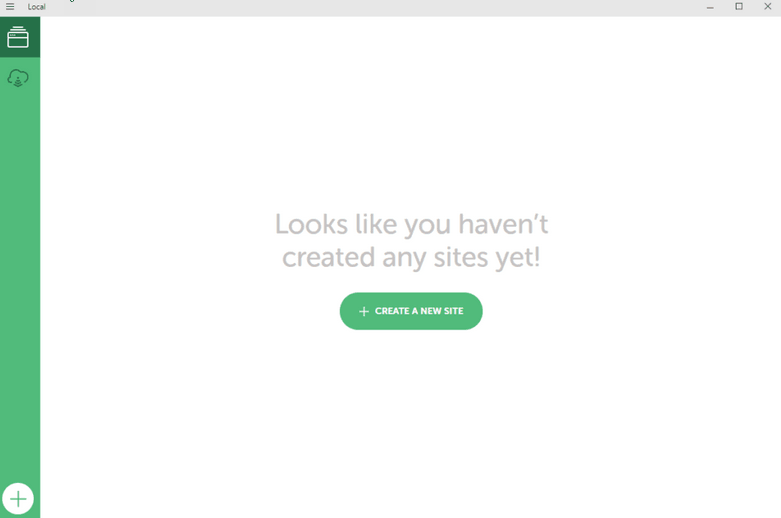
You can choose from numerous options available such as create a new website, go to Flywheel’ Flywheel’s managed WordPress hosting services by clicking the cloud icon, which allows you to push the local version to live and vice versa.
While on the top left, there is an Options menu that allows you to configure numerous settings and preferences. So now, let’s get started with our first website.
- Step 2: Create your local WordPress site
Hit the “CREATE NEW SITE” button and move on to a simple wizard. You will see a wizard, simply go through the steps, and you will get a new WordPress website for yourself.
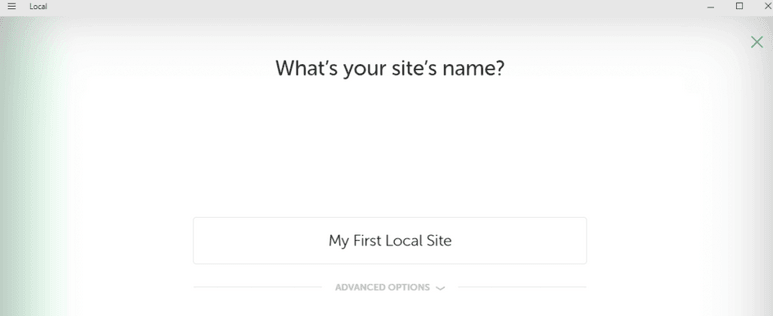
Usually, numerous sites are available; thus, experts recommend having a descriptive name for the website. Here is a sample name that we will be using for this example. There is always a choice for you to change the name of the site. You can also look at the advance options if you would like to change them according to your requirements.
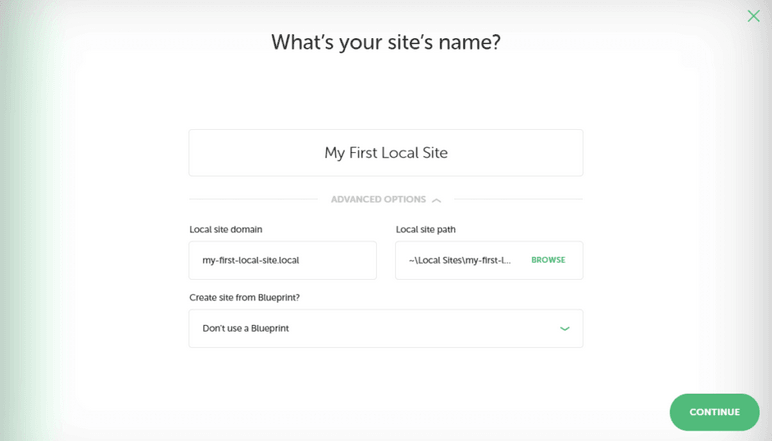
In the advance options, you have the opportunity to set a domain and path of the site that you will be creating. There is no specific requirement for the domain name and suffix; you can choose whatever you like. Local will automatically host files to make it work for you.
Moreover, Local will also create a directory that will store the site files; however, it will allow you to set up that directory path anywhere you want. Now, if the step is complete, then let’s move on to the next one.
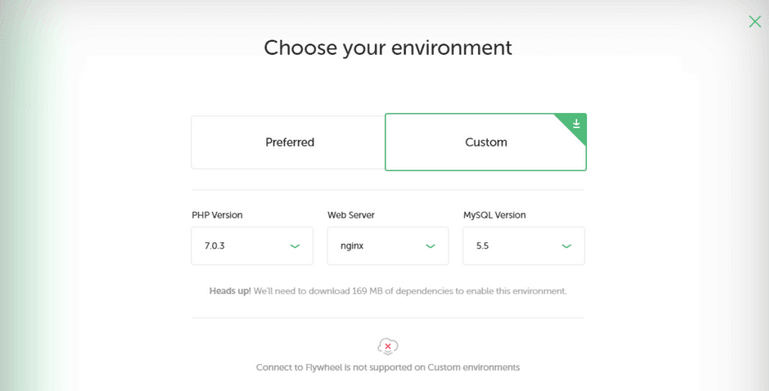
It ‘sIt’s time to choose your environment. Flywheel provides you with two options Preferred and Custom. If you decide Preferred, it will set up your local site using a recommended set of tools while Custom you need to configure your environment yourself.
If you are a beginner, then the preferred option will work best for you. Simultaneously, the Custom option is best for developers as they mostly come up with specific requirements. It is important to note that that Flywheel does not allow users to push the changes to live with the custom option. It will ask you to download some extra files. When you have decided on your choices, you can continue to the last step.
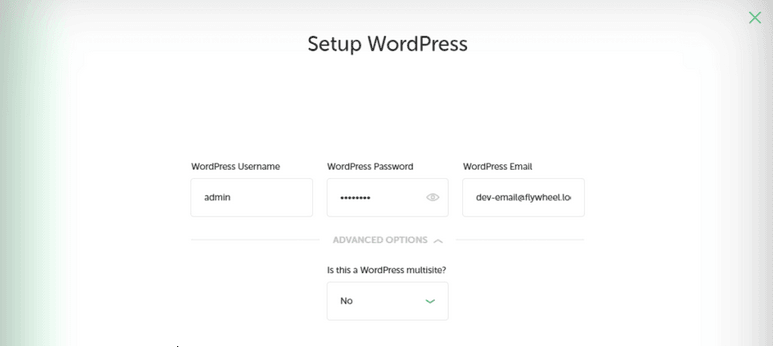
In this last step, you need to create a username, password, and admin email address. You can also convert this installation into a multisite installation. Once done, deciding your choices, hit the Add site button below. Wait for a few minutes, and then you will see a new site listed on the dashboard along with the details. The screenshot below shows the details.
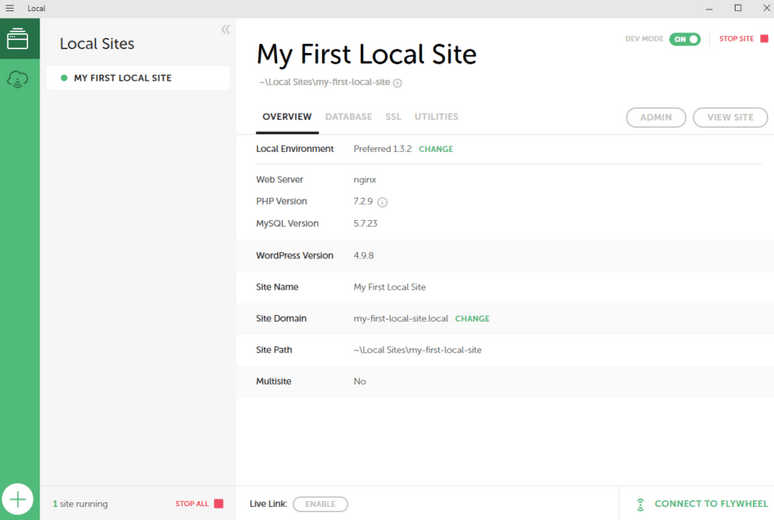
Yay! You are now a developer of a WordPress website. Hit the Admin button to log in to the site and start working. Moreover, this dashboard will always be available if you wish to make any changes to the local site setup or domain.
With this installation, you are working with a fully-featured WordPress site, which means you can install plugins, add custom themes, and even code.
- Step 3: Export your site & make it live
Once done developing your first site, it is time to go live. The above two steps are were to let you know about the local environment setup for WordPress while here; you will learn how to go live with your local website. As stated above, you can always push your changes to live and vice versa.
To make this process simple and easy, we recommend our users to use Local Connect. With the help of Local connect, you will be able to quickly move your local changes to the live environment. This feature is not only easy to use but also free for our clients. Follow the steps below and get started with one click publish for your websites.
At first, you need to signup with Flywheel via your local dashboard. The following screenshot shows you how to do it.
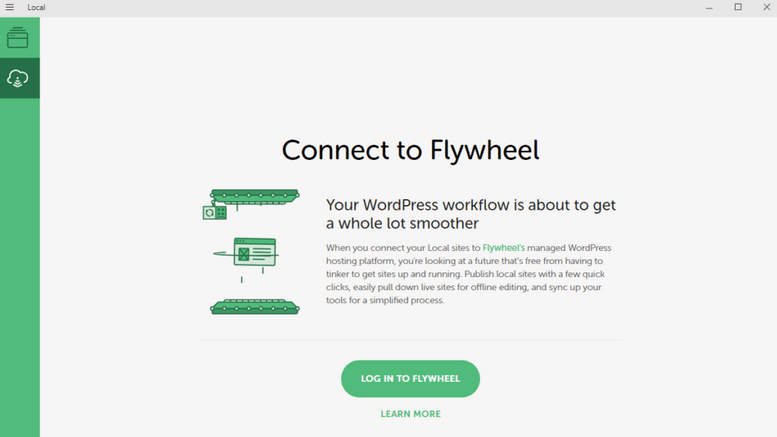
If you have not signed up, you can quickly sign up through our sign up process; otherwise, just add your username and password to make the connection. After this step, it will be a matter of a few clicks to push your local version to live.
After logging in, you have options available, according to which you can copy the live site to the local and vice versa. Once done making the changes, you can copy them back to the live environment.
Conclusion
As a beginner, you will be feeling proud of yourself if you have been able to publish your first website. The Flywheel is currently dominating the hosting arena because of its unique features. With the ease of testing and troubleshooting without affecting your live system, it is undoubtedly one of the best options available to developers of the modern world.