Are you looking to set up your online selling store and trying to find out the easiest way of creating an online eCommerce store? Then, you have landed on the right page.
Now, you can conveniently create your own online WooCommerce website by yourself for free of cost with this guide.
Creating an online e-commerce store with the help of online information can be an overwhelming task. But if you follow our step-by-step procedure, you will end up with a great-looking eCommerce store in no time.
You’ll need only three tools in creating your own store.
1. Elementor: this is a free page builder plugin for WordPress that will help you in creating your store’s pages like homepage, about us, product catalogue, checkout and many other pages.
2. WooCommerce: this is the CMS which will run your store
3. Cerato theme: Cerato is a highly functional WordPress theme that comes with deeply customizable options and built-in WooCommerce integration and demo sites to create online shop instantly.
First of all, install WooCommerce from WordPress directory and then follow this step by step tutorial to get your online e-commerce store with an impressive look.
- How to Build an Elementor WooCommerce website using Cerato theme
- Step1: Download Cerato theme from ThemeForest Downloads page
- Step 2: Cerato theme installation
- How to use Header Builder
- How to use Footer Builder
- How to use different theme options
- Customize the WooCommerce theme style
- Customize Homepage settings
- What is Elementor and how does it work With Cerato Theme
- Elementor settings
- Create a WooCommerce store with Cerato theme
- Step 1: create a shop Homepage
- Store Notice page
- Customize Product Catalogue to display on the shop page
- Checkout page settings
- Customize shop page
- Customize product page settings
- How to add and manage new products
- Create multiple categories
- Create order Tracking page
- Create a wishlist and compare page
- Wrapping up
How to Build an Elementor WooCommerce website using Cerato theme
Cerato is the premium Elementor WordPress theme that comes with perfect functionalities for building an online store. Cerato theme is compatible with WooCommerce plugin and includes powerful and advanced features that are essential in creating an online e-commerce store.
Cerato offers unlimited possibilities to utilise your creativity by using stunning theme options. Its highly mobile-optimized layouts quickly adjust with every screen sizes.
With Cerato theme and Elementor page builder, you can customize anything with multiple customizable option panels.
Quickly set up your online store with the one-click demo importer and save lots of time. The one-click demo importer option will quickly recreate your own shop in a minute without any coding.
Cerato has unlimited header and footer options as well, and you can create powerful and amazing footer and header styles with visual Drag’n Drop option. Same way, you can enlist your products by using unlimited category layouts.
Step1: Download Cerato theme from ThemeForest Downloads page
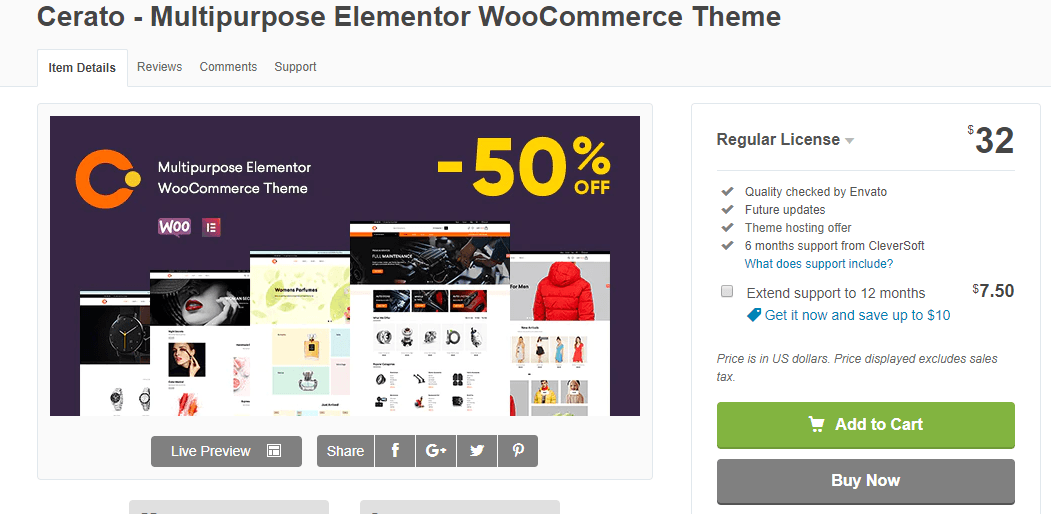
Start the installation procedure by purchasing the Cerato theme from ThemeForest Downloads.
Once you click on Download. Three options will popup
1. All files and Documentation
2. Installable WordPress file only
3. License Certificate & Purchase Code (PDF)
4. License Certificate & Purchase Code (text)
You can use the 1st option to download complete package including documentation while the second option “installable WordPress file only” is to install the WordPress theme directly.
Unzip the folder, and it will contain three folders inside.
- Readme.txt
- Documentation
- Cerato.zip
Step 2: Cerato theme installation
To install the Cerato theme, you should have a current WordPress version. Once you activated WordPress, then follow these steps of theme installation.
- First of all, upload the theme files and then activate the theme.
- The theme files can be uploaded in two ways;
FTP upload: if you are using FTP program then go to your server folder “/wp-content/themes/”. And upload the non-zipped theme folder.
WordPress upload: Go to> Appearance> Add new themes> upload.
Go to> browse> select the zipped theme folder> click “Install Now”.
You can view this video tutorial to install the theme quickly.
Once you are done with the installation process, then feel free to create your website and play with amazing theme options to create a stunning site.
Now, we’ll discuss how we can use header and footer builders with unlimited options to perk up the header and footer section.
How to use Header Builder
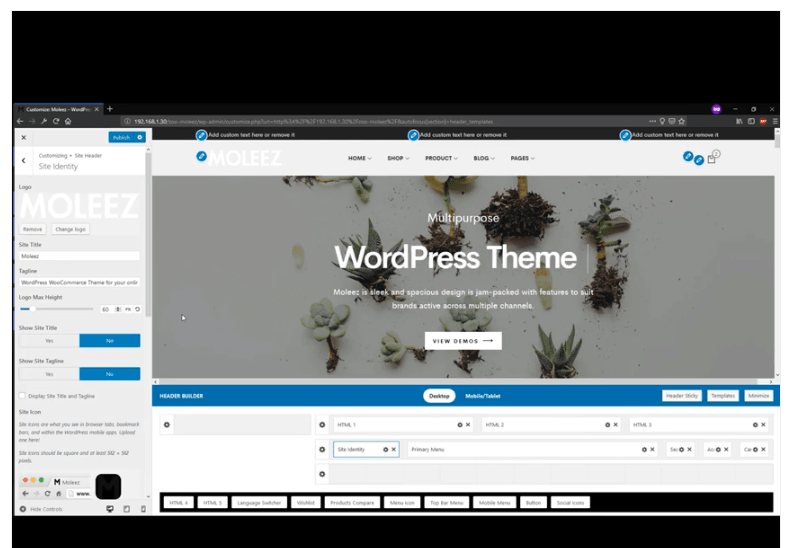
Cerato theme allows customization of all design’s related settings by using WordPress Live customizer where you can change anything and view the live results.
Go to> WordPress Admin > Appearance > customizer> how to use header Builder.
With header builder, you can change font style, colours, and height and also add or remove elements like language, social media icons or any other element as per your choice.
Watch the video tutorial here “ how to use Header Builder”.
How to use Footer Builder
Footer builder includes different styles of footer widgets which you can use on multiple pages or select and customize on a single page. Moreover, add multiple widgets, replace them or rearrange widgets in a blink of an eye with powerful footer builder.
Have a look at video tutorial on “how to use Footer builder”.
How to use different theme options
Cerato theme also allows different theme styles configurations and if you like to change the default settings of the theme then
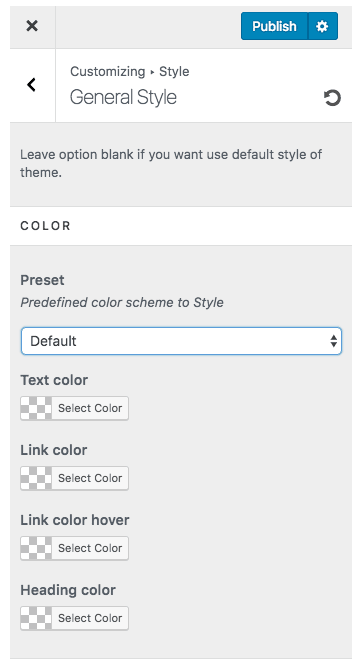
Go to > WordPress Admin > Appearance > customize > Style.
The customization section allows changing the font color, size and background color.
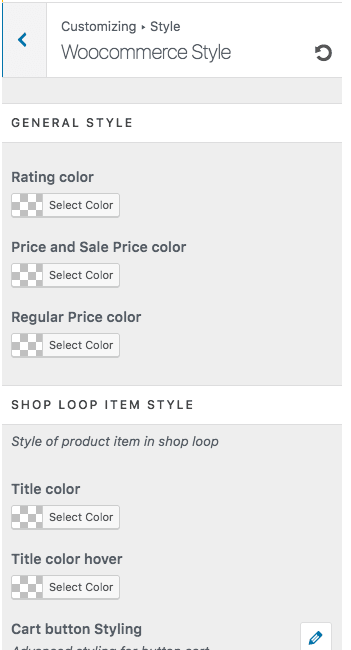
Customize the WooCommerce theme style
This section controls color options for WooCommerce elements like title, price, sale price, cart button, out of stock, quick view button and many other elements.
Customize Homepage settings
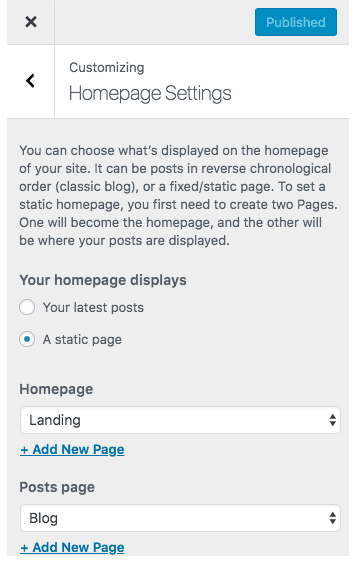
You can also customize Homepage settings. You can choose in which order you want to show your posts whether you like the traditional chronological order of post display or a fixed or static page. If you wish to display a static Page as your homepage then you have to select two pages; one will become your static homepage and the other page will display your posts.
You have gone through how to install the Cerato theme and how you can customize different theme options.
Now, let’s discuss how Elementor visual page builder will help you in creating your online store and how can you create stunning page layouts by simple drag’n drop option.
What is Elementor and how does it work With Cerato Theme
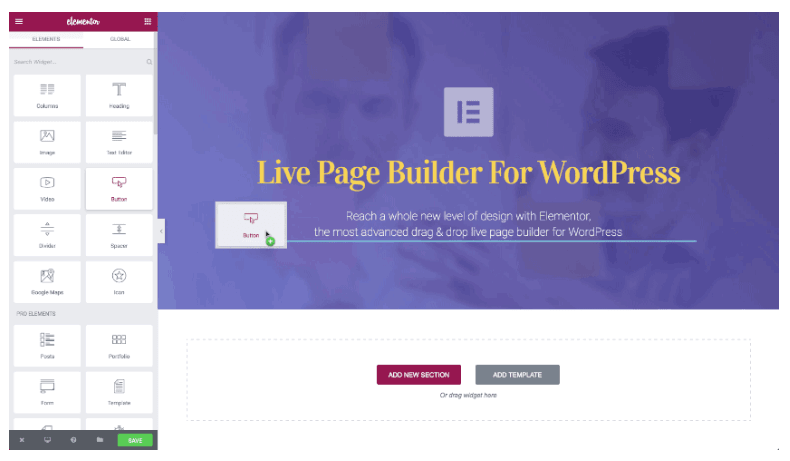
Elementor is a visual page builder for WordPress sites that allows users to create web pages in live mode, where they could visualize all changes livelily.
Elementor is a live frontend editor that replaces the basic WordPress editor, so the users could easily visualize changes in layouts without swinging back and forth between editor and preview mode. This compelling page builder enables the users to create intricate design visually without using any coding or CSS. Check out this tutorial for further information.
Elementor settings
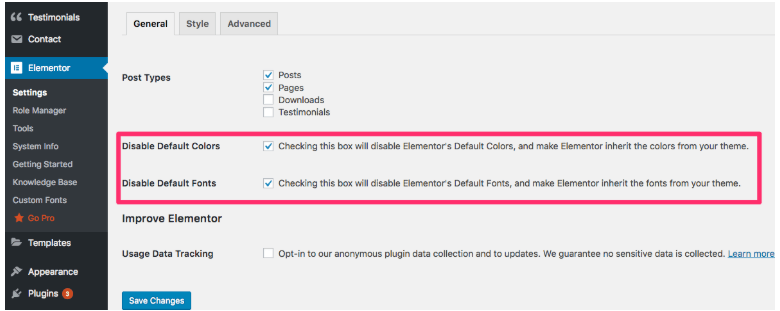
Move to Elementor > Settings in the WordPress and checked two boxes Disable Default Colors and Disable Default Fonts.
Create a WooCommerce store with Cerato theme
Step 1: create a shop Homepage
If you want to set up your homepage as your shop front page, then do some basic changes, and change the default WooCommerce base page to your WordPress shop homepage.
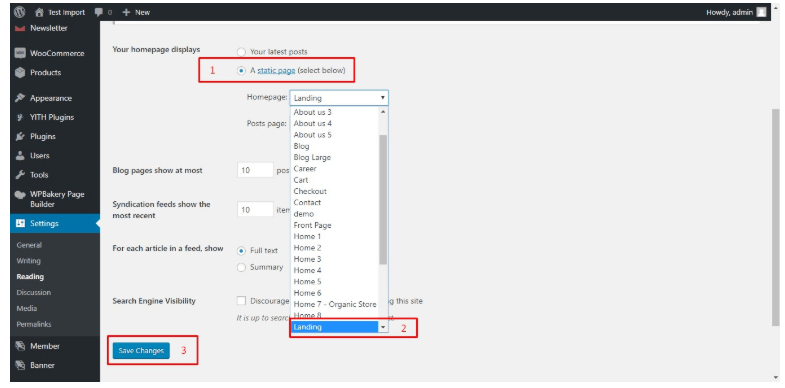
In the homepage settings area: Go to > front page display > click on Static page > select your desired page from the dropdown menu > save changes.
To show your shop on the front page follows these steps too;
Go to> WooCommerce >settings > products > Display > change current WordPress homepage settings to Shop > save changes.
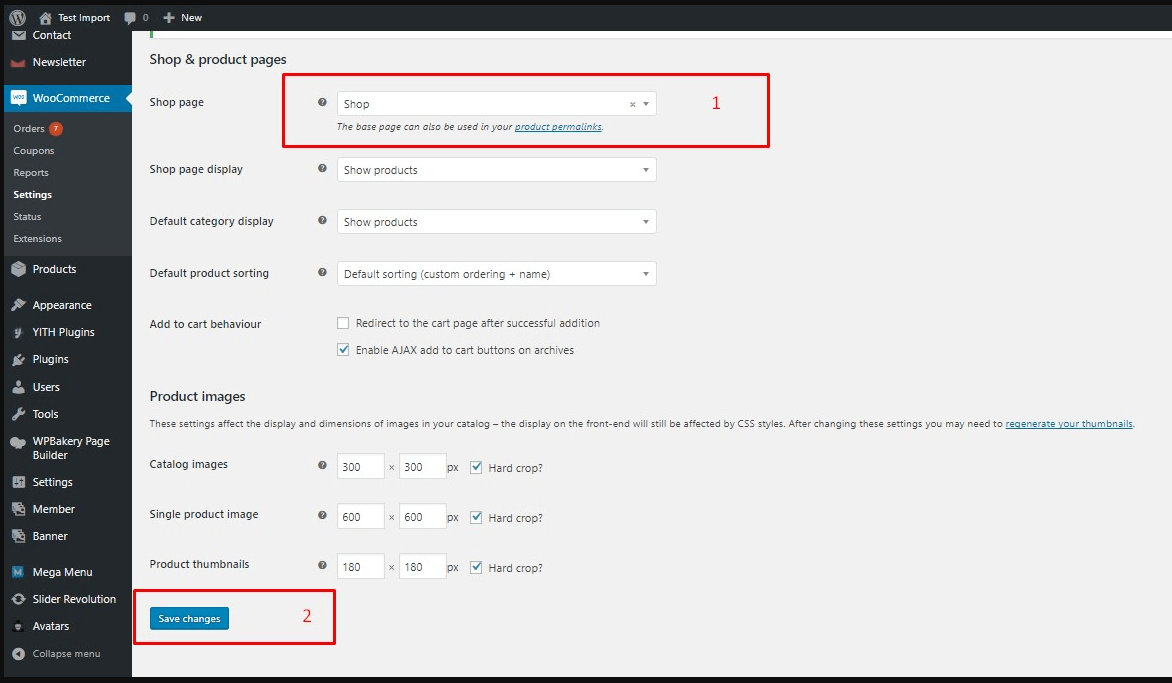
That’s it. Now you have your shop homepage on display.
Store Notice page
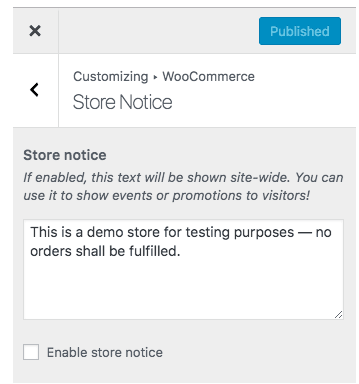
If you want to display any kind of notice on your site, then create a store notice page which will be displayed on all pages of your website. You can display free shipping notice or limited stock available notices.
Customize Product Catalogue to display on the shop page
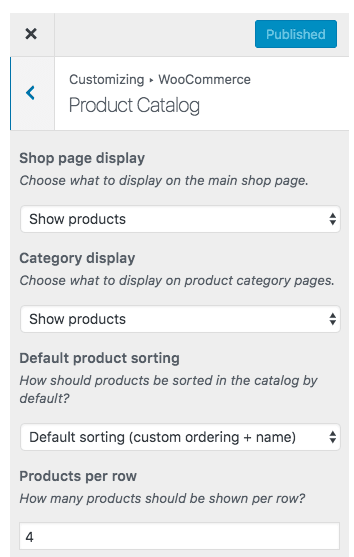
In this section, choose which products you want to show on the main shop page. Choose the category and how the products are going to be sorted out and how much products you want to display per row.
Checkout page settings
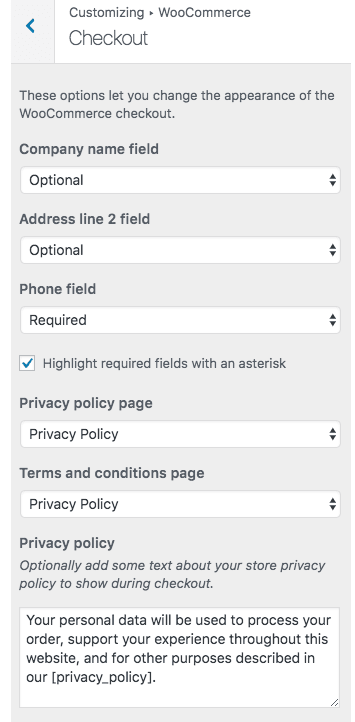
You can change the checkout page settings also and create terms and conditions as per your companies policies.
Customize shop page
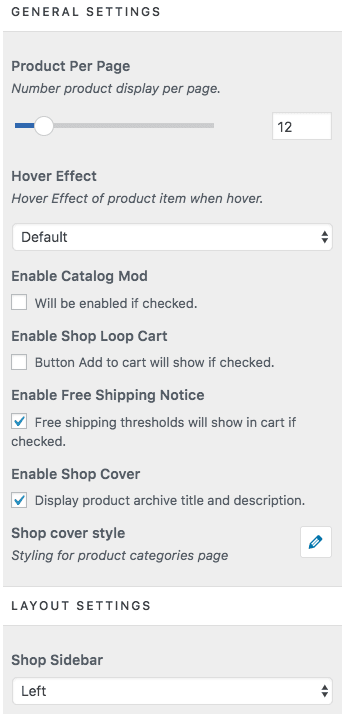
In this setting section, you can control multiple product display options;
- How many products to display on the homepage
- Enable or disable hover effect on products
- Enable/ Disable product Catalogue
- Enable free shipping notice on your site
- Enable product border
- Control white space between the product’s display
- Cart icons
- Enable Highlighted products on top with a slideshow
- Shop sidebar
Customize product page settings
In this section, you can set single product page settings and you’ll be able to control the following options
- Enable/ Disable product share option
- Enable Buy now a choice; this option allows the users to redirect to the cart page once they select any product to buy.
- Enable next or previous products navigation
- Enable product zoom option
- Enable recently viewed products by other viewers
- Enable related products available
How to add and manage new products
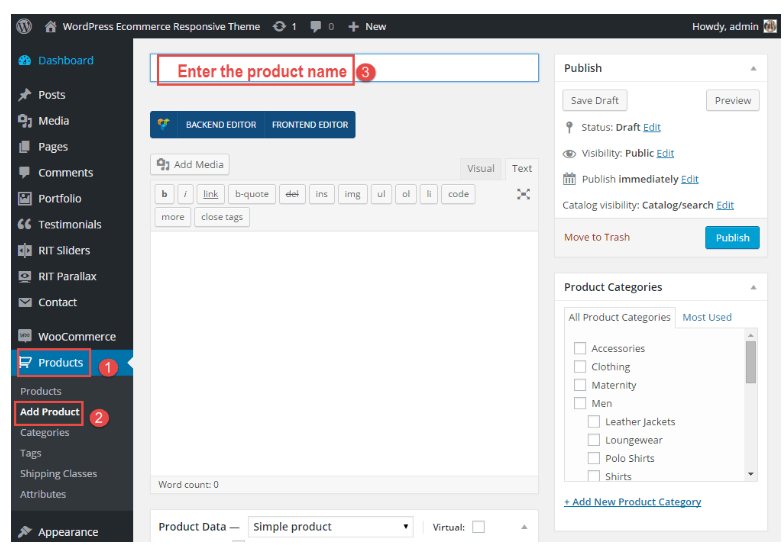
In the left bar, the product menu option is available and you can add new products. Once you click on the add product, a window will pop up where you can enter all of its attributes, title, price and stock details.
Create multiple categories
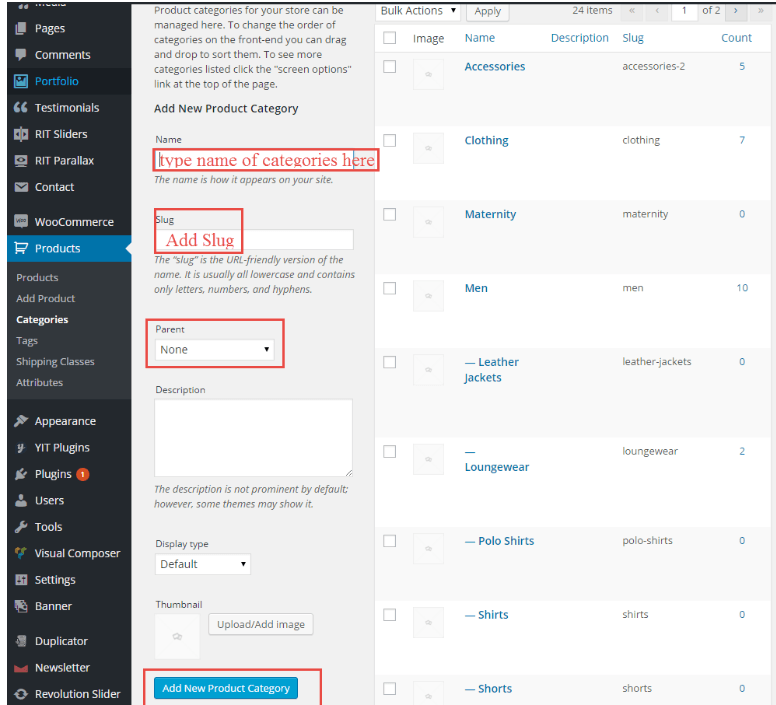
Create unlimited classes to organize your products. The customers will easily navigate between different categories, and sort out products they want without any hassle.
Create order Tracking page
Cerato theme allows its users to create a tracking page for the customers. Follow these steps
- Add new page from pages menu
- Create a page title
- Paste this shortcode in the text editor; [woocommerce_order_tracking]
- Click publish
Create a wishlist and compare page
Follow this procedure to create a wishlist and compare pages.
Step 1: create new pages for wishlist and compare pages.
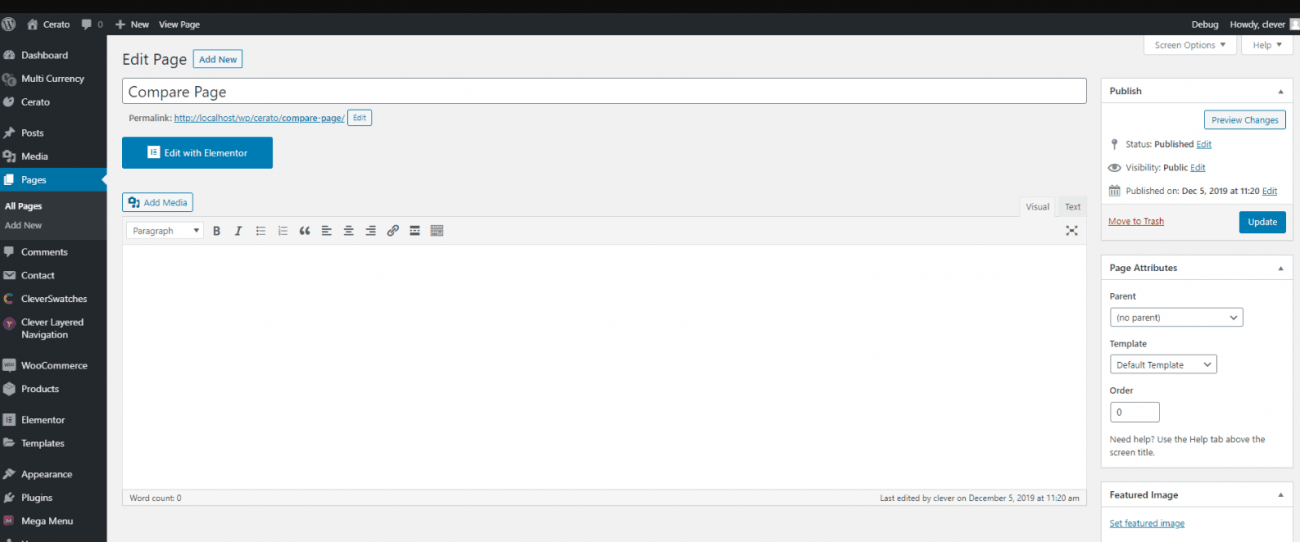
Step2: Go to> customize> wishlist/ compare
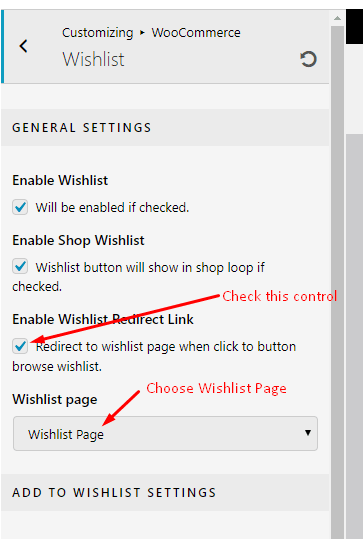
After setting these two areas the final display of wishlist and compare pages will look like this;
Wrapping up
Cerato is no doubt one of the perfect WordPress themes that come with the Elementor page builder. Cerato theme’s rich features give a perfect choice to create a stunning online eCommerce store with tons of customizable options. You can create amazing header and footer layouts, product and catalogue details and so many other options. So, try any homepage style that fits perfect for your online store creation.

