
Shopping trends are changing at a rapid pace and people tend to buy online more than ever.
That’s why they need for an eCommerce store is increasing to satisfy the online shopping habits because people find it more convenient to buy online rather than going out for shopping.
You can also start your ecommerce store right away, using the right tools and setup. And you’ll notice a drastic increase in your sales within a record period of time.
If you have planned to start an ecommerce store and looking for a WordPress expert to do the job for you, let me tell you, you don’t need any.
Yes! You can do it yourself because you don’t need to be a WordPress developer or coding expert and you can do it without having any knowledge of coding with the right tools and setup.
Just follow the step by step tutorial of creating a WooCommerce shop page using Elementor page builder.
Let’s dig out deeper to get to the point!
- What you’ll need in creating a product page using Elementor?
- How to install the Elementor page builder?
- Create an Elementor WooCommerce product page step by step
- Mobile optimize your WooCommerce product page
- Elementor Pro Pricing
- Wrapping up
What you’ll need in creating a product page using Elementor?
Install the WooCommerce plugin on your WordPress site from the WordPress.org repository and on top of that you’ll need to install the Elementor page builder. The Free version can be downloaded from the WordPress.org however the free version comes with a limited customization options. Therefore, if you like to get limitless customizaiation options than go for the pro Elementor and download it from the official Elementor.org.
How to install the Elementor page builder?
- For Elementor free version:
Go to Plugins > Add new > enter Elementor page builder > click install and activate.
- For Elementor Pro:
Purchase the Pro version from the Elementor.com and then upload the zip file and then click on install and activate.
Create an Elementor WooCommerce product page step by step

The standard WooCommerce product page looks like any basic WooCommerce product page without any crisp.
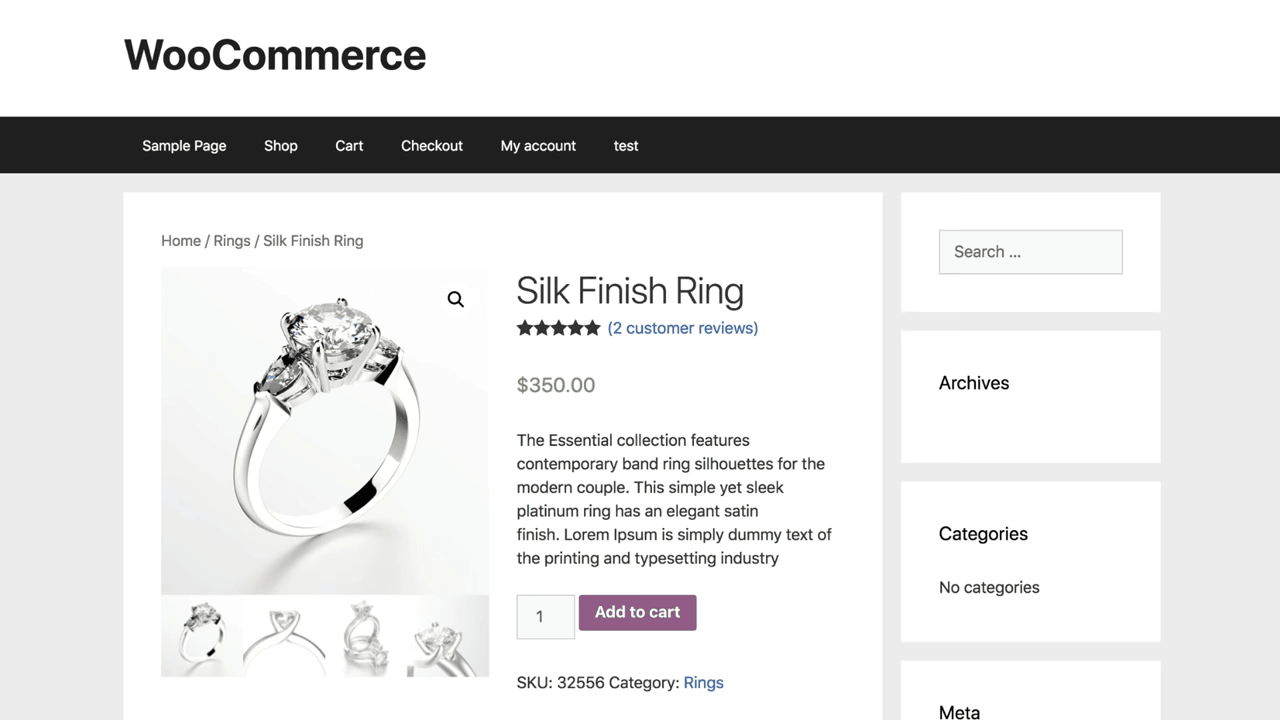
However, if you like to add your brand’s voice than you have to customize it uniquely.
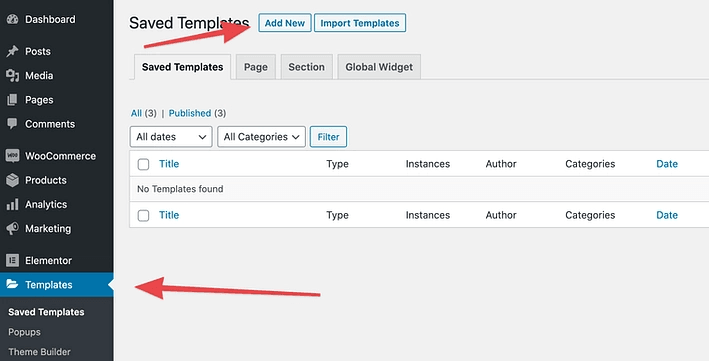
Step1: Go to the Template section from your Dashboard menu and click on “Add new”.
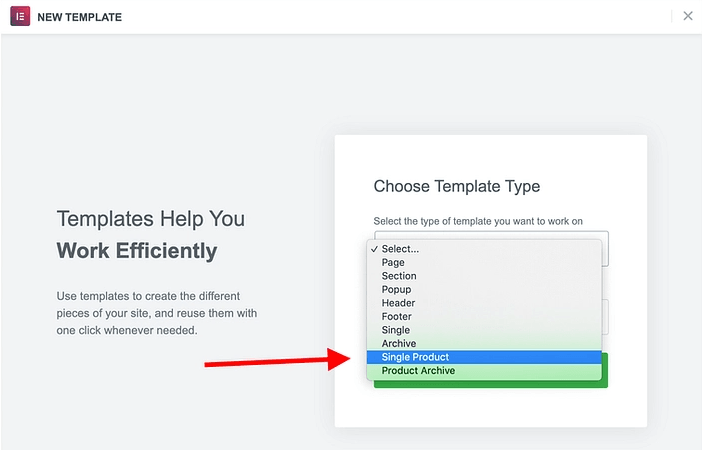
Now from the dropdown menu select the item “Single Product”
The best part is, the Elementor comes with some pre-made product page templates, so, if you like to quick start, select anyone from the options that looks closest to your desired one.
It’s lot more easier to create a product page from the pre-made template rather than creating from scratch. Therefore, modify any existing template and save your time and effort.
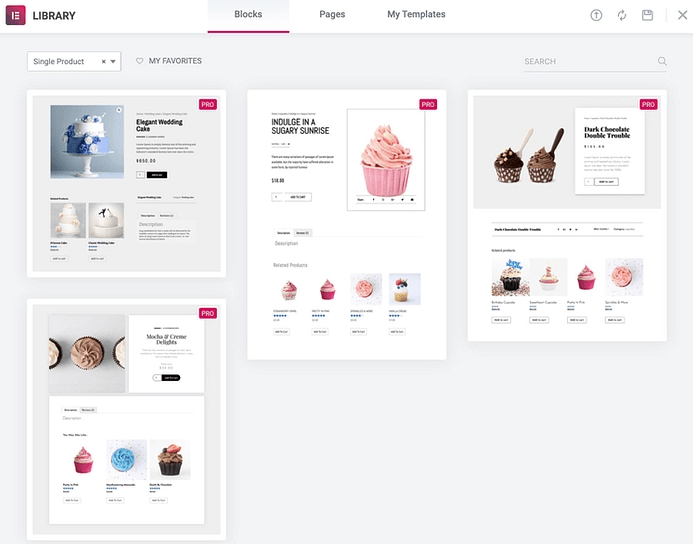
We have selected this template for our product page.
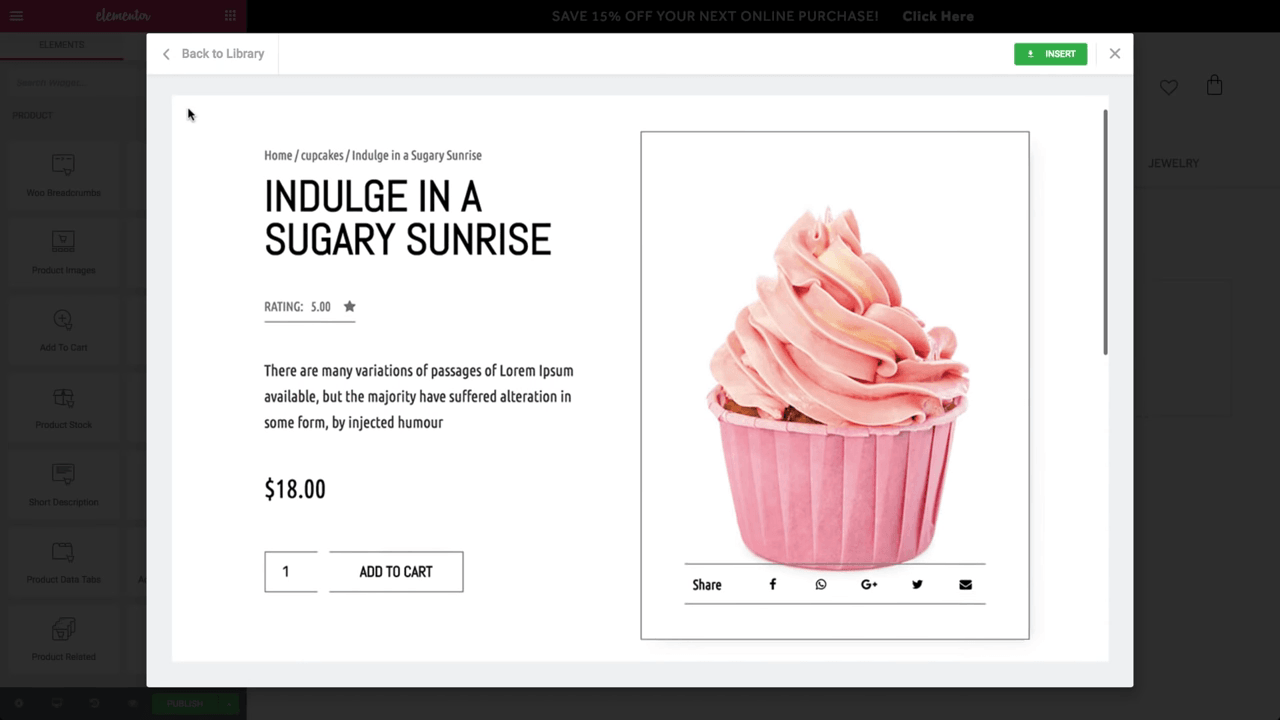
Once you have selected your favorite template, it’ll lead you to the Elementor editor where you can customize the template as per your taste.
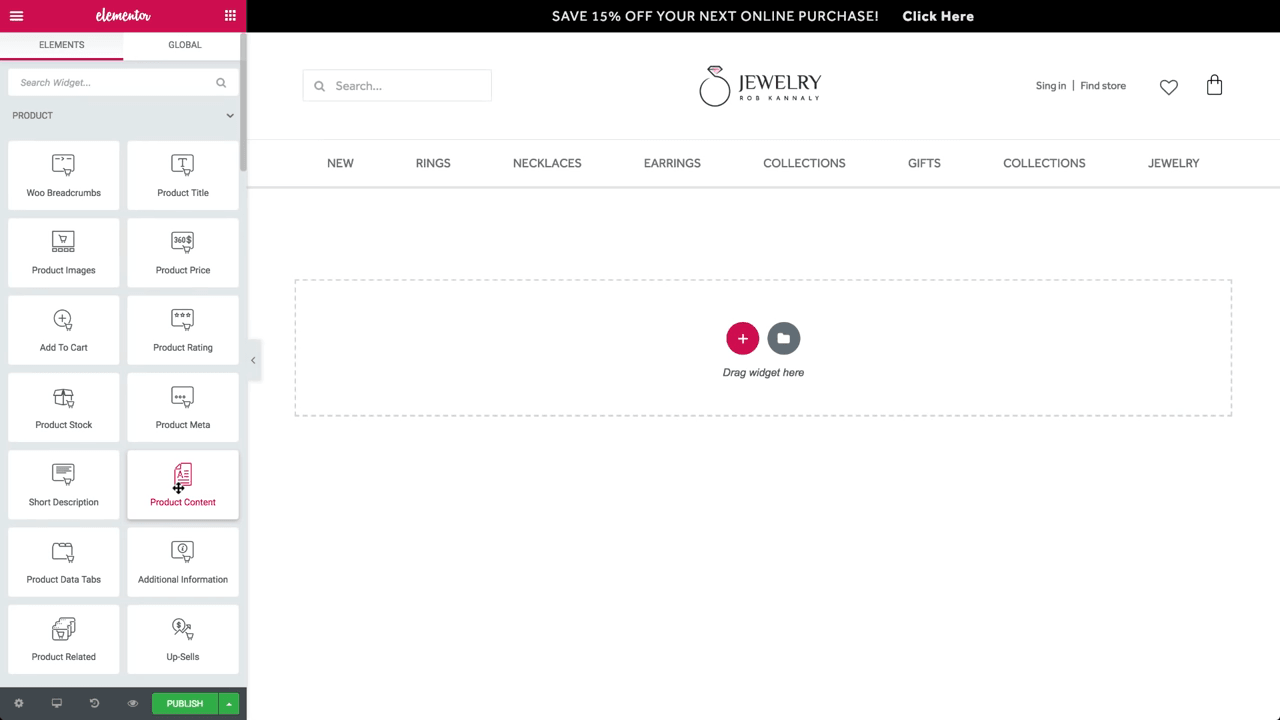
Here you can see different blocks on the leftside menu. Drag and drop the block you like to work with.
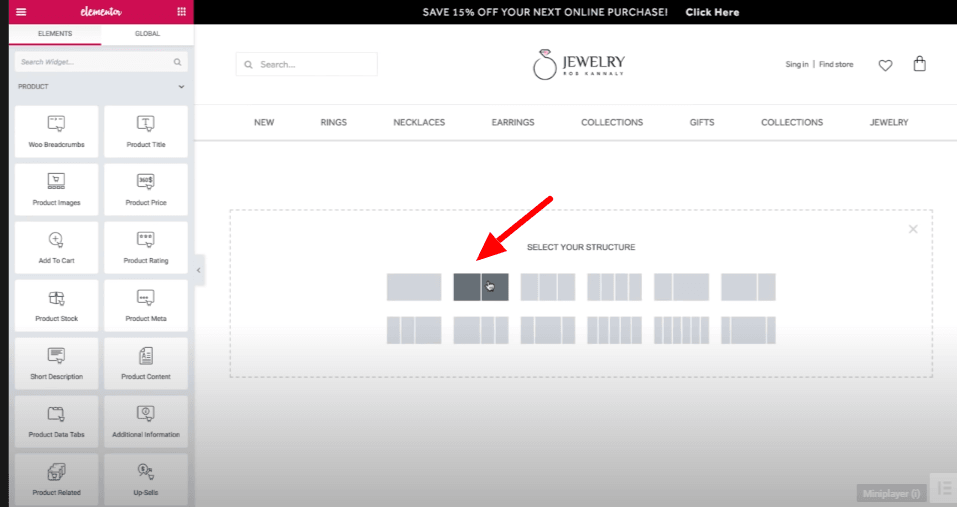
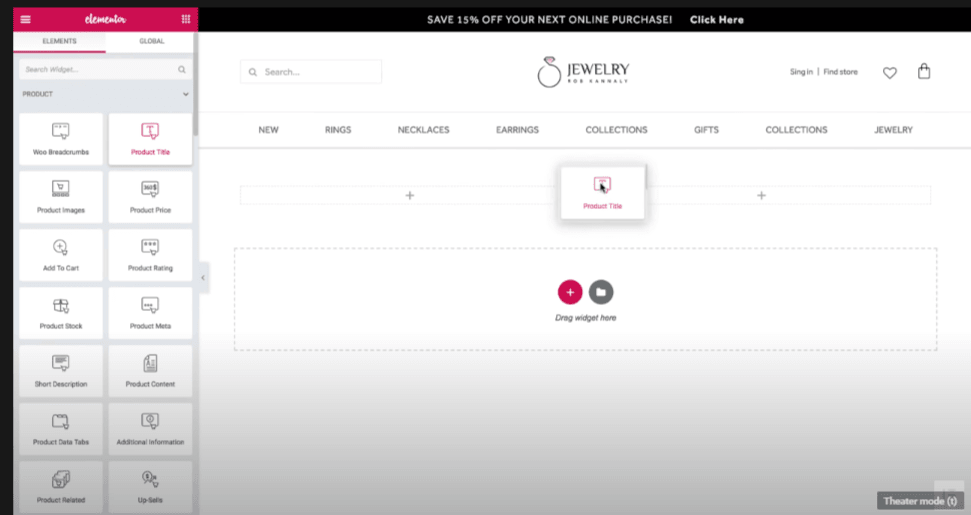
Click on the “+” Add button and select which column size you like to add.
We have selected two column size for our product template.
Now, add a product title widget on the right column and add the title of your product on it.
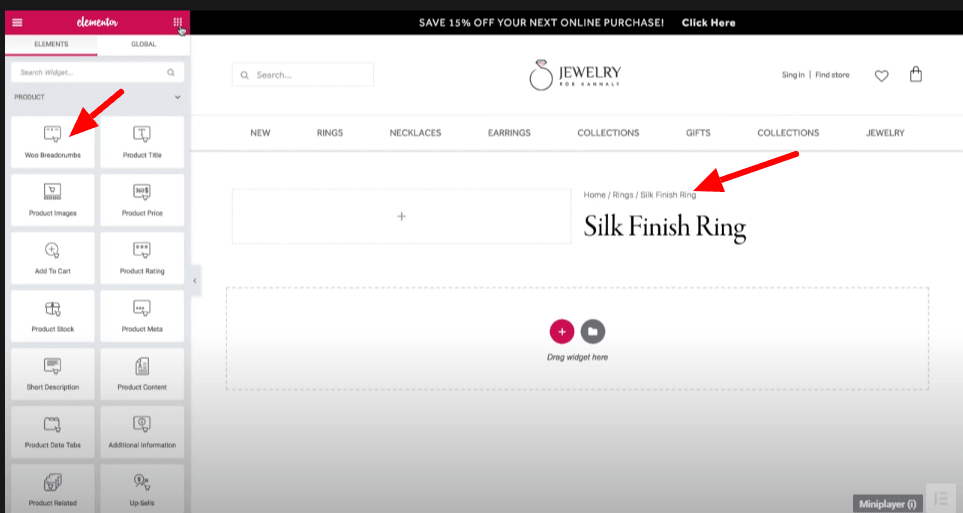
Once you have added the product title, next step is to add the “Woo breadcrumbs” above it.
Now, add the product image in the left column and drag’n drop the product image widget from the left column.
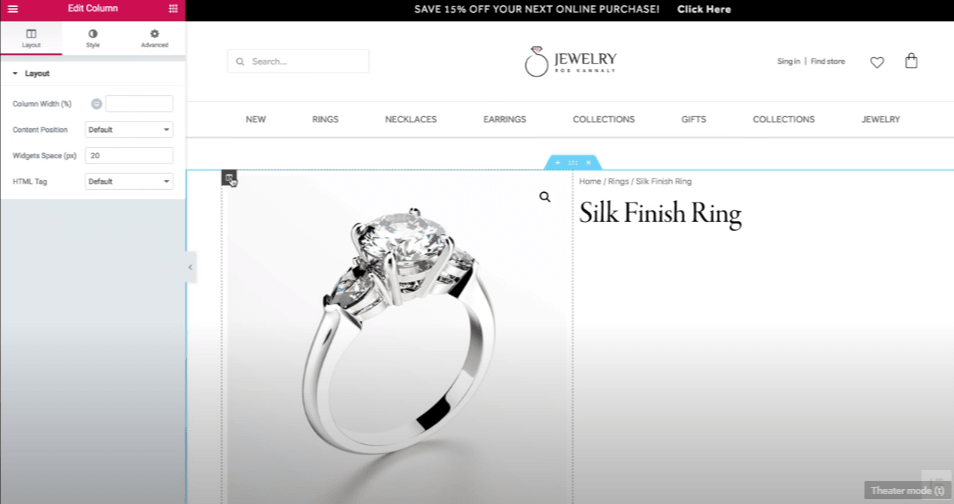
You can add the padding to both columns to keep them slightly apart from each other.
After adding the image and adjusting the padding according to the required dimensions add the product rating widget under the product title.
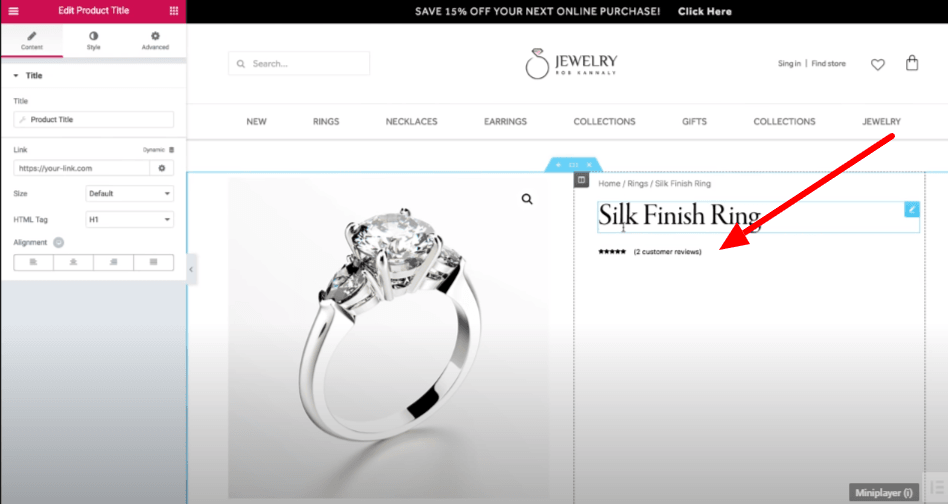
Add a brief description of product widget underneath the product review block. you can also adjust the space between the two blocks.

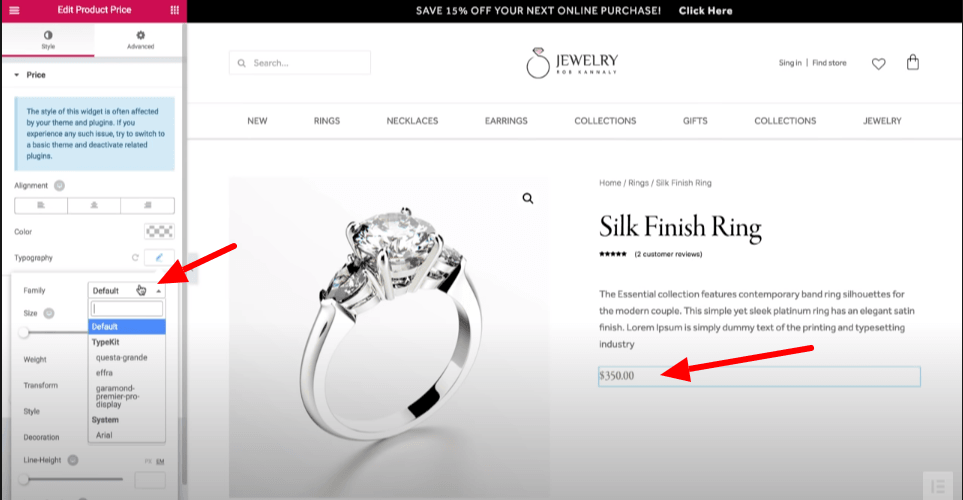
Once you are done with the product description and all details, our next step is to add the price of the product and for this you’ll have to drag’n drop the price widget under the description of the product.
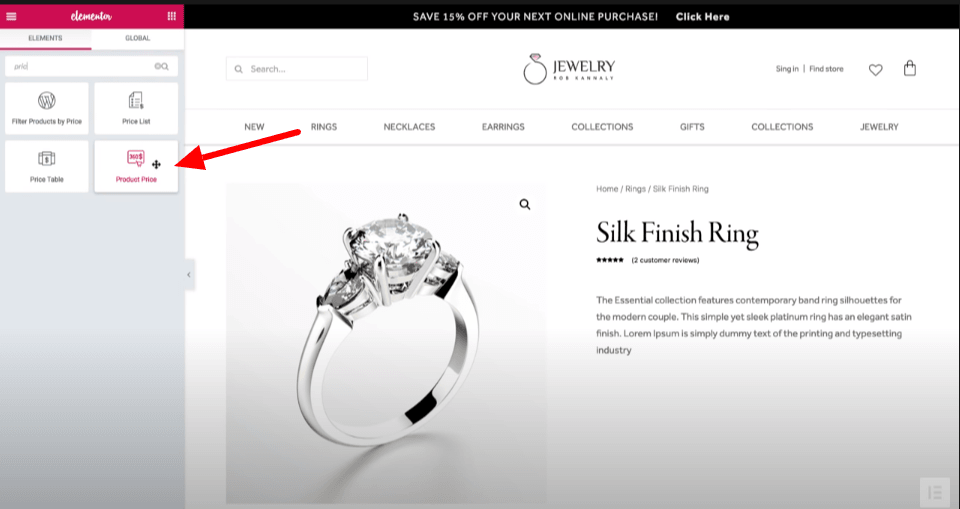
After adding the price tab below the product description you can customize the price widget by selecting the options from the left menu. You can enlarge the icon, change the font style and also the font color from black to any other color of your choice.
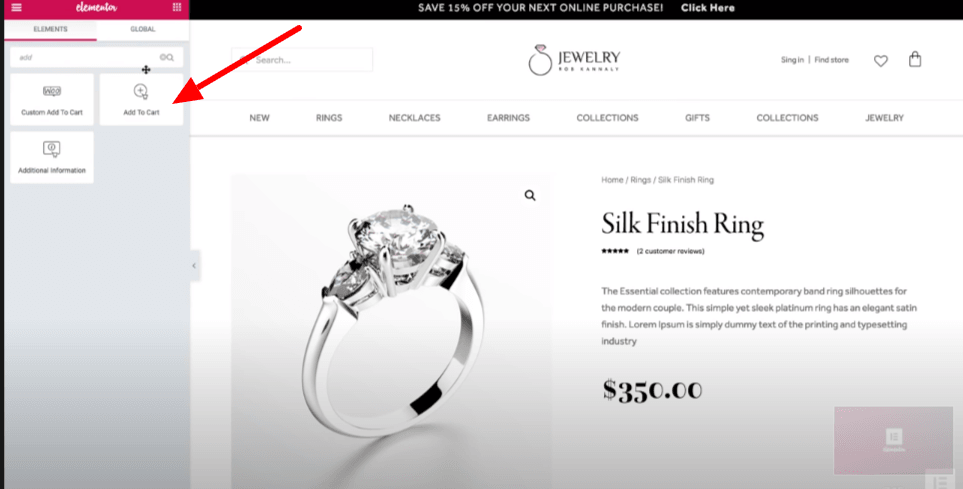
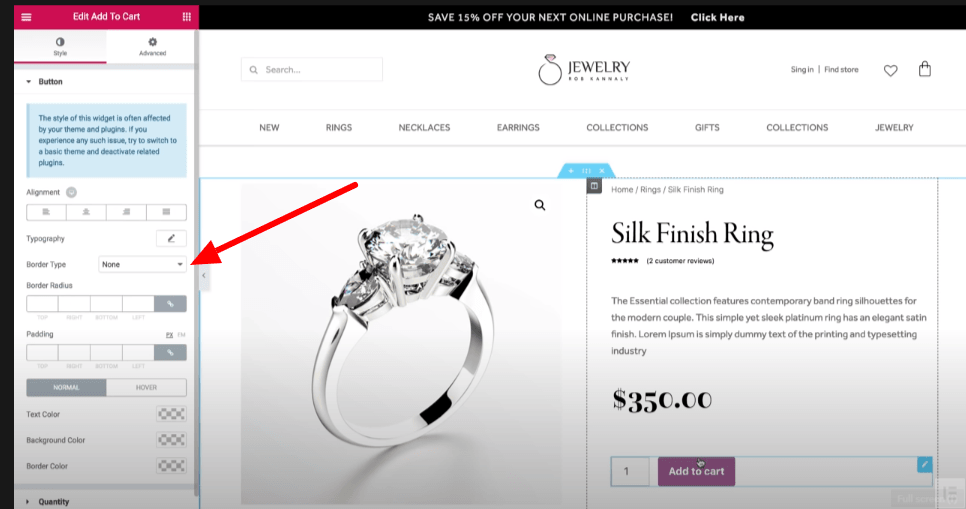
Now add the widget “add to the cart” and customize its color, font or style from the menu if you like to.
Now, add product meta under the price widget that’ll show the product category and product serial number.
Step 2: add additional information about the product in the next section.
Create a new two column section and then add Product data tabs including description, additional information and reviews. And on the right side of column add related product section.
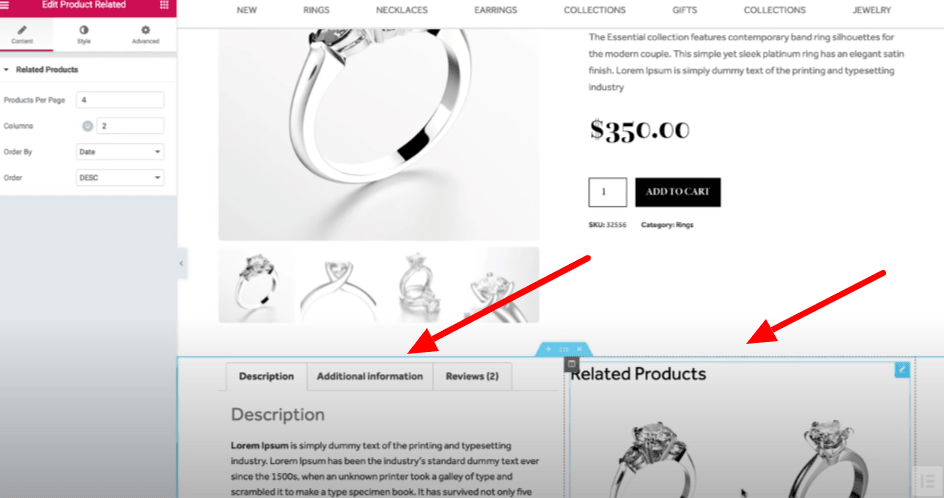
To keep the same format of each column you can click on the left corner of each column and copy and paste the column format for each column.
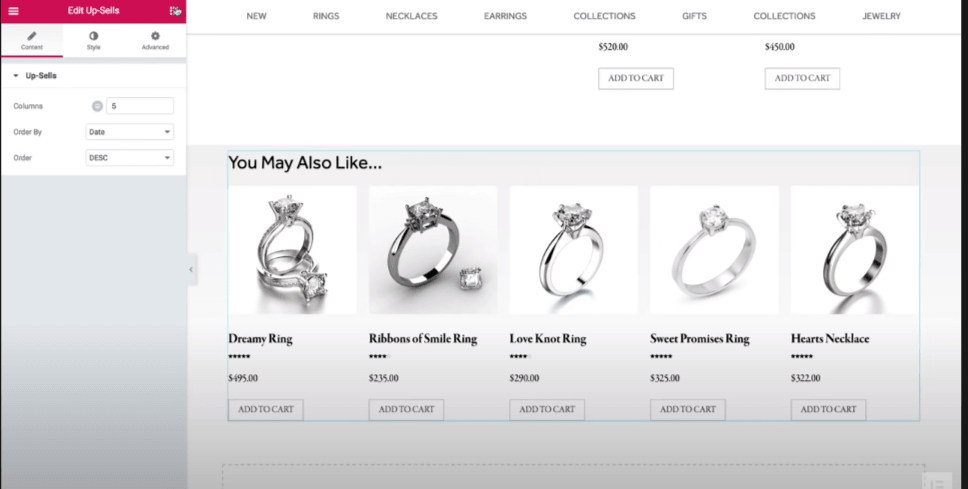
Step 3: add another section of add “up-sell section.”
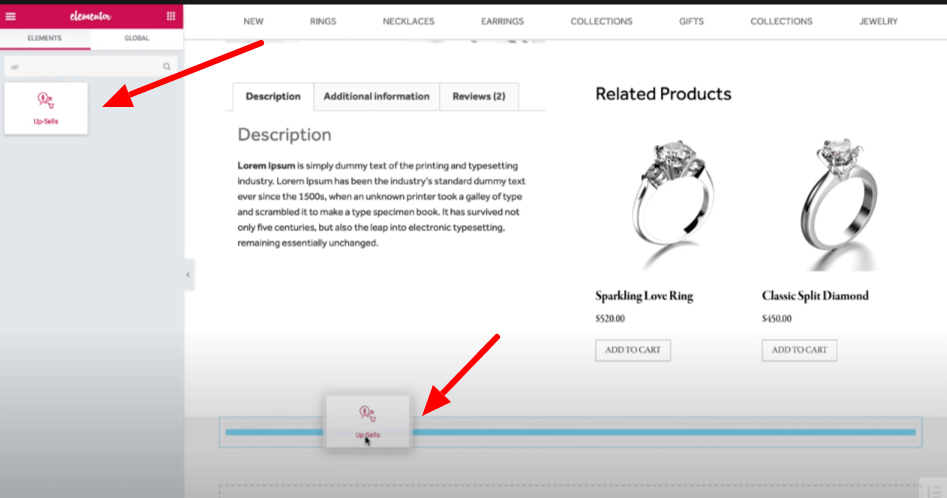
Here is how will you up-sell section look like after addition. Add some padding to align the section.
And finally, you are done with your product page designing. Now, the final step is where you want to publish your product? you can click on publish or go to the eye section in the lower most corner of the left menu and click on the settings to select the category of the product.
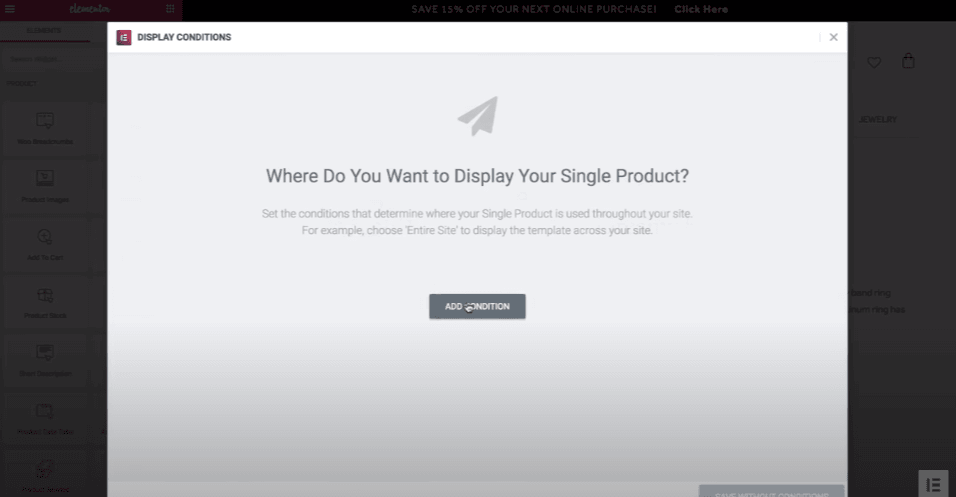
Click on the add condition menu and then select the category of your product and click publish.
Mobile optimize your WooCommerce product page
Since a lot of traffic is going to come through the Smartphone’s so you’ll have to optimize your store for the Smartphone viewing, otherwise you may lose your sales.
Although, the WooCommerce is already mobile optimized, yet to reassure if your product page templates looks absolutely good on mobile screen follow the procedure.
You’ll find an option Responsive Mode on the bottom left corner of Elementor interface.
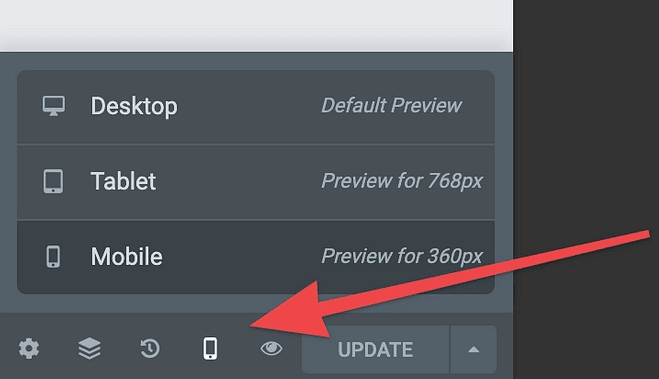
When you click on the Mobile responsive option you can switch between Mobile, Desktop and tab viewing options.
Click on any of the options you like to view and tweak the design if you find any complication.
Now, save and continue to publish your product page.
Elementor Pro Pricing
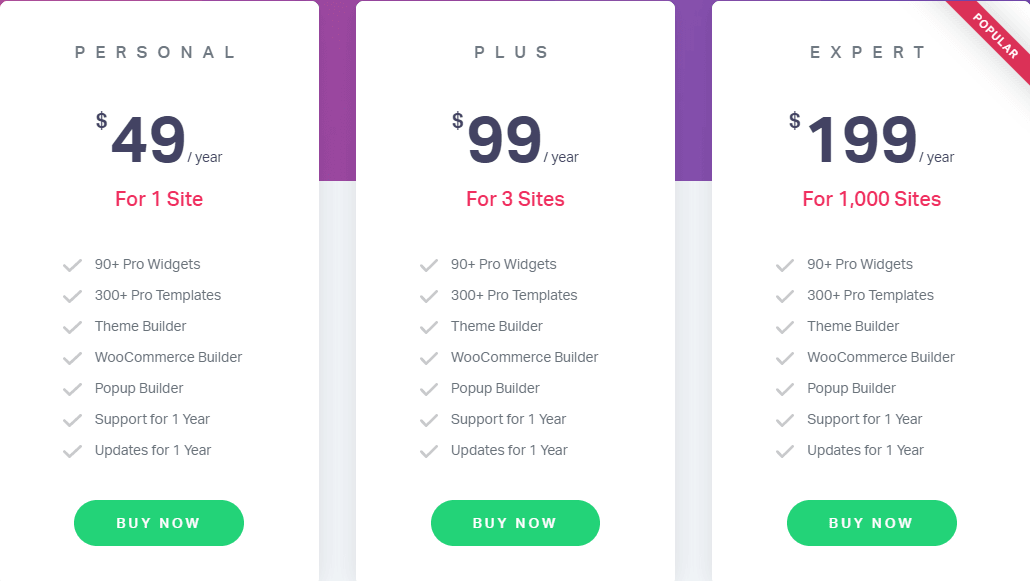
Elementor basic version is available for free while the pro version comes with three licenses. If you are looking for your personal blog or for single site then the personal license is most suitable for you where you can get a WooCommerce builder along with 90+ pro widgets.
While the plus and expert licenses are suitable for grown up business or agencies with a support of 3 sites and 1000 sites respectively.
Wrapping up
The sole purpose of Elementor page builder is to enable the users to unleash their creativity without relying on the coding. Elementor comes with a variety of widgets that lets you create any sort of product pages based on attractive layouts. The basic WooCommerce elements are more than 10 that enable the users to customize every kink and curve of the shop page. And if you don’t find your desired element in the Elementor menu, don’t worry! There are many other advanced settings that can upgrade your arsenal and add multiple elements to your library. One of them is Essential Add-ons that comes with dedicated elements for WooCommerce only.


