
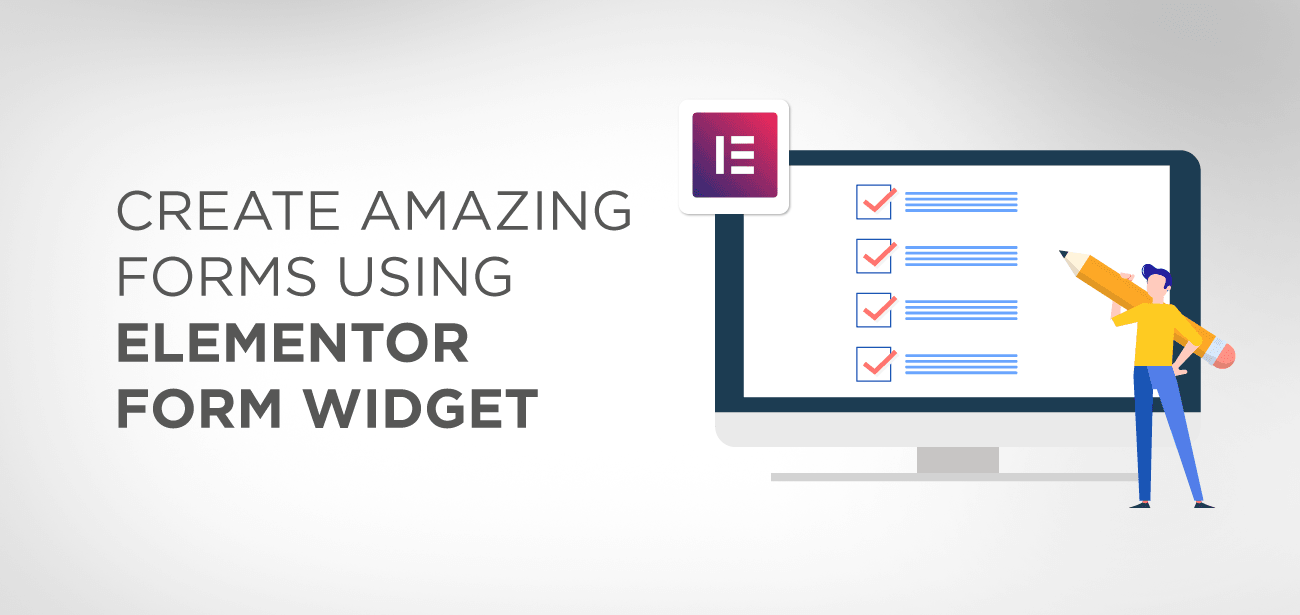
Contact forms are an essential part of online business. It works as a bridge to connect the buyer and the seller. Contact forms are equally beneficial for an online eCommerce store or even for your blog. What possible benefits can you get using contact forms? In this article, we are going to discuss those benefits.
- How to Boost Your Business/Website Using Contact Forms?
- 1. Improve Your Mistakes Using Readers’ Reviews
- 2. Secure Your Email by Filtering Spam
- 3.Multipurpose Contact Form
- 4.Improve Your Conversion Rate
- Why Use Elementor Forms Widget to Create Contact Forms?
- Pros: Main Features
- Cons
- Elementor Forms Widget Pricing
- How to Create a Contact Form Using Elementor
- Step 1: Add the Elementor Contact Widget to Your Page
- Step 2: How to Create the Form Fields
- Advanced Tab settings
- Step 3: Stylize your Contact Form as Per Your Brand’s Theme
- (Optional)Step 4: Set up the Form Submission Options
- (Optional)Step 5: Setting up Custom Messages Setting in Contact Form
- Final Step: Publish your Contact Form
- Bottom Line
How to Boost Your Business/Website Using Contact Forms?
1. Improve Your Mistakes Using Readers’ Reviews
Once you install the contact form on your website, visitors will start communicating with you using the contact form. They can point out your mistakes, give new ideas, or give their feedback about the features of your products. It’s an easy way to find out what specifically people are looking for in your product.
2. Secure Your Email by Filtering Spam
If you have installed contact form on your website, you need not put email id elsewhere. In this way, spammers cannot find your email address to attack.
3.Multipurpose Contact Form
Contact forms can be used in several ways; it can be used for feedback, business proposals support request, or sales requests.
4.Improve Your Conversion Rate
When the customer contacts you through contact forms, most likely will convert after effective communications. So, there are high chances to improve your conversion rates.
Why Use Elementor Forms Widget to Create Contact Forms?
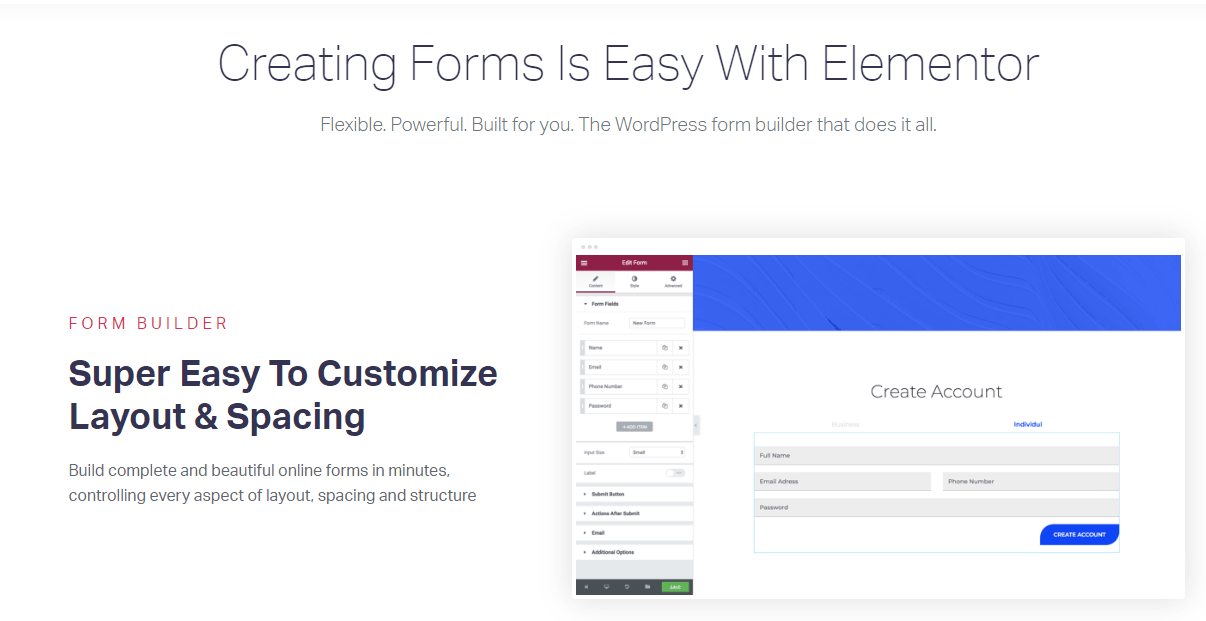
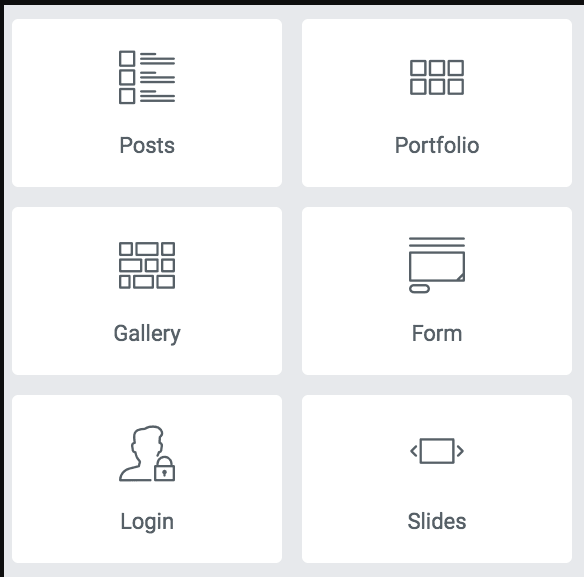
Elementor is by far one of the most popular page builder plugins available for WordPress. It comes with a Forms Widget element that allows you to easily create different types of forms for your blog or website.
Here’s a look at some of the pros and cons of using Elementor Forms Widget to give an idea of what it has to offer:
Pros: Main Features
- Tons of powerful options to help you customize the layout, spacing, and structure of your forms.
- Get full design control to stylize your form elements with different colors and typography to match your brand and overall site aesthetics.
- Over 10+ field including names, email, phone number, date, time, password field, and much more. This allows you to easily collect different type of data from your readers/visitors.
- Dedicated space to store and manage all form submission data. Option to edit, delete, and filter through the data and even export them.
- Support for multi-step forms. Divide a long form into multiple segments so the users doesn’t get overwhelmed.
- Integrate your contact form with more than 30+ powerful marketing automation services.

Cons
- Customer support is slow to respond.
- You may find difficulty after updating the latest version, so keep a backup of your site before updating the plugin each time.
- Not available with Elementor Free version. You need to get the Pro version to access the forms widgets.
Elementor Forms Widget Pricing
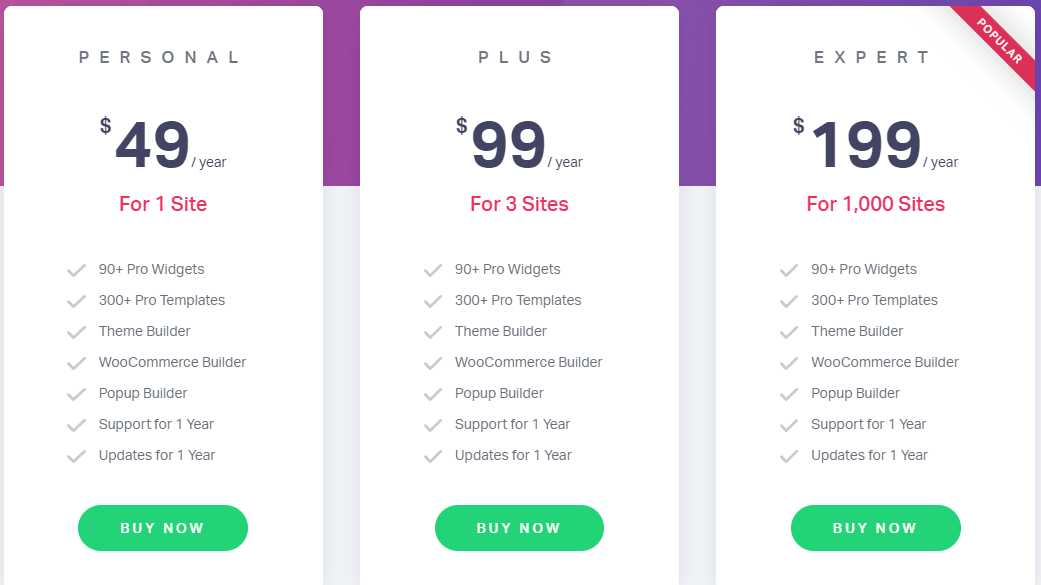
The Elementor contact form widget comes with the Elementor Pro version, and you’ll have to buy the whole bundle for your site. The single site license comes with 90+ pro widgets along with a contact form widget for $49/ year.
How to Create a Contact Form Using Elementor
Now that you have a basic idea of what the Elementor Form Widget has to offer, let’s go over a quick step-by-step walkthrough on using it to create a contact form for your website.
Step 1: Add the Elementor Contact Widget to Your Page
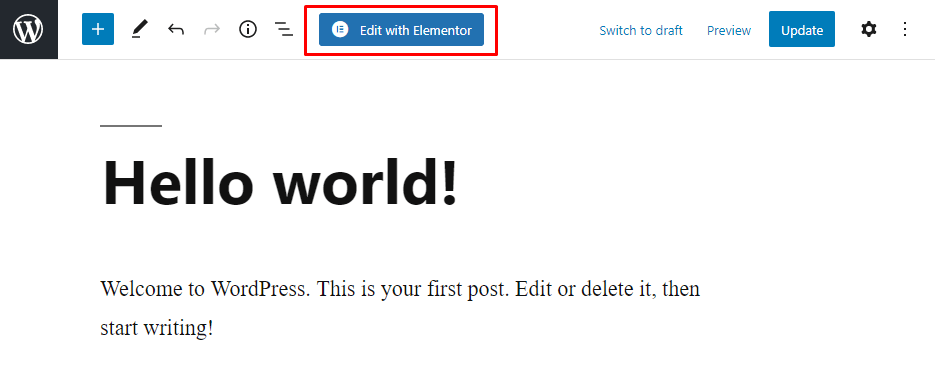
Head on over to the Page where you want to place the Contact form. It can either be your Homepage, About Us, or a dedicated contact page for that matter.
Once you have selected the Page, click on the Edit with Elementor on the top toolbar to toggle Elementor page builder.
This is going to bring up the Elementor builder with a list of all the Elementor widgets on the lefthand sidebar.
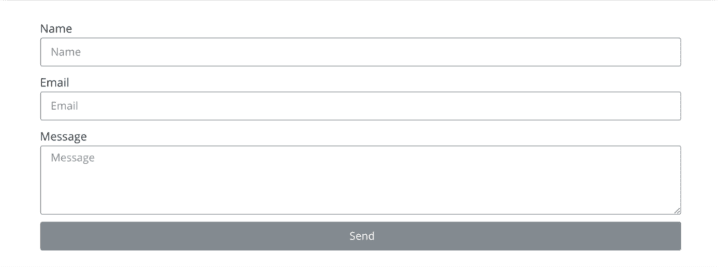
Now drag the Elementor form widget onto the page, and here is how it will look like on your Page.
Step 2: How to Create the Form Fields
The basic form consists of some primary fields; such as
- Name
- Email address
- Message
But you can create many other custom fields as well to narrow down the customers qualifying questions. It will also help you to enlist the customer’s credentials according to this budget.
So to add custom fields, click on the “Add Item.”
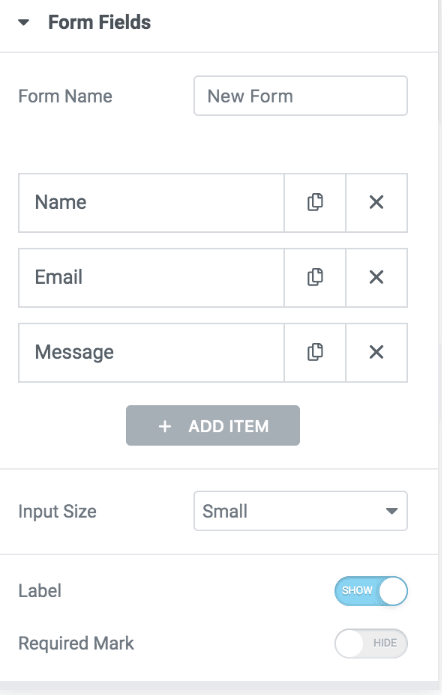
After opening the add new item, your contact form will look like this.

There is a huge list of types of fields that you can use. Some of them are as follows
- Text.
- Text area.
- URL.
- Tel.
- Radio.
- Select.
- Checkbox.
After the type of field, there is another field, “Label.” The label option is visible on the top of the field type, so select it wisely.
The next field is “placeholder.” The placeholder is the texts which will appear in the field before the user insert any information in the field.
The Required setting is enabled when a user failed to submit any required fields. It won’t allow the user to submit the form until the specified fields are filled.
The last option is column width; you can align the fields selecting the custom column width.
Advanced Tab settings
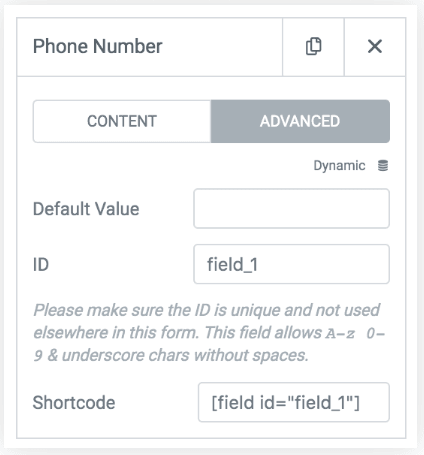
The default value is submitted when no other value is submitted. The field’s ID is stored for the field’s data. The shortcode can be used to insert the field anywhere.
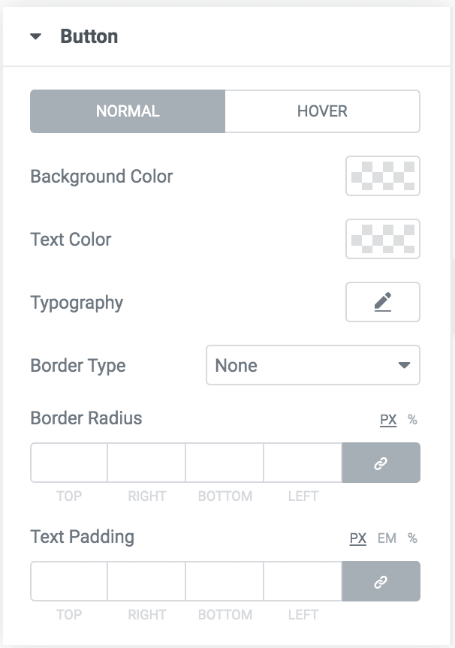
Step 3: Stylize your Contact Form as Per Your Brand’s Theme
You can use a custom styling option to change the appearance of the form as per your brand’s look. In the editor, you can style form, field, Button, and messages. You’ll have a wide range of options to stylize your contact form ranging from spacing, padding, colors, size of fields, labels, inputs, and buttons.
(Optional)Step 4: Set up the Form Submission Options
When you click on Email, you’ll see a lot of options for Email action. If you don’t like to re-fill the contact, you can simply go with pre-filled ones. Here is a brief detail of how the submission form will work.
To. You can send Emails to a single recipient or multiple recipients at a time. Put in the email address where you want to submit the form.
Subject: mention the subject of the Email sent to the client
Message: you can add details of fields to be sent from your form. Or you can use the shortcodes
From Email: this is the Email that you will use get the submitted forms
From Name: choose a name that you like to submit along with the Email.
Reply to: by default, this is the id of the website’s admin, and you can change it whenever you like.
CC: send emails to multiple email addresses using CC
BCC: same function as that of CC you can use Bcc to send emails to multiple recipients.
Once you are done with field editing, then hit the send button to submit the form. You can choose to send it as a plain text or HTML.
(Optional)Step 5: Setting up Custom Messages Setting in Contact Form
You can set up custom messages as per customers’ actions. Once a customer fills out the form, they will instantly receive personalized messages based on their action. In this way, you’ll have a more direct and personalized approach with your customer.
To enable a custom messaging, click on “Additional Options” and then enable “Custom Messaging” to “Yes.”
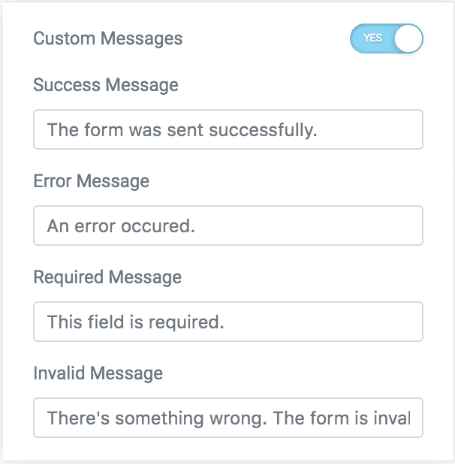
You can see different fields; such as success messages will appear once the customer has successfully submitted the form. An error message will appear if the customer failed to submit the form, and the same way the required message will appear when the required fields are not filled in, and the form is submitted.
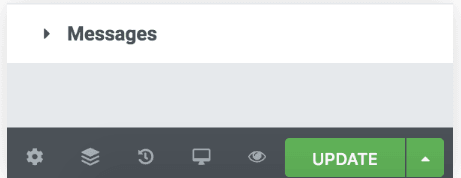
Final Step: Publish your Contact Form
Once you are done with all the setup procedures and styling of your contact form, it’s time to publish your form to the world. Just click on the update button, and your contact form will be visible on your Page.
Bottom Line
It’s super easy to create a contact form using the Elementor pro widget. It comes with easy drag’n drop contact form builder and highly customizable options that stand out from other contact form plugins in the market. You can use easily change its styling and color scheme according to your brand. Also, you will get many other beautiful widgets, more than 300+ pro templates, and pop up builder all-in-one pack. It is a full-featured WordPress page builder equipped with all necessary widgets and features, so; you don’t need to buy any other page builder to customize your website. Moreover, it allows integration with more than 30+ marketing services; that’s why it is one of the hottest selling plugins in the market.
So, it’s your turn now, which contact form plugin suits you best? Do mention in the comment section.


Ja leuk hoor, dit wist ik allemaal al.
Wat ik wil kan ik nergens vinden.
Ik wil de letterkleur wijzigen van de tekst in de placeholder.
Ik heb alles op donkergrijs gezet, maar op mijn site blijven de placeholderteksten lichtgroen: bijna onleesbaar voor mijn klanten.
Help waar moet ik op klikken.
PS Ik heb elementor pro
Hi, thanks for commenting. Are you talking about the color in the form?
Bonjour,
Comment faire pour recevoir des pièces jointes via ce formulaire elementor en faisant en sorte que les pièces jointes soient dans le mail de réception et non à télécharger sur le serveur?
Merci d’avance
Mélanie
Hi, I think that this feature is not included in the Elementor form.
Krásný den :),
používám elementor pro a jejich formulář. Poskládala jsem si takový dotazník pro zákazníka, ale potřebovala bych některá pole skrýt s tím, že si je zákazník přes nějaké tlačítko odkryje a vyplní, když bude potřebovat. Jde to nějakým způsobem udělat?
Například tam bude pole “popiš jak chceš, aby stránka vypadala” Zákazník vyplní název stránky a do toho pole “popiš jak chceš, aby stránka vypadala” napíše popis. Ale ten zákazník může mít více stránek, které bude chtít takhle popsat. Tak si to představuju tak, že tam bude tlačítko nebo ikona plus, na kterou když klikne, tak se objeví znovu tohle pole a bude ho moct vyplnit a tak dále. Je to možné? Nebo znáte jiný způsob, jak by se to dalo udělat?
Děkuji předem za váš čas u trávení u tohoto komentáře. Doufám, že mi rozumíte.
PS: Vůbec nevím, jestli se tu mluví česky nebo anglicky, je to pro mě trošku matoucí. Tak píšu raději i s překladem. (Omlouvám se za svojí angličtinu)
A beautiful day :),
I use the elementor for and their form. I compiled such a questionnaire for the customer, but I would need to hide some fields so that the customer can reveal them and fill in them when he needs to. Is there any way to do it?
For example, there will be a field “describe how you want the page to look” The customer will fill in the name of the page and in the field “describe how you want the page to look” will write a description. But the customer may have more sites that he wants to describe like this. So I imagine that there will be a button or a plus icon, which when clicked, this field will reappear and be able to fill it in, and so on. Possible? Or do you know another way to do it?
Thank you in advance for your time in spending this comment. I hope you understand me.
PS: I don’t know at all if Czech or English is spoken here, it’s a bit confusing for me. So I prefer to write with a translation as well. (I am sorry for my english)
Hi, I’m sorry but the dynamic field display in Elementor forms are not implemented. You can upvote and track the feature here: https://github.com/elementor/elementor/issues/4268