
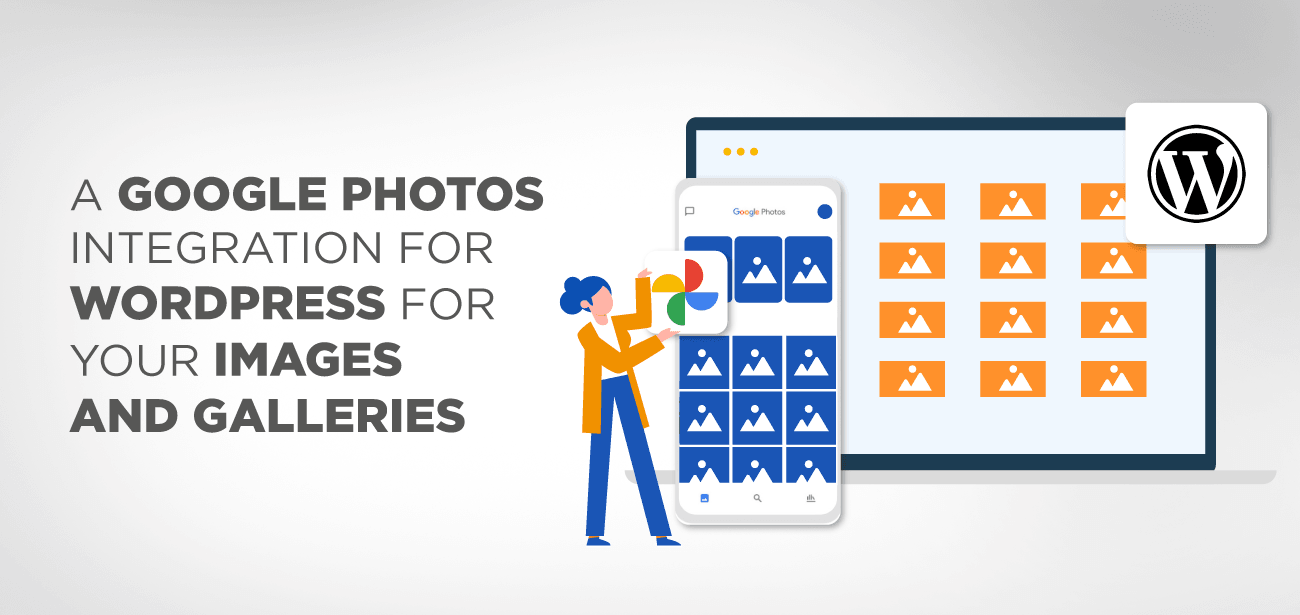
Photos are a terrific way to liven up your posts and make them more attractive. In addition to attracting attention, they enable readers to connect with the content you’re presenting and raise your website’s overall degree of engagement.
Is it worth your time to download photographs for your posts and then upload them to your WordPress site, or do you prefer to avoid it? Don’t you wish you could keep all of your photographs in a single location so that they were conveniently accessible?
- Creating a Google Photos Album in WordPress
- Setting up an automatic synchrony Google Photos and WordPress
- 1-Connection
- 2-Disclaimer
- 3-Approve
- Using a custom app, create a manual link between Google Photos and WordPress.
Imagery and video are more likely to be remembered by visitors when they are included in the content. Images may elicit emotional responses in us, draw our attention, and guide readers in a specific path, among other things; this, in turn, can enhance your social media shares, allowing you to reach even more potential viewers in the process.
Additionally, using photographs, particularly if you have a blog associated with your small business, might increase your sales volume. Potential customers are interested in seeing how an item will appear when it is used or worn. To put it another way, putting photos on your website makes it easier for users to make buying decisions.
Taken together with the fact that visual content is simpler to remember, it becomes evident that photos should be a vital component of your website’s design and functionality. Additionally, whether you’re discussing personal or corporate facts, photos may assist readers in recalling more of your content.
Manage the loading and importing of pictures on WordPress is not quite an easy task. Google photos come in as a palliative to solve this problem. Google Photos make it easier to add photos on a website or blog than go through the stress of downloading the images to your laptop, editing them before uploading them to your blog.
With Google Photos, you can create a WordPress gallery where you save every image associated with your WordPress website, which in turn loads the pictures directly to your WordPress media library folder.
Creating a Google Photos Album in WordPress
The Google Photos integration is very beneficial if, for example, you have a media agent who takes images with a smartphone and then uploads them to your WordPress site; the photo will be automatically uploaded to your Google Photos account and then to your WordPress site.
For this example, we’ll use the WP Media Folder and the Gallery Addon, which are helpful when generating galleries, to construct a gallery directly from a Google Photos account.
First and foremost, we’ll use WP Media Folder’s cloud extension to connect our WordPress site to Google Photos; it’s quite simple! WordPress and Google Photos can be linked in two ways. The first option is to connect via JoomUnited’s ready-made Google application, which takes less than a minute to set up. The second alternative is to develop your software.
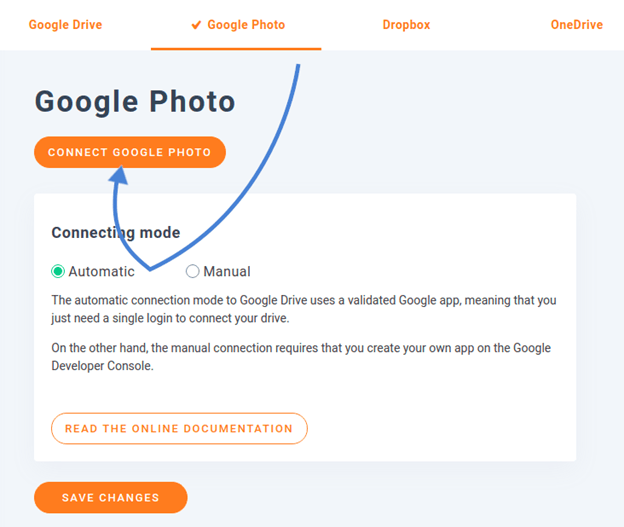
A prior integration with Google Photos on WordPress included Dropbox, OneDrive, and the Google Drive service itself, among other benefits. The integration of Google Photos with WordPress must be configured in the same way as the rest of the services. The Google Photos tab can be found in the WP Media Folder settings, which can be found under the cloud sub-menu, aptly called the Google Photos tab.
The integration of Google Photos with your WordPress blog can be accomplished in two ways. When it comes to synchronizing photographs from the cloud with your WordPress website, the difference is whether you utilize JoomUnited’s ready-made application or construct your own. We’ll start with the first choice, which is by far the simplest of the three.
Setting up an automatic synchrony Google Photos and WordPress
1-Connection
The automated option is the simplest approach to synchronize Google Photos with WordPress. First, go to WP Media Folder’s settings, then to the cloud sub-menu, where you’ll find the Google Photos tab. To use JoomUnited’s Google application, select automatic.
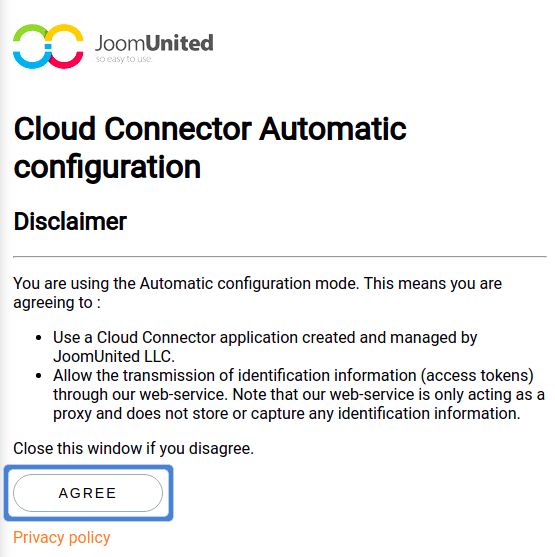
2-Disclaimer
You must agree to two conditions to integrate Google Photos with WordPress and utilize your cloud photos and albums on your site. Click the Connect Google Photo button to get started. The first notice you must accept is a disclaimer explaining why JoomUnited requests access to your Google Photos content.
3-Approve
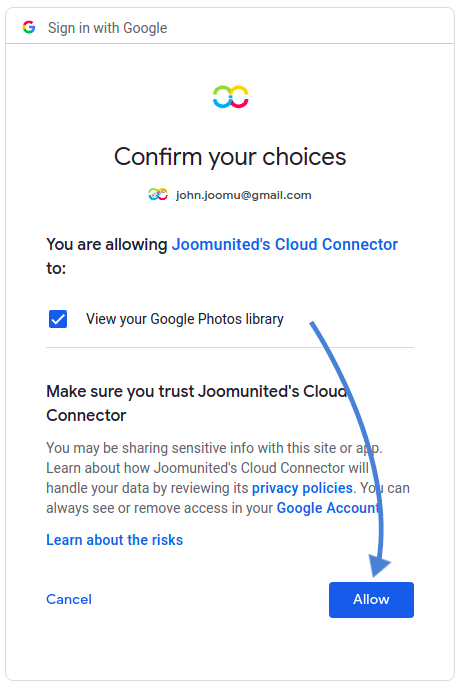
After you’ve approved the first disclaimer, you’ll be directed to Google, where you may choose which account to link. A pop-up will also inform you of the permissions that Google will grant JoomUnited’s ready-made app, specifically access to your Google Photos account. Accept this to complete and begin using your Google Photos and WordPress connection.
Using a custom app, create a manual link between Google Photos and WordPress.
You can make your own Google app instead of using JoomUnited’s. To do so, in the options, select manual instead of automatic. To link it to your site, you’ll need to build a Google dev App, which you can do here.
After clicking on “Create Project,” you will be able to name your project and then click “Create.”
Wait a few seconds for the project to be created, then click on the notification to get to the project.
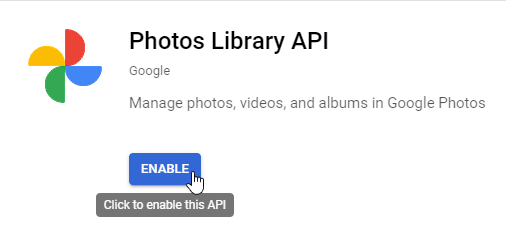
If this is the first time you’ve used the Photos Library API, you’ll need to enable it. To do so, go to APIs & Services > Library, search for “Photos Library API,” select it, and click “Enable.”
Click APIs & Services from the left menu, then Credentials > Create Credentials > OAuth client ID from the left menu.
If this is your first time, pick the user type under “Configure Consent Screen.”
The most crucial step is now:
To begin, select “web application” and give it a name.
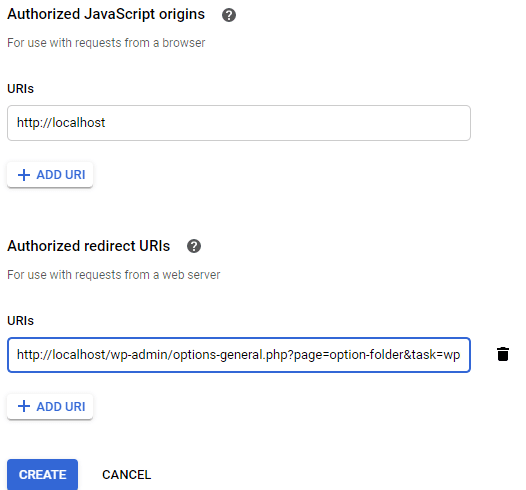
Now go to the “Authorized JavaScript origins” section and add https://your-domain.com to the “Add URI” area (replace by your domain name, with no trailing slash).
Add: https://your-domain.com/wp-admin/options-general.php?page=option-folder&task=wpmf&function=wpmf google photo authenticated (change “your-domain” with your domain name) to the “Authorized redirect URIs “area.
Select “Create” from the drop-down menu.
Because Google’s policy has recently changed, you must fill your Authorized domains on the OAuth consent screen tab > Edit App.
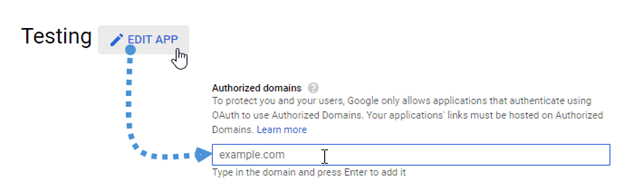
You should also provide your domain in the Domain Verification tab. Please select “Add domain” from the drop-down menu and follow the on-screen instructions.
You can now go back to step one and create the credentials.
Finally, there you have it! You now have your ID and Secret to enter into WP Media Folder’s settings.
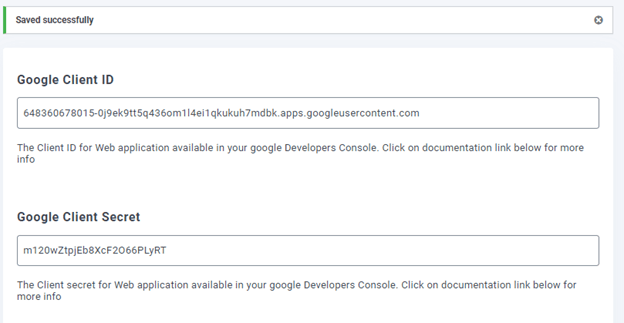
Now go to Settings > WP Media Folder > Cloud tab > Google Photo and paste the Client ID and Client Secret from your Google dev App into the WP Media Folder setup, then save it.
Finally, select “Connect Google Photo” and log in to your Google account to preserve the data (the one with the Google Photo cloud you want to use).
Allow all permissions to be granted.
Confirm your choices, and the rest will fall into place.
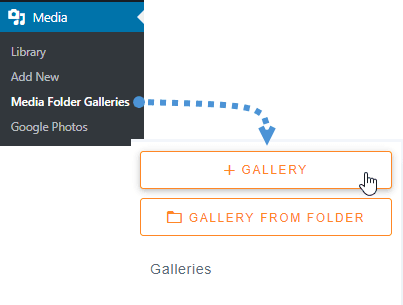
After we’ve completed all of these steps, we’ll go ahead and create a gallery using Google Photos material by navigating to Media > Media Folder Galleries > +Gallery.
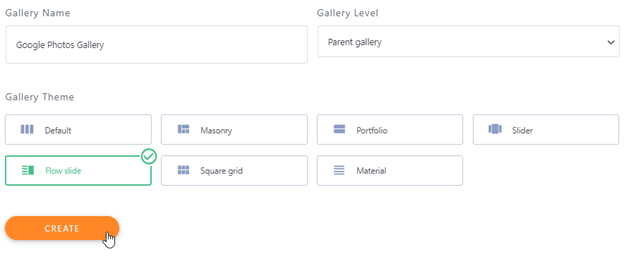
We’ll need to input a name, choose a theme, and then click “Create.”
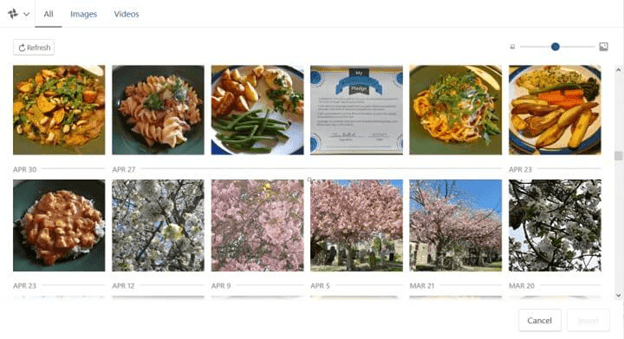
The next stage in the gallery creation process is to add the gallery’s material. Again, we’ll have Google Photos as an option, so choose it.
You’ll find the Google Photos folders on the left side, and on the main page, you’ll see the images. We’ll choose everything and then click “Import Selection.”
It will import your pick for you automatically.
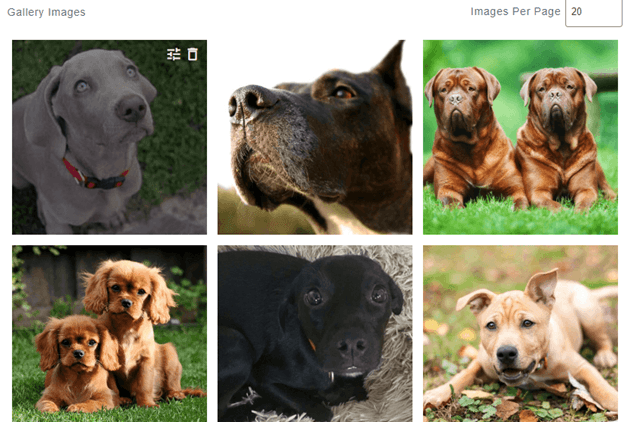
All of the photographs will be accessible from the dashboard, allowing you to move, delete, and update meta information, among other things.
After you’ve finished editing the gallery, click “Save.”
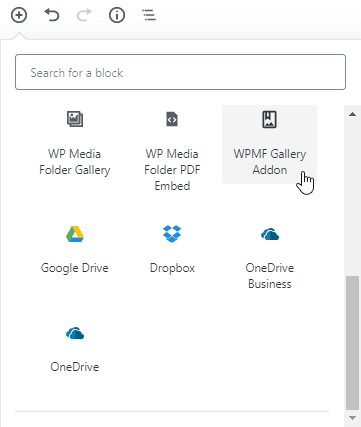
Now that we’ve completed the gallery construction, go to the post/page where you want to add the gallery; we will add it to a Post, so go to post> Add New.
WPMF Gallery Addon block > + > WP Media Folder > WPMF Gallery Addon block
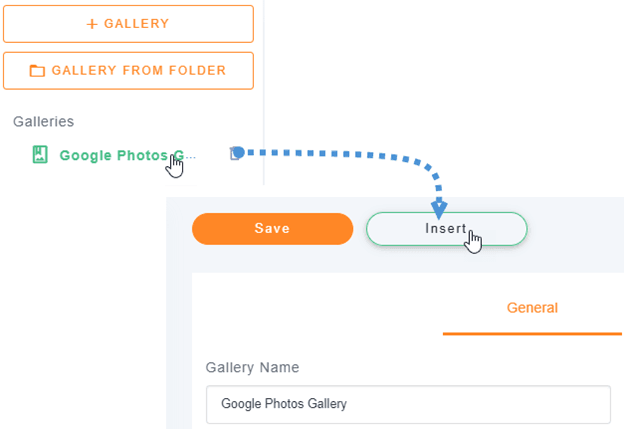
Click on “Select or Create a Gallery” (yes, we can create the gallery directly from the post creation), then select the gallery we generated previously and click “insert.”
You’ll see a preview of your gallery in the block editor; there are many options on the right section, such as the change theme option, which allows us to adjust our gallery directly on that area if we don’t like how it looks.
Finally, press the Publish button to complete the process.
Both steps are identical: first, build a gallery as you would normally do, and then add the images to it as you would normally. This time, while you are selecting photographs, select the From Google Photos option from the drop-down menu. Select the pictures or album you wish to utilize for the gallery and click on the Import button. Finally, save the gallery and include it in a WordPress page or post of your choosing. As is customary, you can select from various design options and personalize the gallery to your liking; in order to provide maximum comfort in handling your content, the Google Photos albums and photographs are synchronized automatically. When used in conjunction with the most recent additions to WP Media Folder, most notably lazy loading, the plugin allows you to present your content in the most effective manner possible, regardless of where you host your images.


